by
by Gemini said
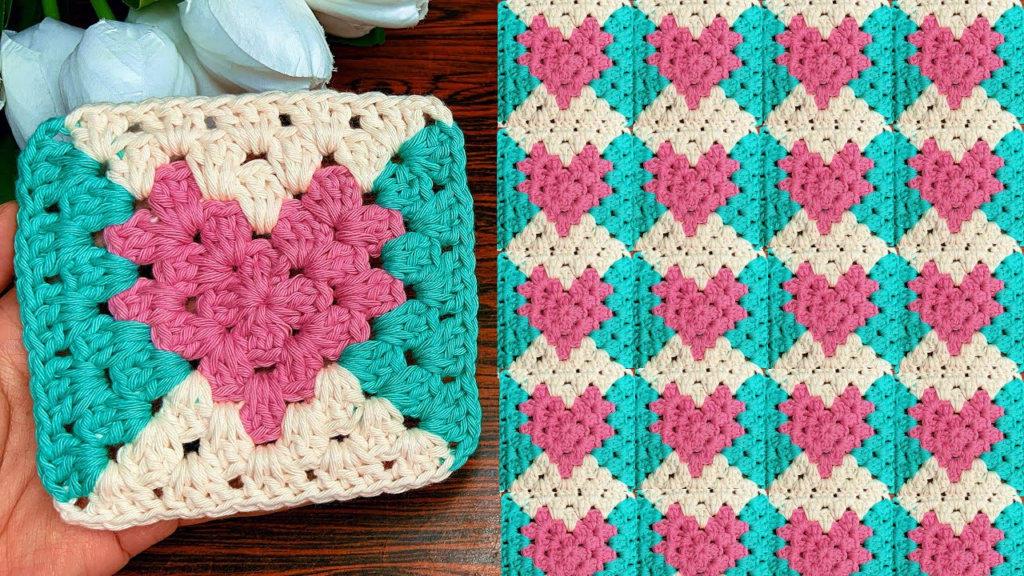
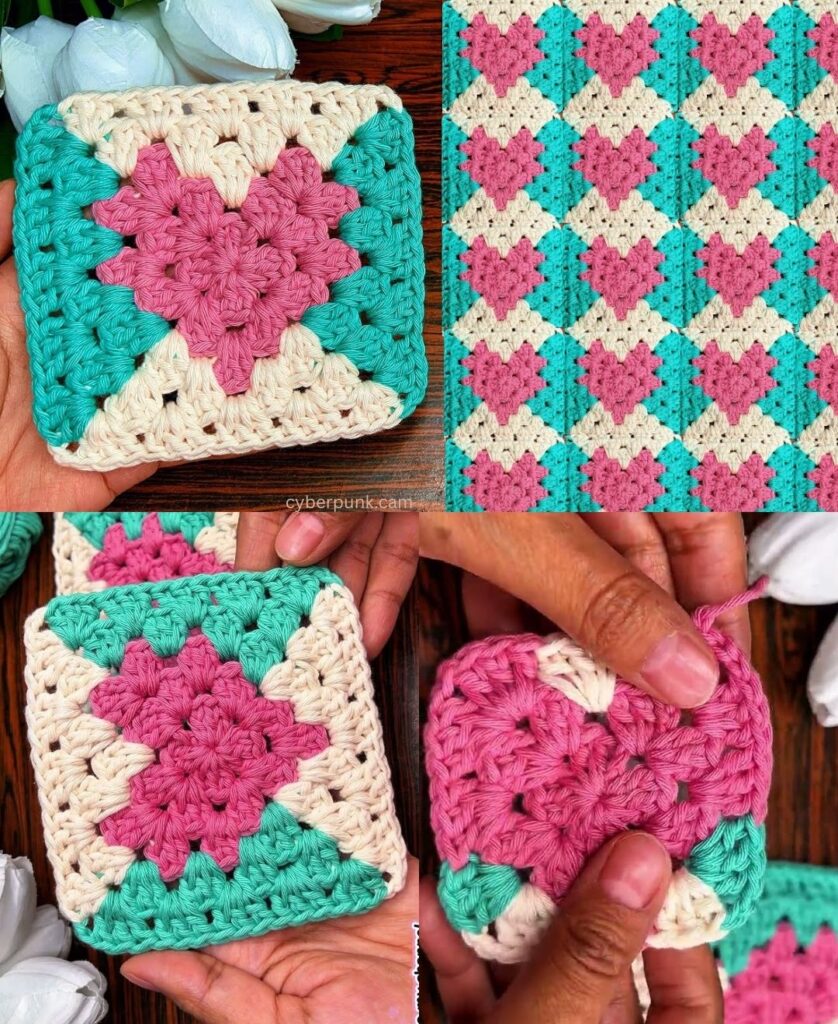
This Heart Granny Square is the ultimate “love letter” in crochet form. It’s festive, surprisingly fast to make, and looks much more complex than it actually is. This design features a centered heart that “blooms” into a classic square frame—perfect for Valentine’s Day coasters, a romantic throw pillow, or a “love-themed” baby blanket.
🧶 The Valentine’s Kit
For a professional look, I recommend using a high-contrast color palette (e.g., a bold Red heart against a Cream background).
| Material | Recommendation | Why? |
| Yarn A | Red or Hot Pink (Worsted Weight) | For the heart center. |
| Yarn B | White, Cream, or Blush (Worsted Weight) | For the square frame. |
| Hook | 5.0 mm (H/8) | Standard size for clear stitch definition. |
| Notions | Tapestry needle & Scissors | To weave in ends (the only “un-fun” part of crochet). |
Stitch Key (US Terms)
- ch: Chain
- sl st: Slip Stitch
- sc: Single Crochet
- hdc: Half Double Crochet
- dc: Double Crochet
- tr: Treble Crochet (Yarn over twice, pull through 2, pull through 2, pull through 2).
🛠 Step-by-Step Instructions
Round 1: The Heart Center (Yarn A)
We will start with the heart. It is worked in one round into a Magic Ring.
- Start: Make a Magic Ring.
- Top Left Hump: ch 3. Into the ring, work: 3 tr, 3 dc.
- The Bottom Point: ch 1. Work 1 tr. ch 1. (This creates the sharp point).
- Top Right Hump: Work 3 dc, 3 tr.
- Finish the Shape: ch 3, then sl st into the center of the ring.
- Close: Pull the magic ring tail tight until the center hole disappears. Fasten off.Insight: You now have a perfect little heart. Don’t worry if it looks slightly “curled”—the next round will flatten it out!
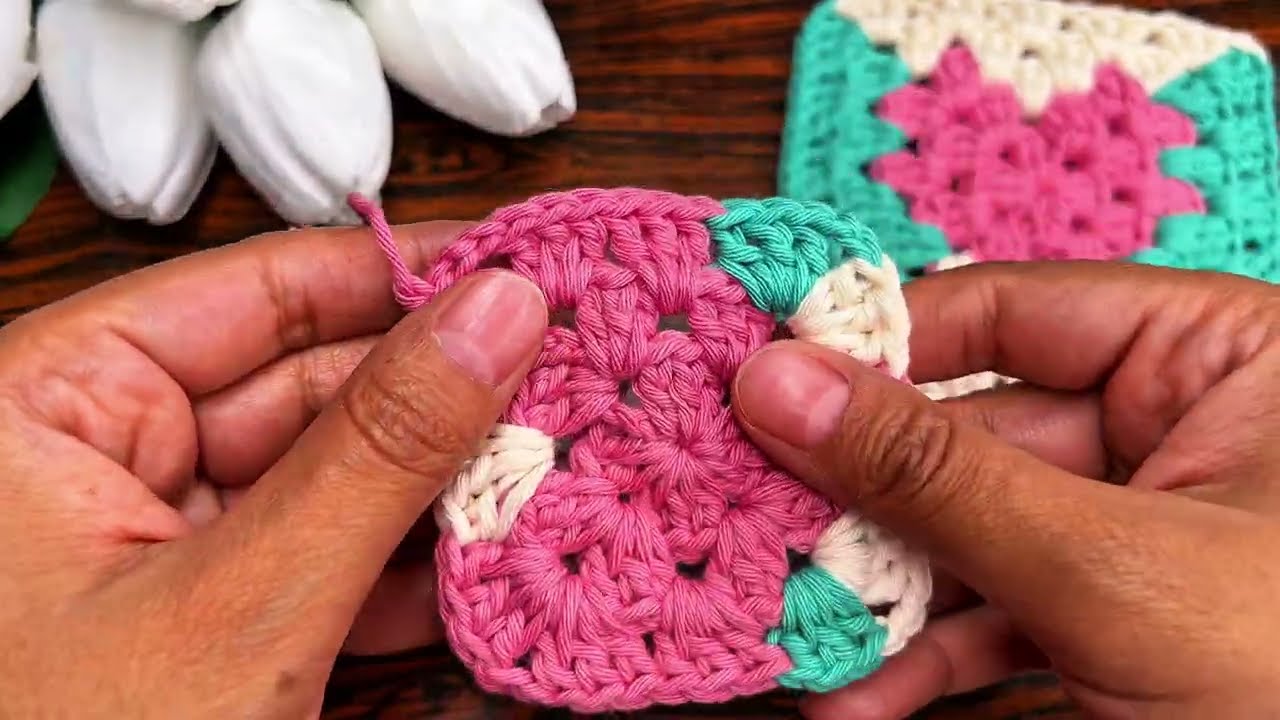
Round 2: Squaring the Heart (Yarn B)
Now we turn the heart into a square. We will be working into the stitches of the heart you just made.
- Join: Join Yarn B in the ch-1 space at the bottom point of the heart.
- Corner 1 (Bottom Point): ch 3 (counts as dc), 2 dc, ch 2, 3 dc in that same space. ch 1.
- Side 1: Skip 3 stitches. Work 3 hdc in the next stitch. ch 1.
- Corner 2 (Top Right): In the top “hump” (the space between the tr stitches), work (3 dc, ch 2, 3 dc). ch 1.
- Side 2 (The Top Dip): Work 3 sc directly into the center “dip” (where you made the slip stitch in Yarn A). ch 1.
- Corner 3 (Top Left): In the other top “hump,” work (3 dc, ch 2, 3 dc). ch 1.
- Side 3: Skip 3 stitches. Work 3 hdc in the next stitch. ch 1.
- Close: sl st to the top of the starting ch 3.
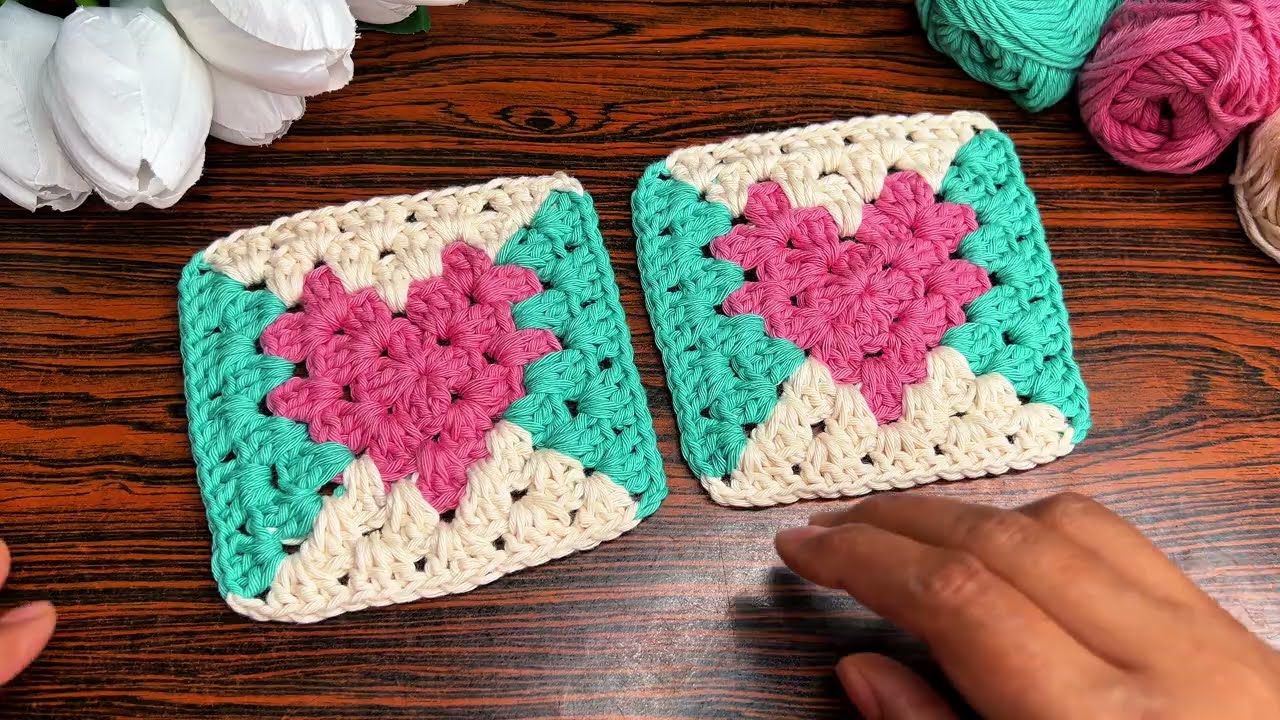
Round 3: The Traditional Granny Round (Yarn B)
To give it that classic “Granny” look, we add one more round of clusters.
- Move Hook: sl st across to the first ch-2 corner space.
- Pattern: * In every Corner Hole: Work (3 dc, ch 2, 3 dc).
- In every Side Hole: Work 3 dc.
- Always ch 1 between every group of stitches.
- Finish: Join with a sl st to the first dc. Fasten off and weave in your ends.
💡 Gemini’s Tips for Success
- The “Magic” Pull: When closing your Magic Ring, pull firmly but gently. If you pull too hard, the “humps” of the heart might overlap. You want them to sit side-by-side like a classic Valentine.
- Leveling the Playing Field: We use different stitch heights (sc,hdc,dc,tr) in Round 2 to compensate for the heart’s shape. The sc stitches go in the “high” parts of the heart and tr go in the “low” parts to make the top of the square perfectly flat.
- Blocking is Love: Heart squares tend to pull a bit because of the tension differences. Steam block your finished squares to ensure they are perfectly flat before joining them together.
Would you like me to show you how to join these heart squares together using a decorative “Lace Join” for a blanket?