by
by To move beyond the classic “retro” afghan look, a Unique Granny Square needs three things: 3D texture, varied stitch heights, and color depth.
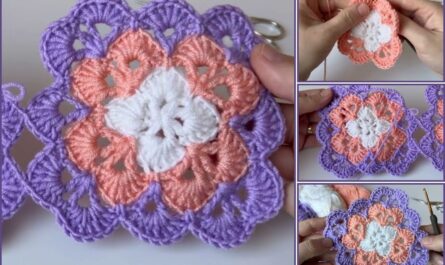
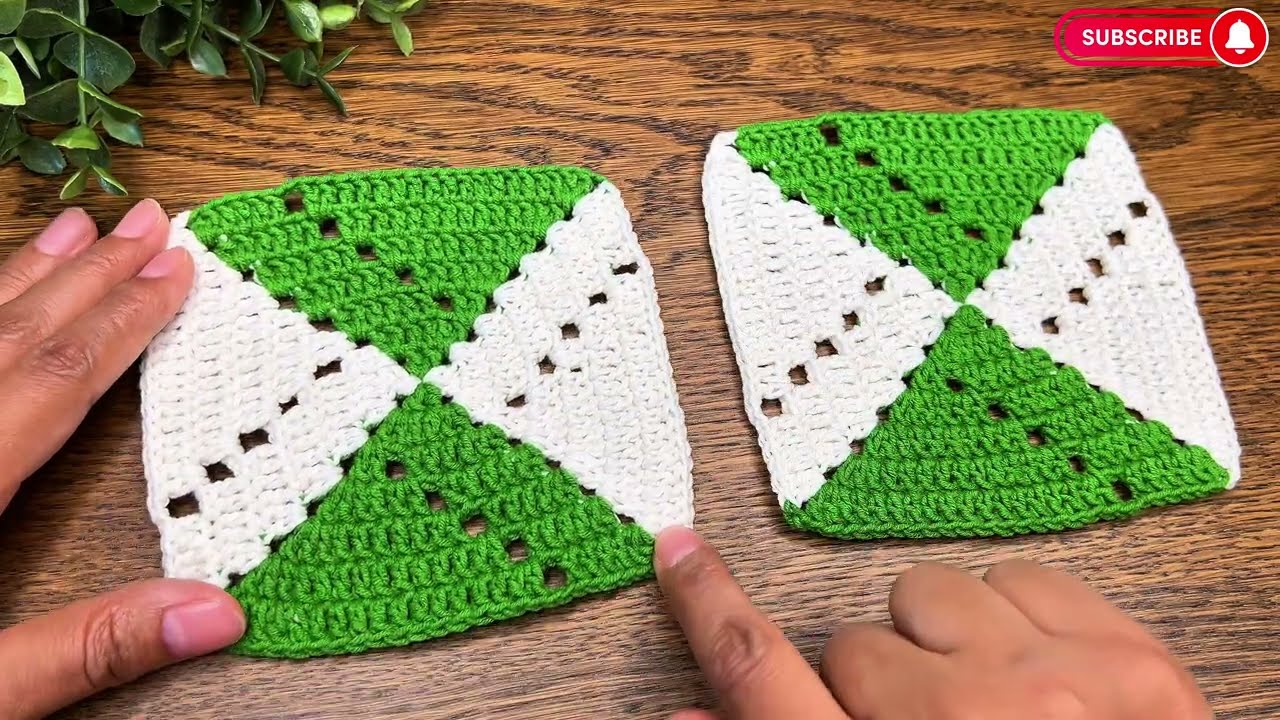
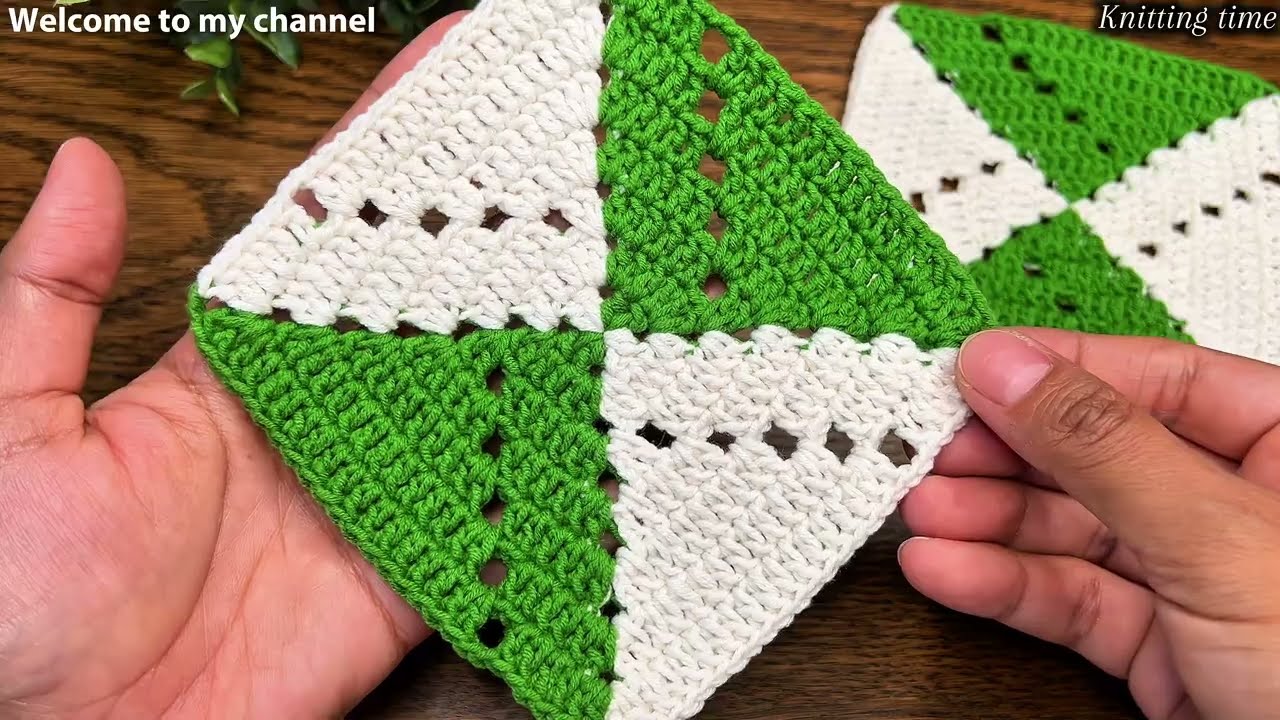
The tutorial below is for the “Radiant Puff” Square. It features a raised, floral-style center that transitions into a dense, modern geometric frame. It’s a “showstopper” motif that looks incredible on baby blankets, textured cardigans, or decorative pillow covers.
🧶 The Designer’s Toolkit
For a unique motif, skip the basic acrylics and try a Cotton-Bamboo blend. It has a slight “glow” and incredible stitch definition that makes 3D elements pop.
| Material | Recommendation | Why? |
| Yarn | DK Weight (Size 3) Cotton Blend | Prevents the 3D puff stitches from becoming too bulky or “heavy.” |
| Hook | 3.75 mm (F/5) | A tighter hook ensures the 3D center remains firm and doesn’t sag. |
| Colors | 1 Neutral + 2 Jewel Tones | High-contrast colors emphasize the “Radiant” geometry. |
🛠 Stitch Key (US Terms)
- ch / sl st: Chain / Slip Stitch.
- dc / tr: Double Crochet / Treble Crochet.
- Puff Stitch: [Yarn over, insert hook, pull up a loop] 4 times in the same stitch. Yarn over, pull through all 9 loops. ch 1 to close.
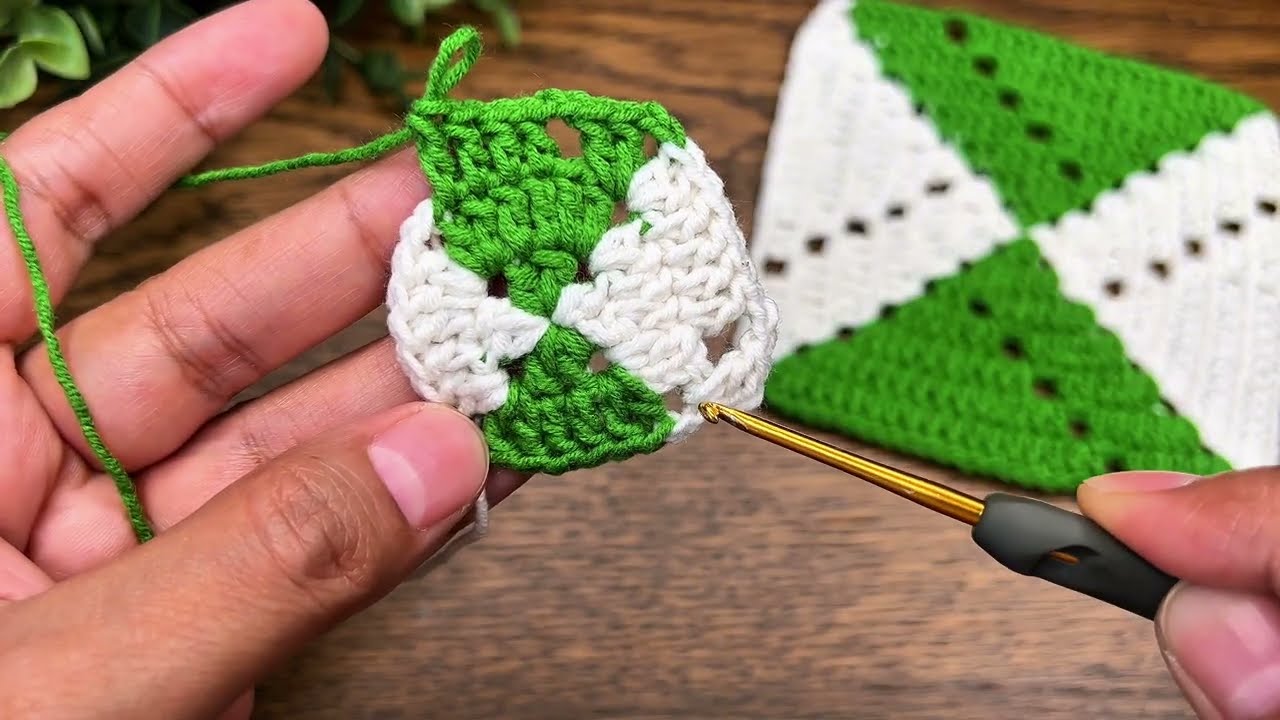
🚀 Step-by-Step: The Radiant Puff Square
Round 1: The Sun (Color A)
- Start: Make a Magic Ring.
- Stitches: ch 2 (does not count as a stitch). Work 12 Puff Stitches into the ring, separated by ch 1.
- Join: sl st to the top of the first Puff. Pull the ring tight.
Note: You should have a 3D “beaded” circle that looks like the center of a sunflower.
Round 2: The Petals (Color B)
- Join: Attach Color B in any ch-1 space between Puffs.
- Pattern: ch 3 (counts as dc). In the same space, work 2 dc.
- Continue: Work 3 dc into every ch-1 space around.
- Join: sl st to the top of the ch 3.
Result: A flat, colorful ring surrounding your 3D center.
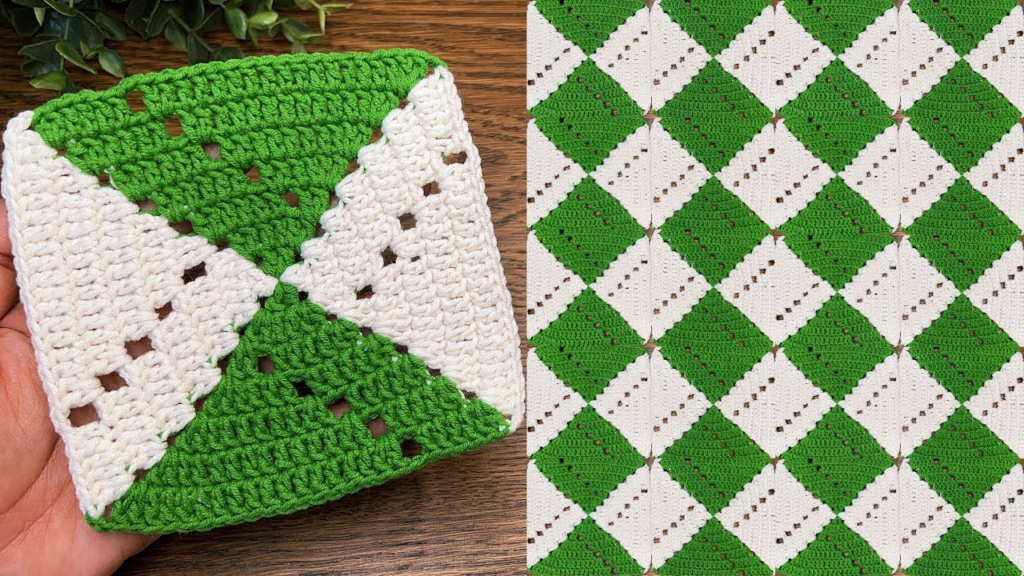
Round 3: Squaring the Circle (Color C)
This is where the magic happens. We use different stitch heights to turn the circle into a sharp square.
- Join: Attach Color C between any two 3-dc clusters.
- Corner 1: ch 4 (counts as tr). In the same space, work (2 tr, ch 2, 3 tr).
- The Side: * ch 1. Skip 3 dc. In the next space, work 3 dc.
- ch 1. Skip 3 dc. In the next space, work 3 hdc.
- ch 1. Skip 3 dc. In the next space, work 3 dc.
- Repeat: ch 1. Work the Corner (3 tr, ch 2, 3 tr) in the next space. Follow the side pattern around.
- Join: sl st to the top of the ch 4.
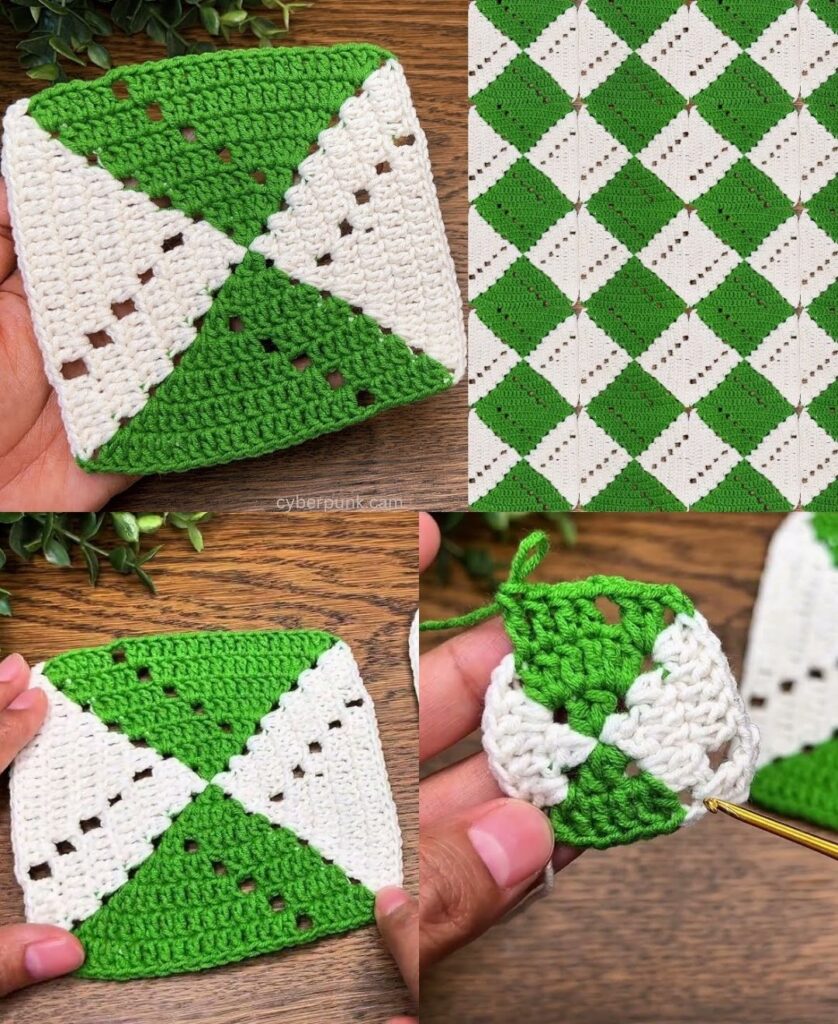
📐 The Symmetry Math
If you are creating a symmetrical project, you can calculate the dimensions ($D$) of your finished piece using the number of squares ($n$) and the individual square side ($s$):
$$D = (n \times s) + (n-1) \times j$$
(Where $j$ is the width of your joining stitch).
✨ 3 Ways to Make it Truly “Unique”
1. The “Reverse” Puff
Instead of working the Puff stitches on the front, work them from the back of your piece. This pushes the “puff” even further forward, creating a dramatic, high-relief texture that feels like a 3D rose center.
2. Surface Crochet Detailing
Once the square is finished, take your hook and a contrasting color. Slip stitch on top of the Round 2 dc stitches. This creates a “braid” that circles the flower, making the square look like a piece of embroidered jewelry.
3. The “Standing” Join
Don’t use a slip stitch to join your rounds. Use a standing double crochet. It eliminates the “seam” that usually runs through a granny square, making the transition between colors look flawless and store-bought.
💡 A Quick Tip on Tension
Because Puff stitches use a lot of yarn, they can sometimes “tug” on the square, making it look circular. Steam blocking is your best friend here. Pin the corners of your finished motifs to a board and apply light steam. This relaxes the fibers and forces the “squaring” stitches to hold their 90-degree angles.
Would you like me to show you how to turn these unique squares into a “Modern Boho” tote bag by joining them with a decorative lace seam?