 by
by A crochet baby blanket is a truly special and heartwarming project, perfect for beginners to practice their skills while creating a cherished keepsake. Given the warm climate of Phnom Penh, using 100% cotton yarn or a soft cotton blend is ideal. These natural fibers are breathable, gentle on a baby’s sensitive skin, durable, and easily machine washable – a crucial feature for any baby item!
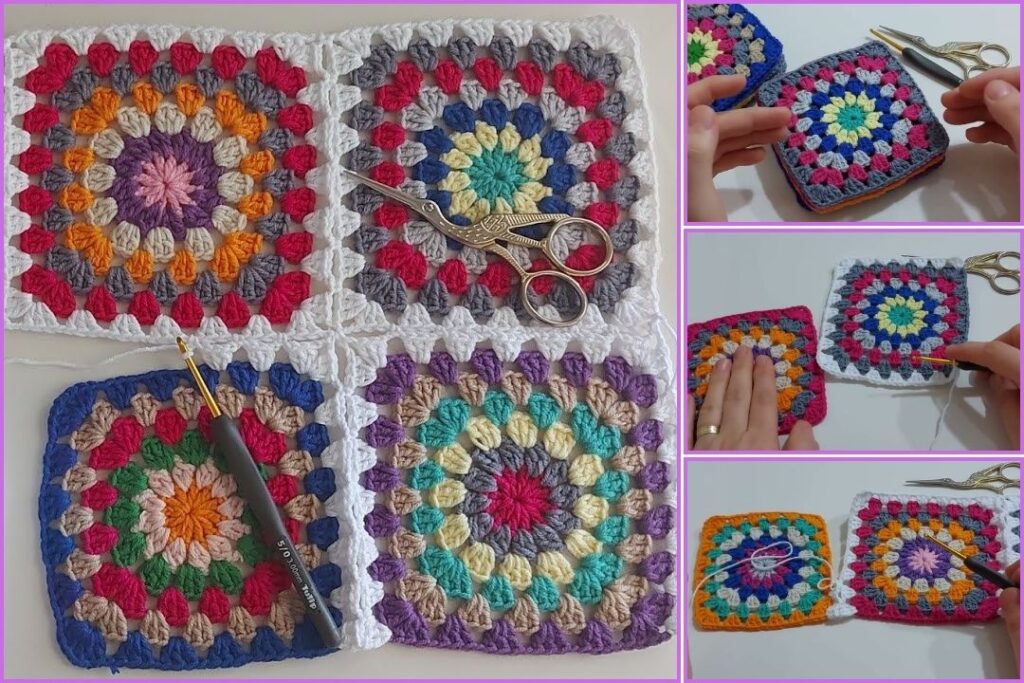
This detailed guide will walk you through creating a simple yet beautiful baby blanket using basic crochet stitches. We’ll focus on the double crochet (dc) stitch, which is fast, easy to learn, and creates a lovely, soft fabric.
How to Crochet a Simple Double Crochet Baby Blanket for Beginners
This pattern creates a straightforward rectangular blanket by working back and forth in rows. It’s an excellent project for practicing consistent tension and getting comfortable with your hook and yarn.
1. Essential Materials You’ll Need
- Yarn:
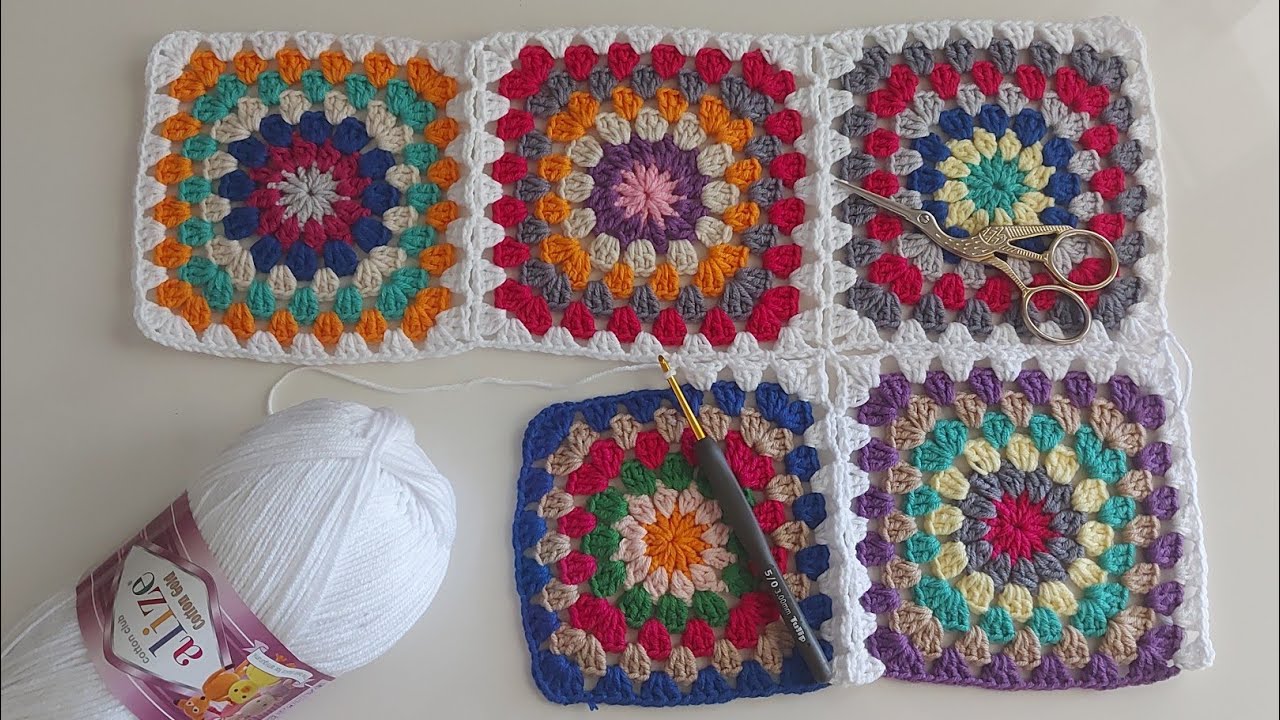
- Fiber: Choose 100% Cotton, a Cotton Blend, or a soft, premium Acrylic Yarn. Look for yarn specifically labeled “baby yarn” or that feels incredibly soft and has good drape.
- Weight: Worsted Weight (also known as Aran or Medium, Category 4) is highly recommended. It’s a good balance of speed and drape. DK (Double Knitting, Category 3) can also work for a slightly lighter blanket, but will take more stitches and rows.
- Colors: You can use one solid color for a classic, minimalist look, or introduce 2-4 (or more!) colors for cheerful stripes. Pastels, brights, or modern neutrals all work wonderfully for baby blankets.
- Quantity: For a standard baby blanket size (approx. 30×35 inches or 75×90 cm), you’ll typically need around 900 to 1200 yards (approximately 820-1100 meters) of Worsted Weight yarn. If using multiple colors for stripes, ensure you have enough yardage for each chosen color.
- Crochet Hook: For Worsted Weight yarn, a 5.0mm (US H/8) or 5.5mm (US I/9) hook.
- Always check your yarn label for the recommended hook size. It’s good practice to make a small swatch (see “Tips” below) to check your tension and ensure the fabric has a nice drape – not too stiff, not too loose.
- Scissors: For cutting your yarn.
- Yarn Needle (Tapestry Needle): This is absolutely essential for neatly weaving in all your yarn ends at the beginning, end, and whenever you change colors.
2. Basic Crochet Stitches You’ll Use
This pattern exclusively uses very basic and fundamental crochet stitches:
- Chain (ch): Used to create your starting foundation row and as a “turning chain” at the beginning of each new row to bring your yarn to the correct height.
- Double Crochet (dc): This is the main stitch used throughout the blanket. It’s taller than a single crochet and creates a lovely, slightly open fabric that works up relatively quickly.

The Simple Double Crochet Baby Blanket Pattern
This pattern creates a straightforward rectangular blanket by working back and forth in rows.
Abbreviations (US Crochet Terms):
- ch: chain
- dc: double crochet
- st(s): stitch(es)
- ea: each
- sk: skip
Step 1: Determine Your Blanket Width and Create Your Starting Chain
The number of chains you start with will determine the width of your finished blanket.
- For a standard baby blanket width (approx. 30 inches / 75 cm):
- Using Worsted Weight (4) yarn and a 5.0mm (H/8) or 5.5mm (I/9) hook, you will chain 112 stitches.
- This chain count is designed so that when you work Row 1, you will end up with 110 double crochet stitches across, which is a good width for a baby blanket. Your personal tension might make it slightly wider or narrower, which is perfectly fine.
Instructions (Using your chosen main blanket color):
- Foundation Chain: Ch 112. (Count carefully! It’s worth double-checking your chain count before moving on to the first row).

Step 2: Crocheting the Main Body of the Blanket
You will work each row, then turn your work to begin the next row, building up the length of your blanket.
- Row 1:
- Work 1 dc into the 4th chain from your hook. (The 3 chains you skipped at the very beginning of the row count as your first double crochet stitch for this row).
- Work 1 dc into each remaining chain all the way across your foundation chain.
- At the end of this row, you should have 110 dc stitches (or 2 less than your starting chain count).
- To prepare for the next row:Ch 3 (these 3 chains will count as your first dc for the next row) and turn your work.
- If you’re planning to change colors here for stripes: Instead of chaining 3 with the current color, fasten off your current yarn (cut it, leaving a 6-inch tail). Then, attach your new color by making a slip stitch (sl st) into the top of the very last dc you just made in Row 1. Then, ch 3 with your new color and turn your work.
- Row 2 (and all subsequent rows):
- Work 1 dc into the first dc of the previous row. (This is the double crochet stitch directly below your turning chain-3).
- Work 1 dc into each dc stitch across the entire row, until you reach the end.
- Crucially for straight edges: Make sure to work your very last dc stitch into the top of the turning chain-3 from the previous row. This ensures your edges remain straight and don’t curve inward or outward.
- At the end of this row, you will still have 110 dc stitches.
- To prepare for the next row:Ch 3 and turn your work.
- If changing colors: Fasten off current yarn (leaving a 6-inch tail). Attach your new color with a sl st to the top of the last dc you just made, then ch 3 with the new color, and turn your work.
- Repeat Row 2: Continue repeating Row 2 exactly as described until your blanket reaches your desired length.
- A common finished length for a baby blanket is around 35-40 inches (90-100 cm). You can measure as you go!
- If you’re making stripes: A popular choice is to change colors after every 2-4 rows for a classic striped look. You can also vary the width of your stripes for a unique design.

Step 3: Finishing Your Baby Blanket
Once your blanket reaches the desired size, it’s time to complete it with a neat finish.
- Fasten Off: After completing your very last row, cut your yarn, leaving a tail of about 6-8 inches (15-20 cm). Pull this tail completely through the loop that is still on your hook and pull it tight to secure the last stitch.
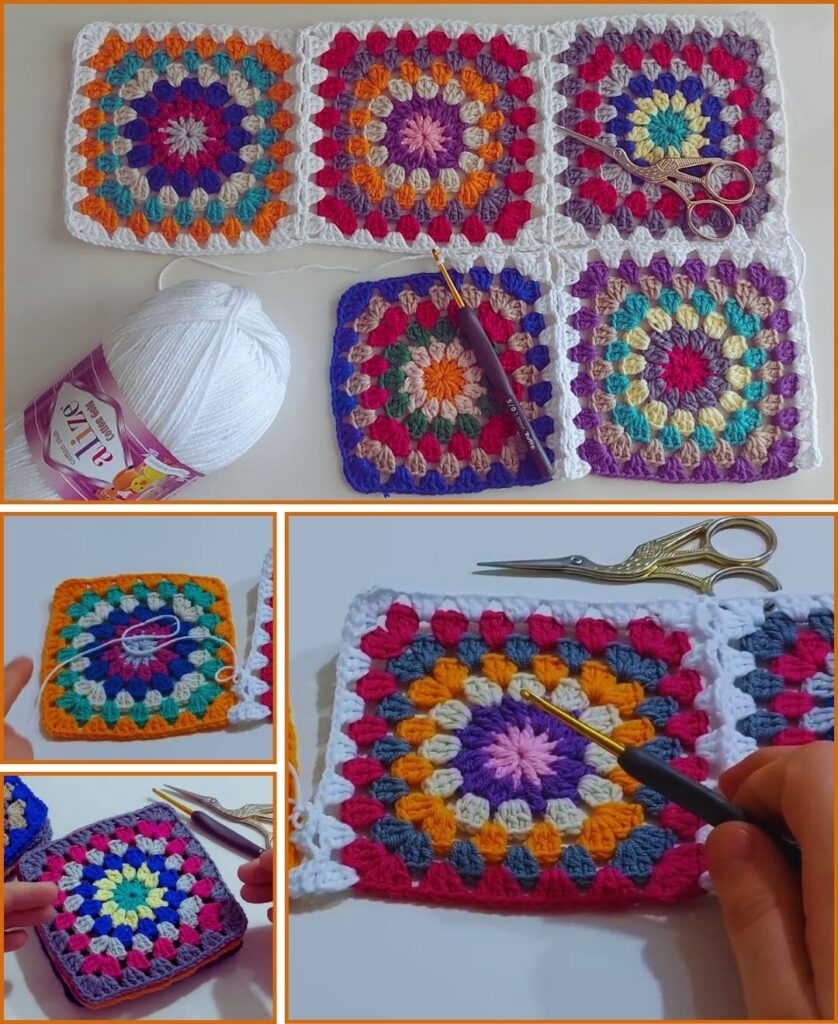
- Weave in All Ends: This is an absolutely crucial step for a professional-looking and durable blanket. Use your yarn needle to carefully weave in every single yarn tail – from your starting chain, from fastening off, and from all your color changes. Hide them securely within the stitches of your blanket, making sure they won’t unravel with use or washing.
- Optional: Add a Border (Highly Recommended for a Polished Look):
- A simple border can give your blanket a beautifully finished edge and a more substantial feel. A single crochet (sc) border is easy and effective for beginners.
- Join yarn (either your main blanket color or a contrasting color) with a slip stitch (sl st) into any corner stitch of your blanket.
- Round 1 (Border):Ch 1 (this chain does NOT count as a stitch).
- Work single crochet stitches evenly around the entire perimeter of the blanket.
- When you reach a corner, work (2 sc, ch 2, 2 sc) into that corner stitch/space. This helps the corner turn neatly without puckering.
- Along the sides of the blanket (where you’re working into the ends of your double crochet rows), try to work approximately 2 single crochet stitches into the side of each double crochet row. Aim for an even look.
- After working all the way around the blanket, join with a sl st to the top of the first sc you made in this border round.
- Optional Round 2 (For a Thicker Border): If you desire an even more substantial border, you can add another round. Ch 1. Work 1 sc in each sc stitch around, remembering to work (2 sc, ch 2, 2 sc) in each corner’s ch-2 space. Join with a sl st.
- Fasten off your yarn after your final border round and weave in any remaining ends.
- Blocking (Optional but Recommended):
- Blocking is a finishing technique that can make a significant difference in your blanket’s appearance and drape.
- Gently wet your entire blanket (you can spray it lightly with water or immerse it in cool water for a few minutes).
- Carefully squeeze out any excess water (do NOT wring or twist the blanket, as this can stretch or damage the stitches!).
- Lay the blanket flat on a clean towel, a foam blocking mat, or even a dry bedsheet. Gently stretch and shape it to the correct dimensions, ensuring all edges are straight and the corners are square. If you have rust-proof pins, you can use them to gently pin the blanket in place to maintain its shape while it dries.
- Allow the blanket to air dry completely. Blocking helps to even out your stitches, relax the yarn fibers, and gives your blanket a beautifully polished drape and shape.
Key Tips for Beginner Blanket Crocheters
- Practice Swatch: Before starting your main blanket, make a small practice swatch (e.g., Chain 20, then follow Row 1 and a few repeats of Row 2). This helps you get comfortable with the stitches and determine if your chosen hook size gives you a fabric you like (not too stiff, not too flimsy). You can also measure your swatch to confirm your desired blanket width before committing to a long starting chain.
- Consistent Tension: Try to maintain an even and consistent tension throughout your entire project. This ensures your blanket is uniform in thickness and doesn’t become wider or narrower as you go. Don’t worry if it’s not perfect at first; consistency improves with practice!
- Count Your Stitches: Especially in the early rows, take a moment to count your stitches at the end of each row. This simple habit is crucial for maintaining the correct width and ensuring your edges stay straight. Accidentally missing a stitch or adding an extra one is very common for beginners.
- Straight Edges: The method of skipping 3 chains at the start of Row 1 (which counts as your first dc) and then working your last dc into the top of the turning chain-3 from the previous row is the most effective way to achieve neat, straight edges.
- Relax and Enjoy! Don’t be afraid to pull out stitches (this is called “frogging”) if you make a mistake. Crochet is very forgiving, and correcting errors is part of the learning process. Focus on enjoying the rhythmic motion of crocheting and the immense satisfaction of creating something beautiful with your own hands.
- Washing Instructions: If you’re making this blanket as a gift, it’s always a thoughtful touch to include a small tag with washing instructions for the specific yarn you used (e.g., “Machine wash cold, tumble dry low” or “Hand wash, lay flat to dry”).
You now have a comprehensive guide to crochet a beautiful and practical baby blanket! This project is a fantastic stepping stone for any beginner crocheter, and the finished blanket will be a treasured item for many years to come.