 by
by A Simple and Fun Narrative Guide for Beginners
Crocheting small toys and decorative items is one of the most enjoyable ways to learn and practice crochet. Among all beginner-friendly projects, a crochet caterpillar stands out as one of the easiest, cutest, and quickest models to make. With its round body segments, bright colors, and playful look, a crochet caterpillar is perfect for beginners, kids’ projects, gifts, or classroom craft activities.
This narrative guide walks you step by step through how to make a very easy crochet caterpillar pattern model, explaining each part clearly and calmly so even first-time crocheters can follow along with confidence.

Why Choose a Crochet Caterpillar?
A crochet caterpillar is an ideal starter project for several reasons:
- It uses basic crochet stitches
- The shape is forgiving and flexible
- Mistakes are easy to fix or hide
- It works up very quickly
- It requires only small amounts of yarn
- It helps you practice working in rounds
Because caterpillars are made from simple rounded sections, you don’t need advanced shaping skills or complicated patterns.
Materials Needed
Before you begin, gather your supplies:
- Medium-weight yarn (green is common, but any color works)
- A crochet hook suitable for your yarn (usually 3.5–4.5 mm)
- Polyester fiberfill or cotton stuffing
- Yarn needle
- Scissors
- Safety eyes or small black yarn for eyes
- Stitch marker (optional)
Using soft yarn is recommended, especially if the caterpillar is meant as a toy or decoration.
Understanding the Caterpillar Structure
A crochet caterpillar is usually made up of:
- A rounded head
- Several small body segments
- Tiny legs or bumps
- Simple facial details
- Optional antennae
Each part is simple on its own, and when combined, they form an adorable caterpillar shape.
Step 1: Crocheting the Head
The head is usually the largest round part of the caterpillar.
- Start with a magic ring
- Work single crochet stitches into the ring
- Increase evenly in each round to form a flat circle
- Continue crocheting in rounds until the head becomes slightly rounded
- Add safety eyes before closing
- Stuff the head lightly
- Decrease stitches to close the shape
The head should be firm but soft, not overstuffed.
Step 2: Making the Body Segments
The body of the caterpillar is what gives it character. Instead of one long tube, it’s made of small round sections.
You can create body segments in two ways:
Method 1: Separate Segments
- Crochet several small balls using the same method as the head
- Make each one slightly smaller than the head
- Stuff and close each segment
- Sew them together in a curved line
Method 2: Continuous Segments (Easier)
- Continue crocheting from the head
- Increase and decrease stitches to form natural bumps
- Each bump becomes one body segment
- Lightly stuff as you go
This second method is often faster and easier for beginners.
Step 3: Shaping the Caterpillar
As you crochet, gently bend the body to create a natural curved pose, like a real caterpillar crawling. This adds charm and personality to the model without any extra work.
Don’t worry if the segments are not perfectly even—small variations actually make the caterpillar look more playful and handmade.
Step 4: Adding Legs
Caterpillar legs can be very simple.
Easy options include:
- Small chain loops attached underneath
- Tiny stitched bumps
- Short pieces of yarn knotted and trimmed
Most beginner patterns keep legs minimal so the focus stays on the body shape.
Step 5: Making the Face
The face brings your crochet caterpillar to life.
You can add:
- Safety eyes or embroidered eyes
- A small stitched smile
- Blush marks using pink yarn or embroidery floss
For beginners, embroidered features are often safer and easier to control.
Step 6: Antennae (Optional)
Antennae are optional but add extra cuteness.
To make them:
- Attach yarn to the top of the head
- Chain 5–7 stitches
- Slip stitch back
- Repeat for the second antenna
You can add a small knot or bead at the tip if desired.

Step 7: Finishing Touches
Once all parts are complete:
- Weave in loose ends securely
- Adjust stuffing if needed
- Shape the body gently with your hands
- Check that all parts are firmly attached
Your crochet caterpillar is now complete!
Tips for Beginners
- Use lighter stuffing to keep the caterpillar soft
- Count stitches slowly and calmly
- Use stitch markers to track rounds
- Practice tension—don’t crochet too tightly
- Choose bright or pastel colors for a cheerful look
Remember, perfection is not the goal—enjoyment and learning are.
Creative Variations
Once you master the basic model, try:
- Rainbow-colored segments
- Striped or dotted patterns
- Tiny hats or bows
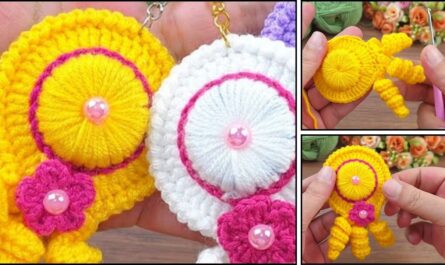
- Mini caterpillars as keychains
- Larger versions as plush toys
Each variation helps improve your crochet skills while keeping the project fun.
Why This Crochet Caterpillar Is Perfect for Learning
This very easy crochet caterpillar pattern teaches you:
- Working in rounds
- Increasing and decreasing stitches
- Simple shaping
- Basic assembly
- Finishing techniques
All of these skills are essential for future crochet projects like animals, dolls, and amigurumi.
Final Thoughts
Making a very easy crochet caterpillar pattern model is a joyful and confidence-building experience. It’s a project that proves crochet doesn’t need to be complicated to be beautiful. With basic stitches, a little yarn, and patience, you can create something charming and handmade.
Whether you’re crocheting for fun, learning a new skill, or making gifts, the crochet caterpillar is a perfect project to start with—and one you’ll want to make again and again.
If you’d like, I can also:
- Turn this into a step-by-step pattern
- Simplify it for kids or students
- Add a materials chart or stitch glossary
- Write it in a more story-like narrative tone
Just let me know 😊