 by
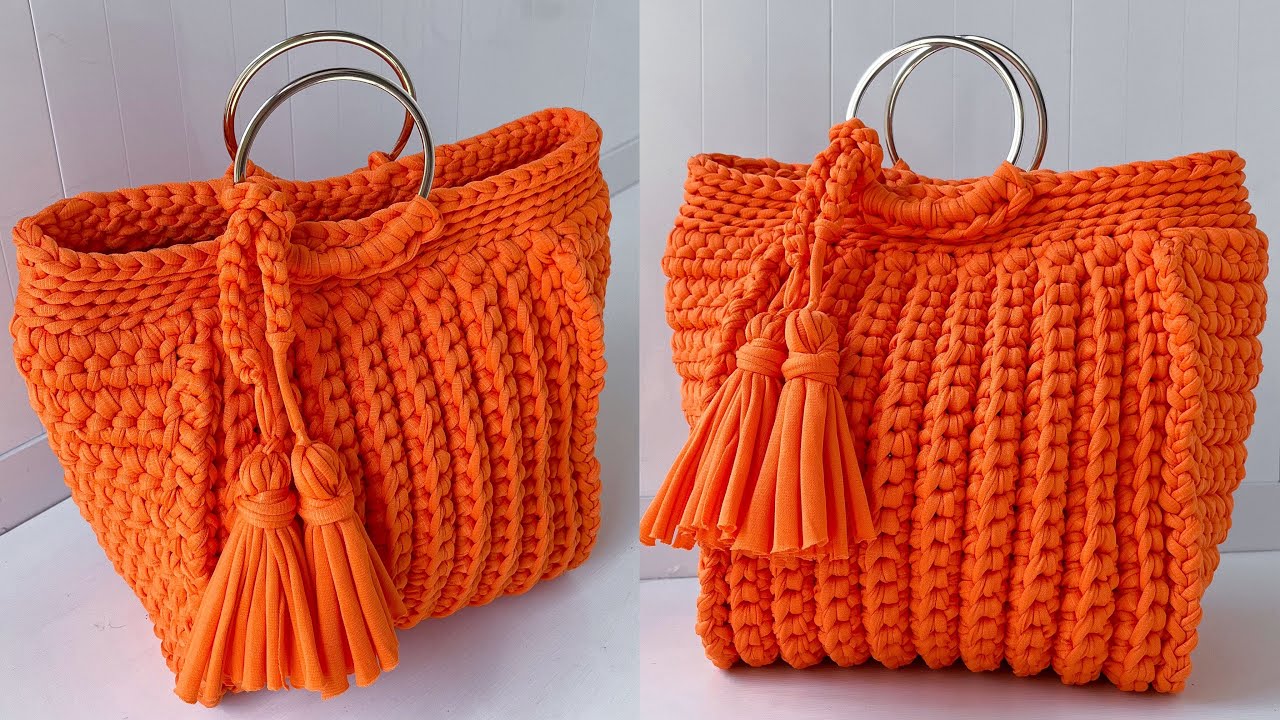
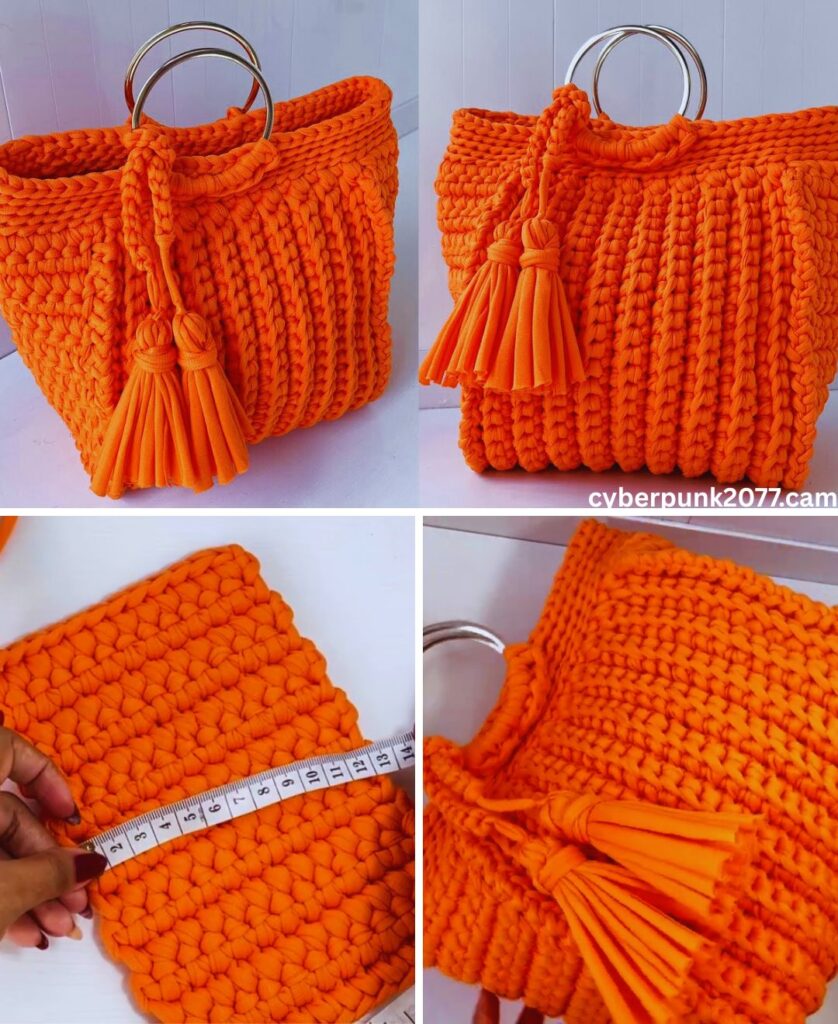
by Creating your own bag using T-shirt yarn is a fun, beginner-friendly craft that combines creativity, sustainability, and practicality. Whether you are new to handmade projects or an experienced crafter looking for a fast and satisfying project, a T-shirt yarn bag is a perfect choice. These bags are sturdy, stylish, and surprisingly easy to make—even in a single afternoon.
In this article, we’ll explore what T-shirt yarn is, why it’s great for bag making, and walk step by step through the process of creating an easy and quick bag.
What Is T-Shirt Yarn?
T-shirt yarn (also called fabric yarn or jersey yarn) is made from old cotton T-shirts or leftover knit fabric. The fabric is cut into long strips and gently stretched, which causes the edges to curl inward, forming a thick, soft yarn.
Why Use T-Shirt Yarn?
- Eco-friendly: It recycles old clothing and reduces waste.
- Durable: Thick fabric yarn makes strong, long-lasting bags.
- Soft and flexible: Comfortable to carry and easy to work with.
- Quick results: Because it’s chunky, projects grow fast.
What You’ll Need
Before you start, gather the following materials:
- Old cotton T-shirts (2–3 shirts for a medium bag)
- Sharp scissors
- A large crochet hook (10–12 mm) or your fingers (for finger crochet)
- Stitch marker (optional)
- Yarn needle (optional, for finishing)
- Ruler or measuring tape
No sewing machine is required, making this an ideal handmade project for beginners.
Step 1: Making T-Shirt Yarn
If you don’t already have T-shirt yarn, you can easily make your own.
- Lay the T-shirt flat on a table.
- Cut off the bottom hem and the top part (just below the sleeves).
- Fold the shirt lengthwise, leaving about 2 cm unfolded on one side.
- Cut strips about 1–2 cm wide.
- Unfold and cut diagonally across the uncut section to create one long continuous strip.
- Stretch the yarn gently to help it curl into a rounded shape.
Roll the yarn into a ball, and you’re ready to start crafting.
Step 2: Choose a Simple Bag Style
For a quick and easy project, a basic tote or pouch-style bag works best. This style uses simple stitches and minimal shaping.
You can choose:
- A small pouch for essentials
- A medium tote for daily use
- A beach or shopping bag with open stitches
For beginners, a rectangular base with straight sides is the simplest option.
Step 3: Create the Base of the Bag
The base determines the width of your bag.
- Make a slip knot and chain the desired length (for example, 15–20 chains).
- Single crochet into each chain.
- At the last chain, add 2–3 stitches to turn the corner.
- Continue crocheting along the other side of the chain.
- Repeat this oval pattern for a few rows until the base reaches your desired size.
Because T-shirt yarn is thick, even 4–6 rows can create a strong base.
Step 4: Build the Sides
Once the base is complete, you’ll start working upward.
- Crochet in continuous rounds without increasing stitches.
- Work through the back loop only for the first round to create a neat edge.
- Continue using simple single crochet stitches.
The bag will naturally start forming its shape. Keep going until the bag reaches the height you want—usually 20–30 cm for a tote.
This part goes very fast thanks to the chunky yarn.
Step 5: Add Handles or Straps
Handles can be short or long depending on your preference.
Simple Handle Method:
- Crochet to where you want the handle to start.
- Chain 10–20 stitches (depending on handle length).
- Skip the same number of stitches on the bag body.
- Continue crocheting around.
- On the next round, crochet into the chain stitches to strengthen the handle.
Repeat on the opposite side for the second handle.
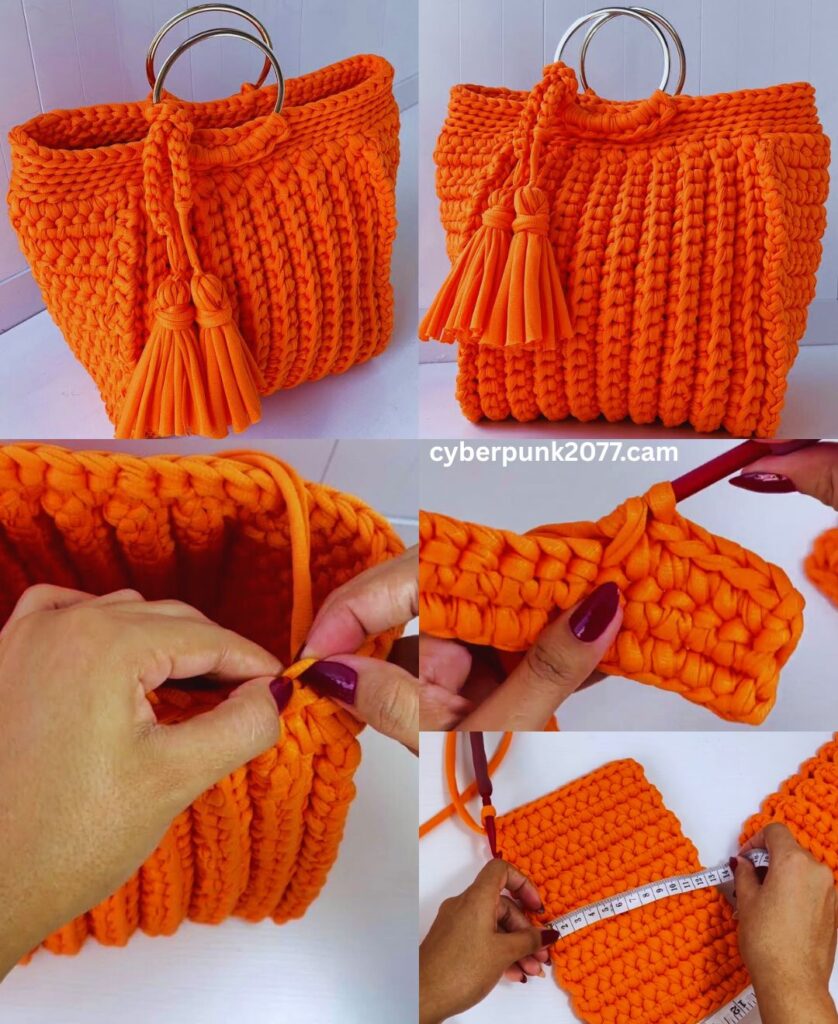
Step 6: Finish the Bag
To complete your bag:
- Cut the yarn, leaving a short tail.
- Pull the tail through the last loop to secure it.
- Weave in loose ends using your fingers or a yarn needle.
You can also add:
- Buttons
- Tassels
- Fabric lining
- Decorative stitches
Even without embellishments, a T-shirt yarn bag looks modern and stylish.
Tips for Making It Faster and Easier
- Use larger hooks to speed up progress.
- Keep stitches loose to avoid hand strain.
- Stick to simple stitches like single crochet.
- Take short breaks to rest your hands.
- Practice finger crochet if you don’t have hooks—it’s surprisingly effective.
Why This Project Is Perfect for Beginners
- No complicated patterns
- Minimal counting required
- Forgiving stitches
- Quick, visible results
- Budget-friendly materials
Even if you’ve never crocheted before, this project is a great way to learn basic skills and build confidence.
Final Thoughts
Making a bag with T-shirt yarn is an easy, quick, and rewarding craft project. It turns old clothing into something useful, stylish, and personal. With just a few tools and some creativity, you can create a sturdy handmade bag in just a few hours.
Whether you’re crafting for yourself, making gifts, or exploring eco-friendly DIY projects, a T-shirt yarn bag is a wonderful place to start. Once you make one, you’ll likely want to make many more in different sizes and colors.
If you’d like, I can also:
- Simplify this for younger students
- Turn it into a step-by-step tutorial
- Add images descriptions or a pattern-style version
Just tell me 😊