by
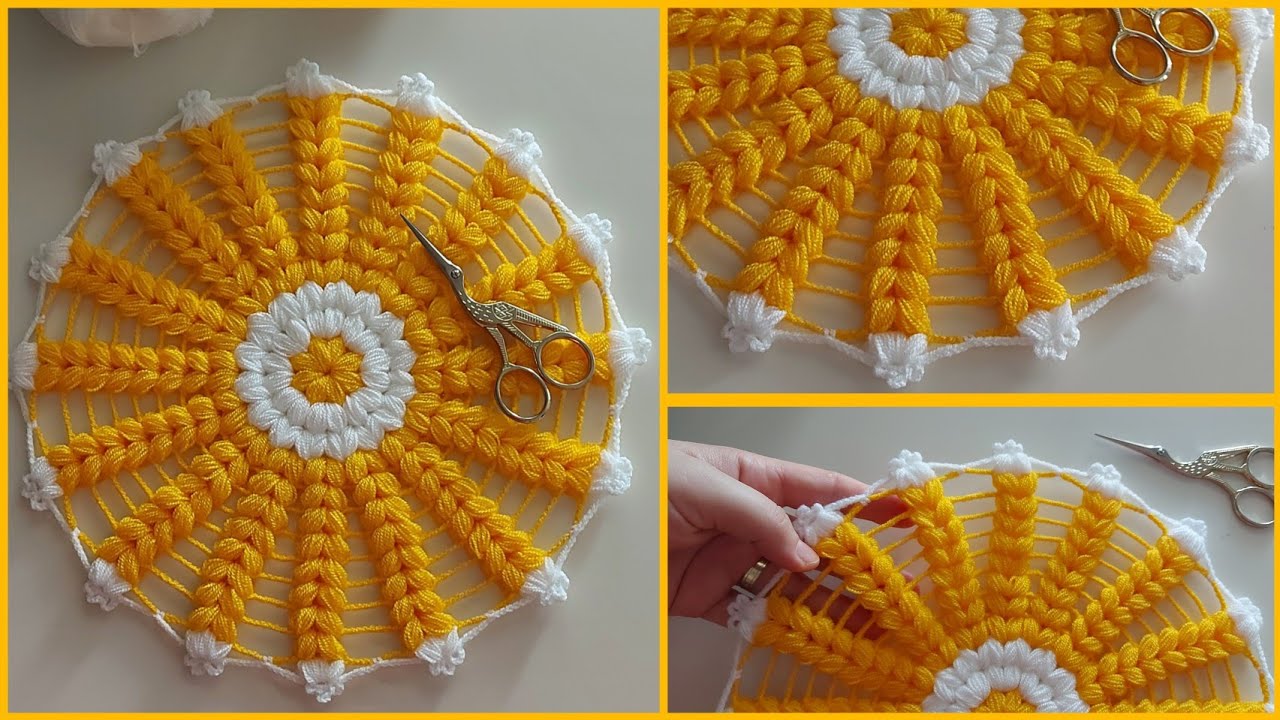
by You’re looking to crochet a beautiful flower-patterned table runner for beginners! This is a fantastic project that can add a charming, handmade touch to your dining room or coffee table. For a table runner, especially in Phnom Penh’s climate, 100% cotton yarn is an excellent choice. Cotton is durable, drapes nicely, can withstand spills and heat, and is easily washable – all ideal qualities for something that will be used on a table.
Given that you’re a beginner, we’ll focus on a modular approach: crocheting individual flower motifs or simple flower-edged squares, and then joining them to form the runner. This is much more manageable than trying to crochet a complex flower pattern directly into a long runner from scratch.
Let’s detail Option 1: Joining Individual Flower Motifs to form a runner, as it’s generally more beginner-friendly and allows for endless color customization.

How to Crochet a Flower Table Runner for Beginners (Joining Individual Motifs)
This method involves crocheting multiple identical (or varied) flower motifs and then joining them together to form a long runner. This allows you to tackle small, manageable pieces and gradually build up your project.
1. Essential Materials You’ll Need
- Yarn:
- For the Flower Motifs: Small amounts of 100% Worsted Weight Cotton Yarn in various bright or pastel colors. You’ll need one color for the flower center (e.g., yellow, cream), and one or more colors for the petals (e.g., pinks, blues, purples, greens).
- For Joining (Optional, but recommended): A coordinating color of 100% Worsted Weight Cotton Yarn to join the motifs and/or for an optional border. This can be white, cream, green, or a neutral that complements your flower colors.
- Quantity: The total yarn needed will depend on the size of your motifs and the desired length of your runner. For a runner of 5-7 flower motifs wide and 15-20 motifs long, you’ll need a few skeins of your main flower colors and perhaps 1-2 skeins of your joining/border color.
- Crochet Hook: A 4.0mm (US G/6) or 4.5mm (US 7) hook. Using a slightly smaller hook than usual for worsted weight can help the motifs hold their shape better.
- Scissors: For cutting yarn.
- Yarn Needle (Tapestry Needle): Absolutely essential for weaving in all yarn ends and for sewing the motifs together.
- Optional: Stitch markers (helpful for marking rounds/stitches), blocking mats and pins (highly recommended for shaping and flattening motifs).

2. Basic Crochet Stitches You’ll Use
This project relies on fundamental crochet stitches:
- Chain (ch): To begin your work and create spaces.
- Slip Stitch (sl st): For joining rounds, neatening, and securing.
- Single Crochet (sc): Creates a dense fabric, used in flower centers and for joining.
- Half Double Crochet (hdc): A medium-height stitch, useful for petal shaping.
- Double Crochet (dc): A taller stitch, forming the main body of petals.
- Triple/Treble Crochet (tr): An even taller stitch, used for more prominent petals.
- Magic Ring (MR): (Also known as Magic Circle or Adjustable Ring). The best way to start the center of your flower for a perfectly tight, hole-free beginning. An alternative chain method is also provided.
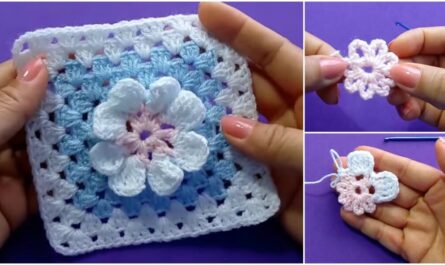
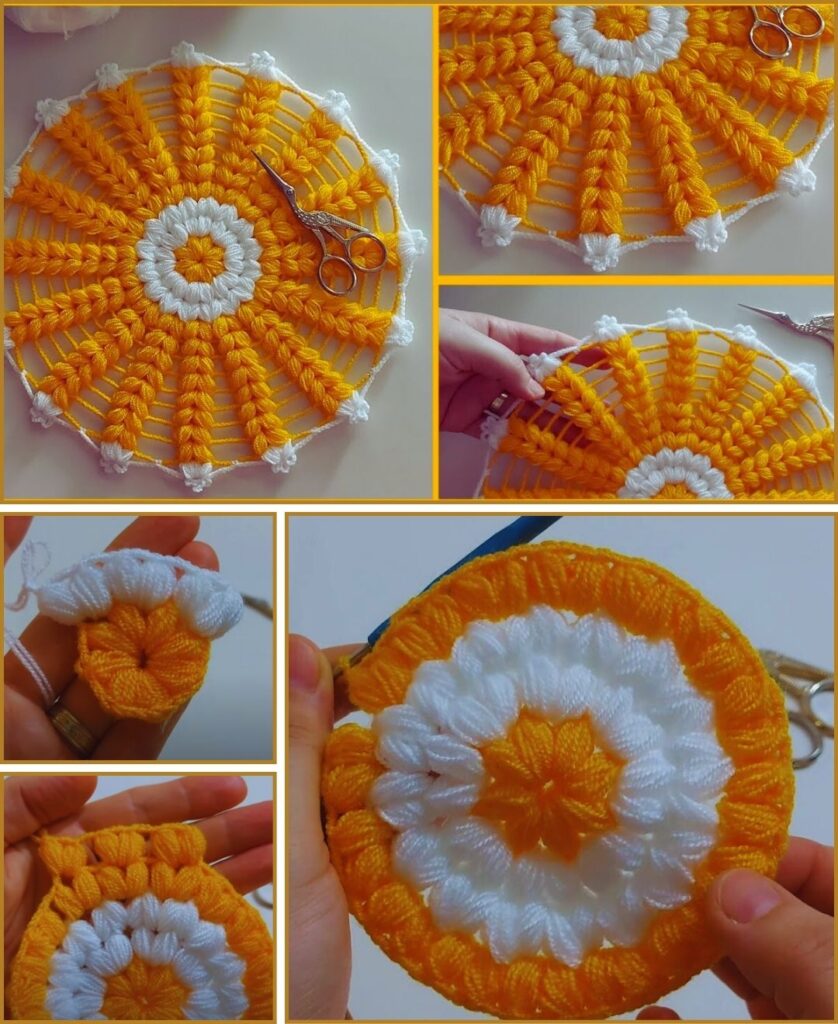
The Flower Motif Pattern (Classic 2-Layer Flower)
You’ll make multiple copies of this flower motif. The total number depends on your desired runner dimensions. For example, for a runner that is 3 flowers wide and 10 flowers long, you’ll need 30 flowers.
Abbreviations (US Crochet Terms):
- ch: chain
- sl st: slip stitch
- sc: single crochet
- hdc: half double crochet
- dc: double crochet
- tr: triple crochet (or treble crochet)
- MR: magic ring
- st(s): stitch(es)
- sp: space
- *: repeat instructions between asterisks

Part 1: Crocheting One Flower Motif
1. Flower Center (Color A – e.g., Yellow): * Start (Choose ONE method): * Method A: Magic Ring (Recommended for a tighter center) 1. Create a Magic Ring (MR). 2. Ch 1 (does NOT count as a stitch). 3. Work 8 sc into the Magic Ring. 4. Gently pull the yarn tail to close the center hole tightly. 5. Join with a sl st to the top of the first sc. (8 sc) * Method B: Chain Method (Easier for Beginners) 1. Ch 2. 2. Work 8 sc into the second chain from your hook. 3. Join with a sl st to the top of the first sc. (8 sc) * Fasten off Color A, leaving a short tail to weave in.
2. First Petal Layer (Color B – e.g., Pink): * Join Color B with a sl st into any sc from the previous round (Round 1). * Round 2: *Ch 2 (does NOT count as st), work (1 hdc, 1 dc, 1 hdc) into the same stitch. Sl st into the next stitch.* Repeat from * to * 7 more times. * (You’ll have created 8 small petals, each made of hdc-dc-hdc, with a sl st in between them into the next sc.) * Fasten off Color B, leaving a short tail to weave in.
3. Second Petal Layer (Color C – e.g., Purple or a deeper pink): * This layer will sit behind the first layer, giving your flower more fullness and a 3D effect. You’ll work into the slip stitches or spaces that are behind the petals of Round 2. * Join Color C with a sl st into any sl st from Round 2 (these are the slip stitches you made into the Round 1 sc stitches, connecting your petals). You’ll be inserting your hook behind the previously made petals. * Round 3: Ch 3 (counts as 1 dc). Work (1 dc, 1 tr, 1 dc) into the same slip stitch. * *Sl st into the next sl st (between petals from Round 2). Ch 3 (counts as 1 dc), work (1 dc, 1 tr, 1 dc) into the same sl st.* * Repeat from * to * 6 more times. Sl st into the next sl st. Join with a sl st to the top of the starting Ch 3. * (You’ll have created 8 larger petals, each made of dc-tr-dc, appearing to pop up from behind the first layer.) * Fasten off Color C, leaving a long tail (about 12-15 inches / 30-38 cm) for sewing.
Part 2: Crocheting Multiple Motifs
- Repeat Part 1: Make as many flower motifs as you need for your desired table runner length and width.
- Determine your dimensions: Measure your table. A typical table runner is about 1/3 the width of the table and extends about 6-12 inches beyond each end.
- Estimate motifs: Lay out a few finished motifs to estimate how many you’ll need across and down. For instance, if each motif is 4 inches wide and you want a 12-inch wide runner, you’ll need 3 motifs across. If you want a 36-inch long runner, you’ll need 9 motifs long (36/4 = 9). So, 3 x 9 = 27 motifs.
- Weave in Ends (Except the long sewing tail from Part 1, Step 3): For all your individual flower motifs, use your yarn needle to weave in the short yarn tails from the center (Color A) and the first petal layer (Color B). Leave the long tail from Color C for sewing.
Part 3: Blocking the Motifs (Highly Recommended!)
Blocking is crucial for a professional-looking finished runner. It helps your motifs lay flat and makes joining much easier.
- Gently wet each flower motif (you can spray them or immerse them in cool water).
- Carefully squeeze out excess water (do not wring!).
- Lay each motif flat on a clean towel or a foam blocking mat. Gently shape each one into a perfect, flat circle, ensuring the petals are neatly arranged.
- Use rust-proof pins to pin each motif securely in place to your desired shape.
- Allow them to air dry completely. This might take several hours or overnight.
Part 4: Joining the Motifs
You can join motifs using either a crochet join or sewing. For beginners, sewing is often easier and provides a very neat finish.
Method A: Sewing (Recommended for beginners)
- Arrange your motifs: Lay out all your blocked flower motifs on a flat surface in the exact arrangement you want for your runner (e.g., 3 flowers wide by 10 flowers long).
- Pin together: Pin adjacent motifs together along the edges where they will connect.
- Sewing: Use the long tail from one of the motifs, or a fresh piece of your joining yarn (Color D, if chosen), threaded onto your yarn needle.
- Using a whip stitch or mattress stitch, carefully sew the motifs together. Stitch through the back loops or edges of the outermost petals/stitches of the adjacent flowers. Aim for small, neat stitches that blend into the crochet fabric.
- Sew all the motifs together, row by row, and then column by column.
- Weave in remaining tails: After each seam, weave in the yarn tails securely into the stitches.
Method B: Slip Stitch Join (Crochet Join – A bit more advanced but creates a continuous fabric)
- Arrange your motifs.
- With your joining yarn (Color D), join it to the edge of one motif.
- Place two motifs side-by-side. Insert your hook into a stitch on the first motif, then into a corresponding stitch on the second motif, and make a sl st. Continue making sl sts through both motifs’ stitches to join them along the desired edge.
- Repeat for all connections.
Part 5: Adding an Optional Border (Highly Recommended)
Adding a simple border around the entire assembled runner can give it a very polished and finished look.
- Join yarn (Color D or a contrasting color) with a sl st to any corner stitch of your assembled runner.
- Round 1 (Single Crochet Border):
- Ch 1 (does NOT count as a stitch).
- Work sc stitches evenly around the entire perimeter of the table runner.
- When you reach a corner, work (2 sc, ch 2, 2 sc) into that corner to help it turn neatly.
- When working along the joined edges of the motifs, try to place your sc stitches evenly around the curves of the petals and into the seams to create a smooth line.
- Join with a sl st to the top of the first sc.
- Optional Round 2 (For a Thicker Border or Decorative Edge): You can add another round of sc, or a more decorative stitch like a picot edge or a simple shell stitch.
- For a simple sc border: Ch 1. Work 1 sc in each sc around, working (2 sc, ch 2, 2 sc) in each corner ch-2 space. Join with a sl st.
- For a shell stitch border: (ch 1. sk 1, 5 dc in next st, sk 1, sl st in next st) around. Adjust as needed.
- Fasten off your yarn after your final border round and weave in any remaining ends.
Finishing Your Flower Table Runner
- Final Weaving: Ensure all yarn tails are securely woven in. This is crucial for a neat and durable finished product.
- Final Blocking (Optional but great): If your runner looks a bit wonky after joining, or if you didn’t block the individual motifs, a final blocking can still help. Gently wet the entire runner, shape it on a flat surface, pin it out, and let it air dry completely.
Tips for Making a Beautiful Flower Table Runner
- Color Planning: Before you start, lay out your chosen yarn colors to see how they look together. You can make all flowers identical, or vary the petal colors while keeping the center color consistent, or go completely wild with different colors for every part!
- Consistent Tension: Try to maintain consistent tension, especially when making your flower motifs, so they are all roughly the same size. This makes joining much easier.
- Accuracy in Motif Making: Double-check your stitch counts for each flower round. If your flowers aren’t consistent, they won’t join neatly.
- Experiment with Joining: While sewing is recommended for beginners, as you gain confidence, you can explore various crochet joining methods (e.g., slip stitch join, single crochet join, join-as-you-go).
- Customize Size: You can easily make this runner longer or shorter, wider or narrower, by simply making more or fewer flower motifs.
- Washing Instructions: Since it’s a table runner, it will likely need washing. Always note the washing instructions for your chosen cotton yarn (typically machine wash cold, tumble dry low).
You now have a detailed guide to crochet a beautiful and charming flower-patterned table runner! This project will be a delightful addition to your home decor.