 by
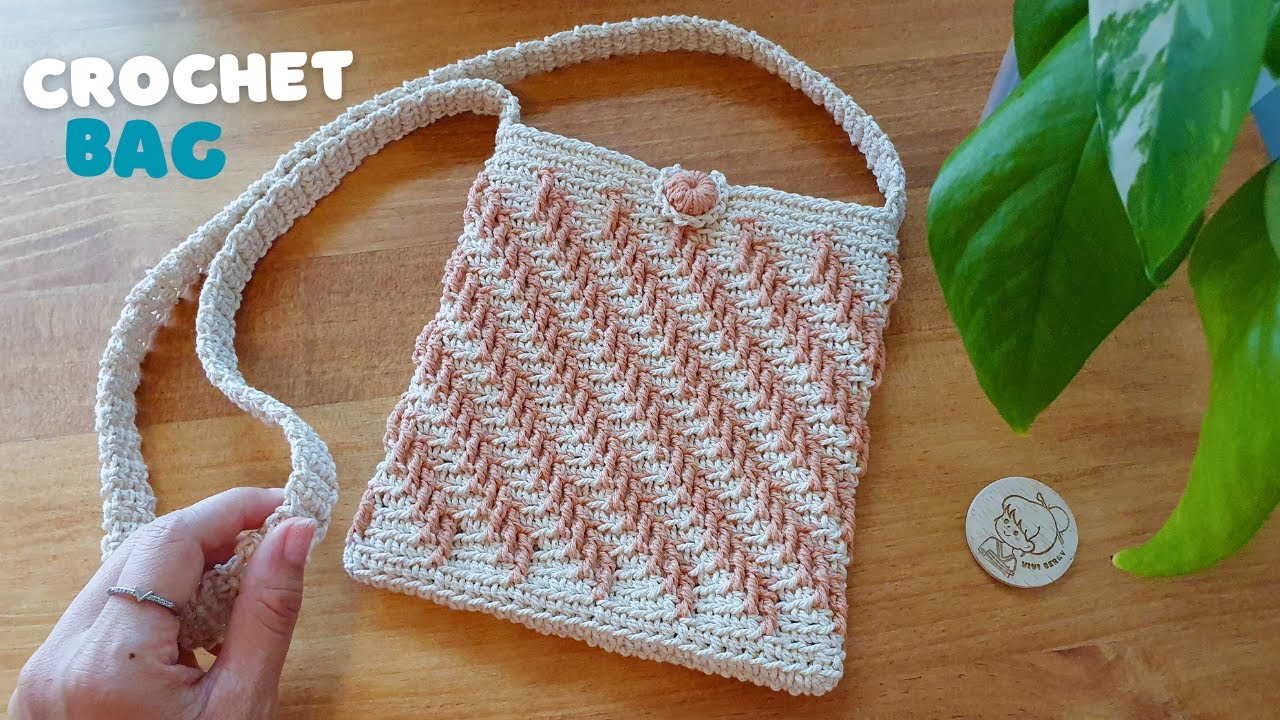
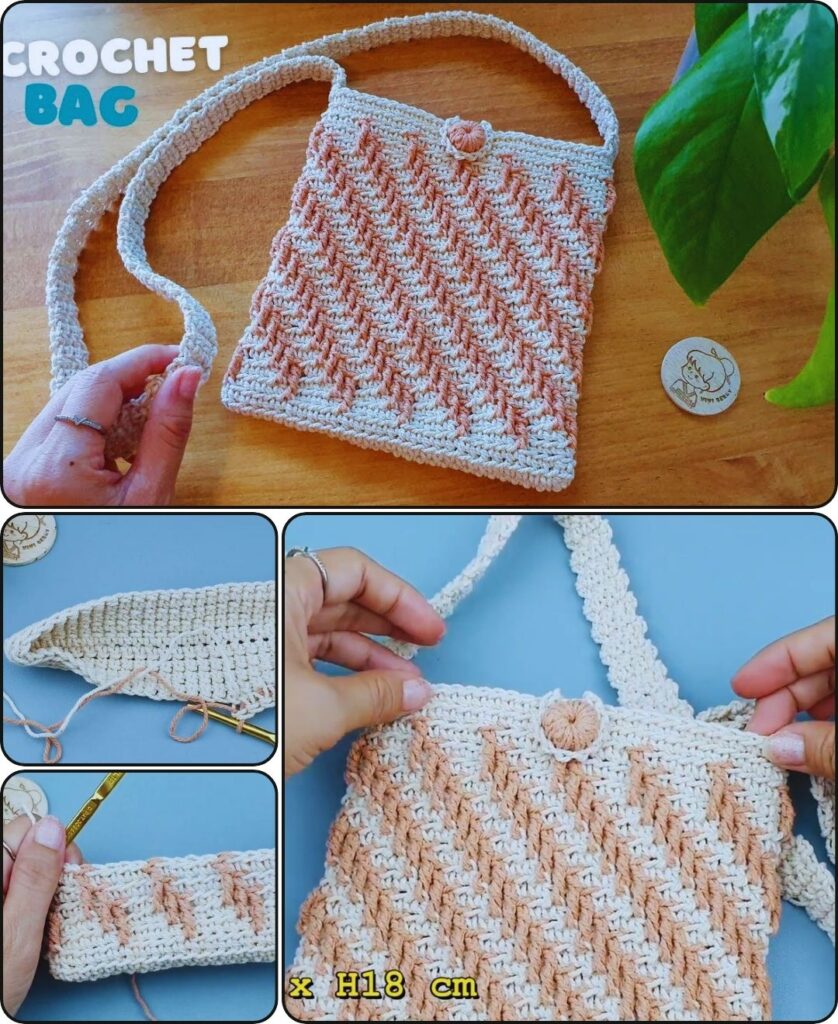
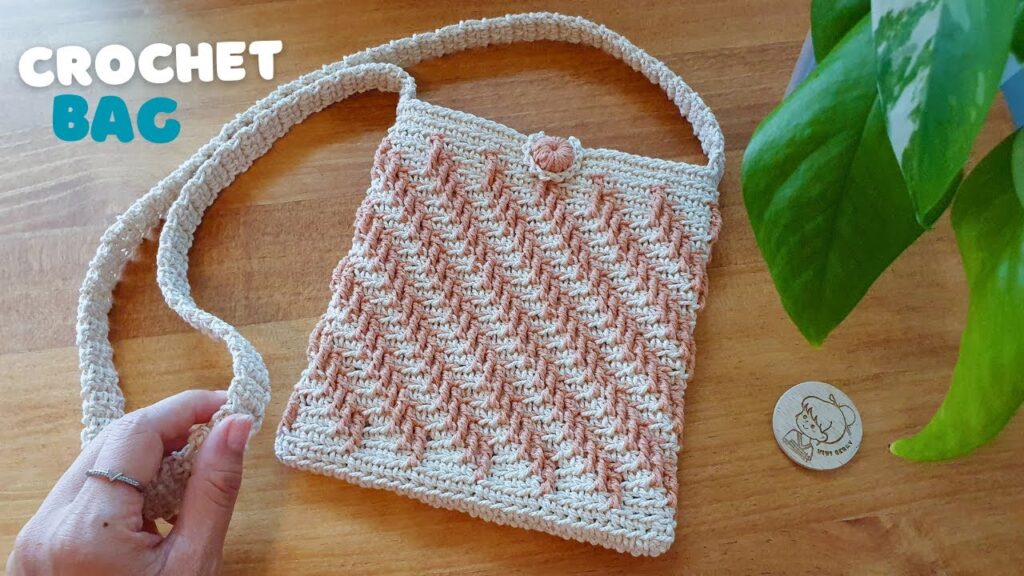
by A crocheted crossbody or sling bag is a versatile and stylish accessory that can be customized in endless ways. It’s a fantastic project for a beginner or an experienced crocheter looking for a quick and satisfying make. The design is simple yet highly functional, perfect for carrying essentials like a phone, wallet, and keys. This detailed tutorial will guide you through the process of creating a beautiful and sturdy crocheted crossbody bag.
Materials Needed
- Yarn: A medium-weight yarn (worsted weight or DK) is an excellent choice for a sturdy bag.
- Cotton or T-shirt Yarn: These are highly recommended as they create a durable, non-stretchy fabric that holds its shape well.
- Acrylic or Wool Blends: Can also be used, but may have more stretch. You’ll want a tighter tension to prevent the bag from sagging.
- You’ll need approximately 200-300 yards (180-275 meters) of yarn, depending on the desired size of your bag.
- Crochet Hook: A hook size appropriate for your yarn. For worsted weight yarn, a 4.0mm to 5.5mm (US size G-6 to I-9) hook works well. Check the yarn label for a recommendation.
- Scissors
- Tapestry Needle: For weaving in ends.
- Optional:
- Magnetic Snap or Zipper: To close the bag.
- D-rings or O-rings: To attach the strap.
- Stitch Marker: To mark the beginning of rounds.
- Bag Liner Fabric: To prevent small items from falling through stitches.
Abbreviations
- ch: chain
- sl st: slip stitch
- sc: single crochet
- dc: double crochet
- hdc: half double crochet
- st(s): stitch(es)
- rep: repeat
- […]: work instructions inside brackets as a group
- BLO: back loop only
- FLO: front loop only
Part 1: The Base of the Bag
The base is the foundation of your bag. It can be a simple rectangle or a circle, depending on the desired shape. A rectangular base is classic for a crossbody bag.
Instructions for a Rectangular Base:
Row 1: Ch 21 (or any odd number for your desired width). Sc in the 2nd ch from the hook and in each ch across. (20 sc)
Row 2: Ch 1, turn. Sc in the first st and in each st across. (20 sc)
Rows 3 and beyond: Repeat Row 2 until your base is the desired length. For a typical crossbody bag, about 8-10 inches (20-25 cm) long is a good size. You’ll have a flat rectangular piece. Do not cut the yarn.
Part 2: The Body of the Bag
The body is worked in continuous rounds around the base you just created. This technique eliminates seams and builds the bag walls.
Round 1: Ch 1, do not turn. You will now be working around the entire perimeter of the rectangle.
- Work 3 sc in the corner st.
- Work sc evenly down the side of the rectangle (you should be working into the ends of the rows you just made). Place 3 sc in the next corner.
- Work sc evenly down the bottom of the original chain. Place 3 sc in the next corner.
- Work sc evenly up the last side. Place 3 sc in the final corner.
- Sl st to the first sc of the round to join.
Tip: The number of stitches will vary depending on your base size. Just be sure to work a tight, consistent stitch and add the 3 sc in each of the four corners to create a smooth turn.
Round 2: Ch 1, sc in each st around. Do not join at the end of the round. Instead, you will now work in a spiral for the body to avoid a visible seam. Place a stitch marker in the first sc of the round.
Round 3 and beyond: Continue to sc in each st around, moving your stitch marker up at the beginning of each new round.
Stitch Pattern Variations for the Body:
- Single Crochet (sc): The most common and sturdy stitch for bags. Creates a dense fabric that holds its shape.
- Half Double Crochet (hdc): Creates a slightly looser, but still solid, fabric.
- Granny Stitch (dc cluster): Creates an open, decorative fabric. Use a liner with this stitch.
- Moss Stitch (sc, ch 1, skip 1): A great option for texture. It’s easy and works up quickly.
- Ribbed Fabric: Work sc or hdc in the back loop only (BLO) to create a subtle ribbed texture.
Continue working in rounds until your bag is the desired height. A height of 6-8 inches (15-20 cm) is a standard size for a crossbody.
Final Round of the Body: Sl st to the first st of the last round to create a clean finish. Fasten off and weave in the end if you are changing colors for the strap.
Part 3: The Strap
The strap is a crucial part of the bag. It needs to be sturdy and comfortable.
Option 1: Simple Single Crochet Strap
Row 1: Ch 8 (or your desired width). Sc in the 2nd ch from the hook and in each ch across. (7 sc)
Row 2: Ch 1, turn. Sc in each st across. (7 sc)
Rows 3 and beyond: Repeat Row 2 until your strap is the desired length. For a crossbody, a length of 45-55 inches (114-140 cm) is typical, but you should measure yourself to find a comfortable fit.
Finishing the Strap: Fasten off, leaving a long tail for sewing.
Option 2: Braided or Twisted Cord Strap
This is a great option for a more minimalist look. Cut 3-4 strands of yarn, about twice the length of your desired strap. Secure one end and braid or twist the strands tightly. Knot the ends to secure them.
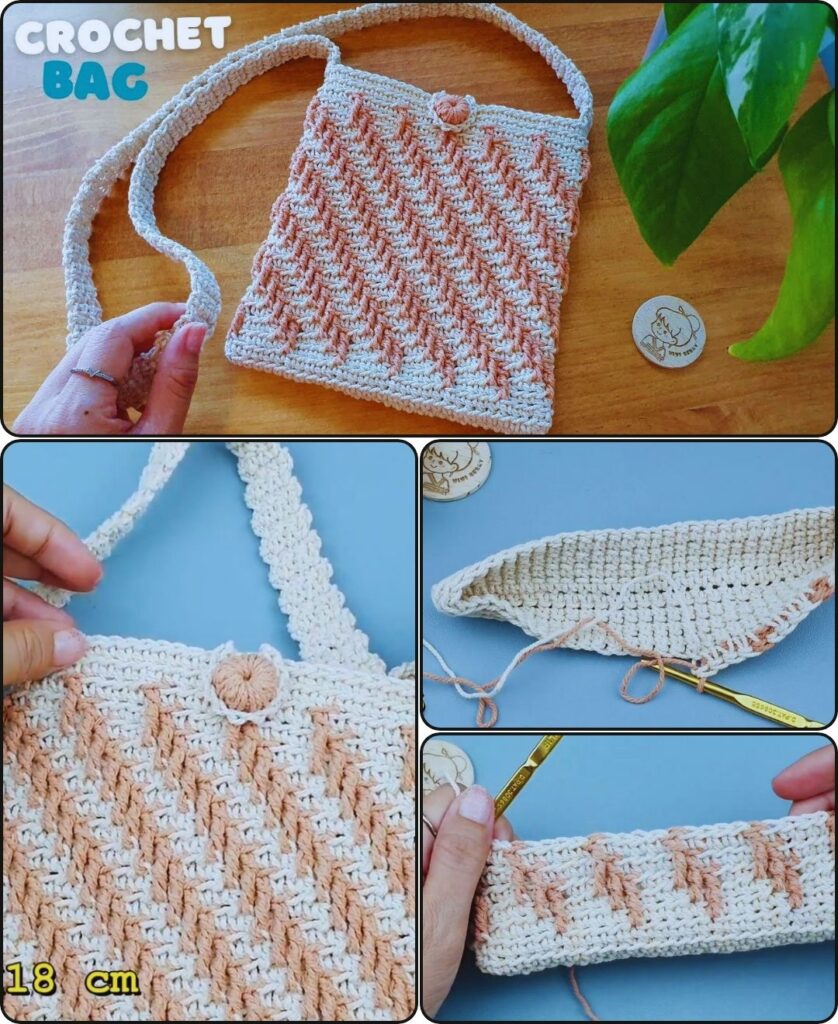
Part 4: Assembly and Finishing
1. Attaching the Strap:
- Lay your bag flat. Use a tapestry needle and the long yarn tail to securely sew one end of the strap to the top corner of one side of the bag.
- Do the same for the other end of the strap, attaching it to the top corner of the opposite side.
- Sew a few rows down to ensure a strong hold. The strap will bear the weight of the bag’s contents.
2. Adding a Closure (Optional):
- Magnetic Snap: Sew a magnetic snap closure to the inside of the bag, just below the top edge. This is a very professional-looking finish.
- Zipper: For a more secure closure, you can sew a zipper in place. This may require some basic sewing skills.
3. Adding a Liner (Optional but Recommended):
- A simple fabric liner can be sewn to the inside of the bag.
- Cut a piece of fabric to match the size of your bag’s body and base.
- Use a running stitch to hand-sew the liner to the inside of the bag, a few stitches down from the top edge.
4. Final Touches:
- Weave in all remaining loose ends with your tapestry needle.
- Give your bag a light blocking if desired to help it hold its shape perfectly.
Congratulations! You now have a beautiful, handmade crocheted crossbody bag that is perfect for everyday use or a night out. This pattern can be easily adapted to make larger totes, smaller pouches, or even backpacks by simply changing the size of the base and body. The possibilities are endless!