 by
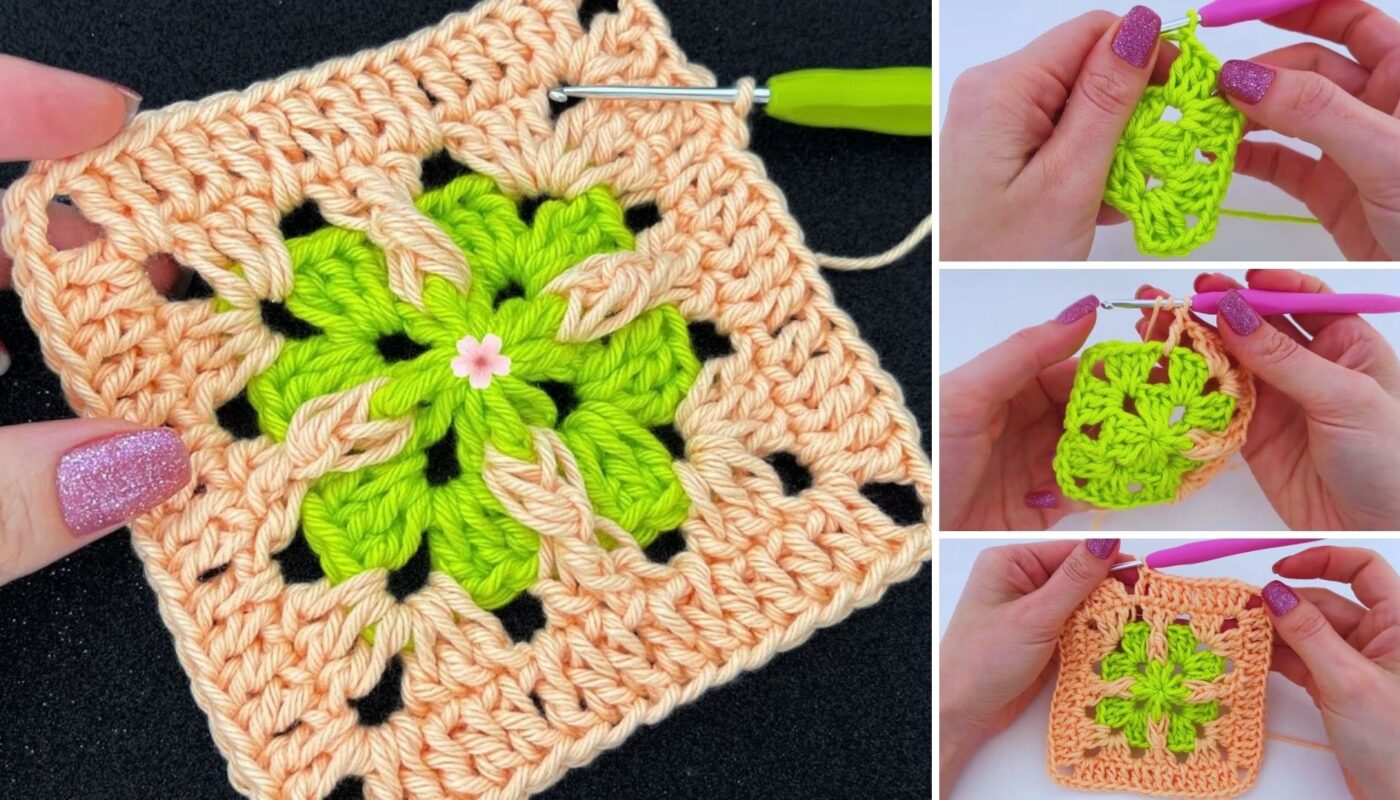
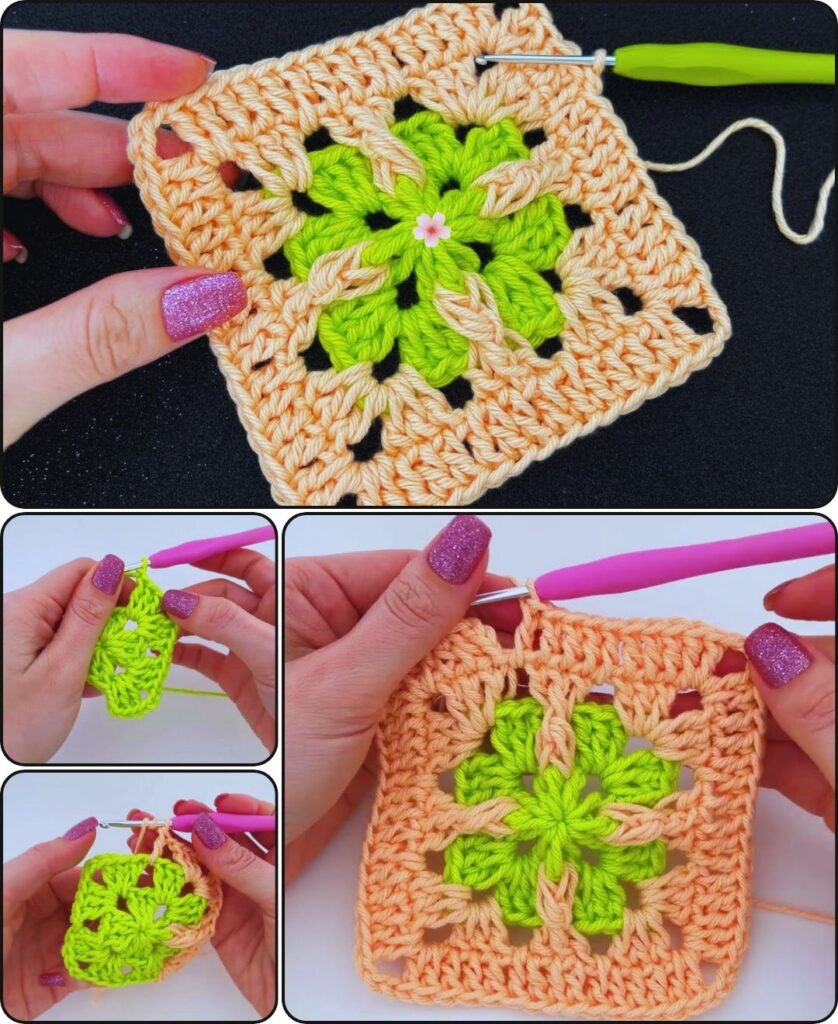
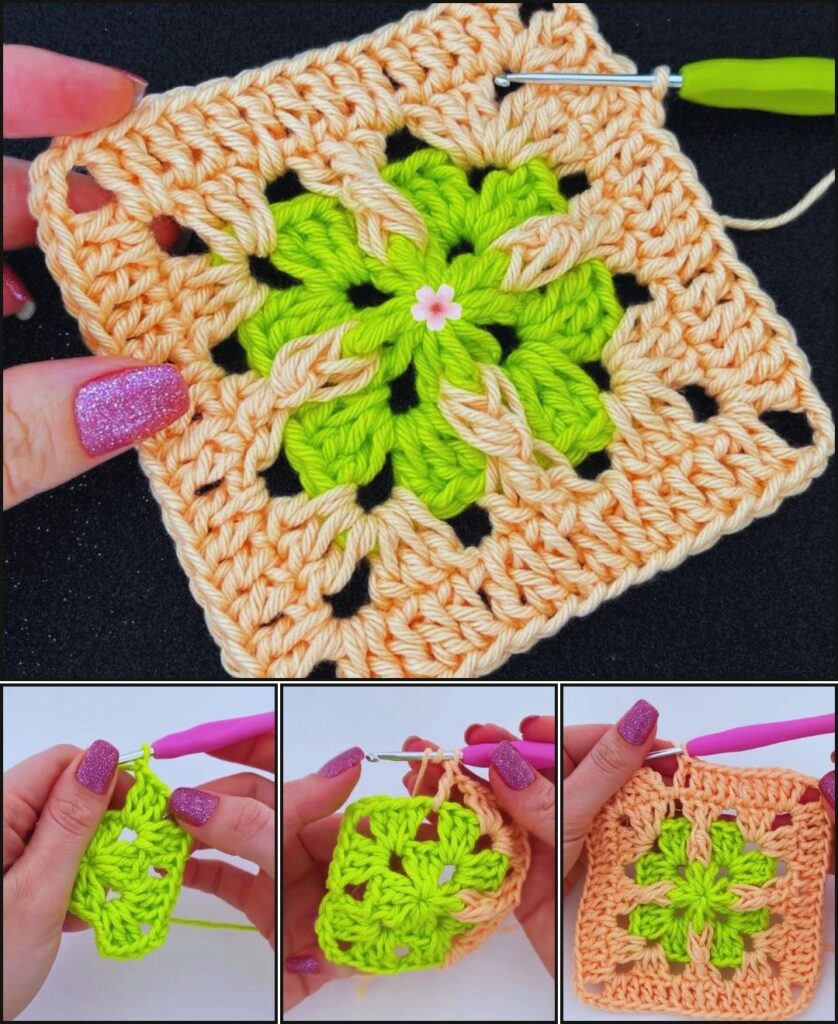
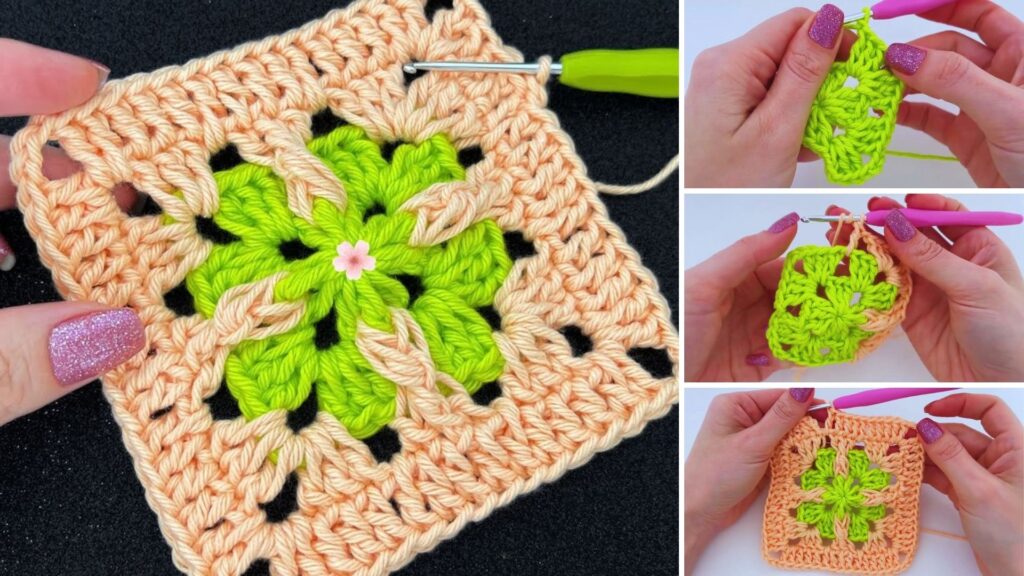
by A crocheted square is one of the most fundamental and versatile motifs in the craft. While the classic “granny square” is a well-known example, a solid square provides a dense, sturdy fabric perfect for projects that require structure and durability. From bags and pouches to rugs and cushions, a solid crocheted square is a building block for a wide range of creations.
This detailed guide will teach you how to crochet a solid, seamless square that is ideal for these types of projects.
Materials Needed
- Yarn:
- For bags and rugs, a sturdy yarn is best. T-shirt yarn, bulky cotton, or a durable acrylic blend are all excellent choices.
- The weight of the yarn will determine the size of your square. T-shirt yarn and super bulky yarn are perfect for rugs, while worsted or DK weight yarn is great for bags.
- Crochet Hook: Choose a hook size appropriate for your yarn.
- For bulky or T-shirt yarn, a large hook (8.0mm to 12.0mm) is ideal.
- For worsted weight yarn, a 4.0mm to 5.5mm hook will work well.
- Consult your yarn label for the recommended hook size.
- Scissors
- Tapestry Needle: For weaving in ends.
- Stitch Marker: To mark the beginning of your rounds.
Abbreviations
- ch: chain
- sl st: slip stitch
- sc: single crochet
- dc: double crochet
- st(s): stitch(es)
- rep: repeat
- (…): work instructions inside parentheses as a group
- […]: work instructions inside brackets as a group
Pattern Instructions: The Solid Square
This square is worked in a continuous spiral from the center out. The key to a solid square is to work a “corner” of increases in each round to maintain the square shape. This pattern uses single crochet stitches for a dense, tight fabric, but you can substitute other stitches like half double crochet (hdc) or double crochet (dc) for a different look.
Part 1: The Center
Round 1: Create a magic ring. Ch 1 (does not count as a stitch). Work 8 sc into the magic ring. Pull the tail to close the ring tightly. Sl st to the first sc to join. (8 sts)
Alternative start for beginners: Ch 4, sl st into the first ch to form a ring. Ch 1, work 8 sc into the ring. Sl st to the first sc to join.
Part 2: Establishing the Corners
In this round, you will turn the circle into a square by creating four corners.
Round 2: Ch 1. Sc in the same st.
- (sc, ch 2, sc) in the next st. (This is your first corner.)
- Sc in the next st.
- (sc, ch 2, sc) in the next st. (Second corner)
- Sc in the next st.
- (sc, ch 2, sc) in the next st. (Third corner)
- Sc in the next st.
- (sc, ch 2, sc) in the next st. (Fourth corner)
- Sl st to the first sc of the round to join. (12 sts, 4 ch-2 sps)
Note: The ch-2 spaces are your corner spaces and will be easy to identify.
Part 3: Expanding the Square
Now you will continue to increase at the corners and work straight stitches along the sides. The number of stitches between your corners will grow with each round.
Round 3: Ch 1. Sc in the same st and in each of the next 2 sts.
- In the corner ch-2 sp, work (sc, ch 2, sc).
- Sc in each of the next 3 sts.
- In the corner ch-2 sp, work (sc, ch 2, sc).
- Sc in each of the next 3 sts.
- In the corner ch-2 sp, work (sc, ch 2, sc).
- Sc in each of the next 3 sts.
- In the corner ch-2 sp, work (sc, ch 2, sc).
- Sl st to the first sc to join. (20 sts, 4 ch-2 sps)
Round 4: Ch 1. Sc in the same st and in each of the next 4 sts.
- In the corner ch-2 sp, work (sc, ch 2, sc).
- Sc in each of the next 5 sts.
- In the corner ch-2 sp, work (sc, ch 2, sc).
- Sc in each of the next 5 sts.
- In the corner ch-2 sp, work (sc, ch 2, sc).
- Sc in each of the next 5 sts.
- In the corner ch-2 sp, work (sc, ch 2, sc).
- Sl st to the first sc to join. (28 sts, 4 ch-2 sps)
Continuing the Pattern:
For each subsequent round, the pattern is simple:
- Sl st to the first st of the round to join. Ch 1.
- Sc in each st along the side until you reach the corner ch-2 sp.
- In the corner ch-2 sp, work (sc, ch 2, sc).
- Repeat for all four sides.
- Sl st to the first sc to join.
Keep going with this pattern, and your square will grow steadily, with the number of stitches on each side increasing by two every round.
Tips for Perfect Squares
- Count Your Stitches: It is essential to count your stitches in each round to ensure the sides are growing evenly. If you miss a stitch, your square will become a trapezoid.
- Consistent Tension: Maintain a consistent tension on your yarn to create a smooth, even fabric.
- Blocking: For a professional, flat finish, blocking is essential.
- For synthetic/acrylic yarn: Use a steamer or a steam iron held above the square (do not touch the yarn with the iron). The steam will relax the fibers and help the square hold its shape.
- For natural fibers (cotton, wool): Gently wet the square and lay it flat on a foam mat or a towel. Pin the corners and sides to straighten it out. Let it dry completely.
Using Your Squares
For Bags:
- Make two squares of the same size.
- Place them on top of each other, wrong sides facing out.
- Single crochet or whip stitch the squares together along three sides, leaving the top open.
- Turn the bag right-side out.
- Add a handle or strap to the top corners.
- Consider adding a lining for durability and to prevent items from falling through the stitches.
For Rugs:
- Make one large square using bulky or T-shirt yarn. This makes a quick, modern rug.
- Make several smaller squares and join them together using a single crochet seam, a whip stitch, or a mattress stitch. This allows for fun colorwork and mosaic patterns.
For Other Projects:
- Cushion Cover: Make two squares the size of your cushion and sew them together.
- Blanket or Afghan: Make a large number of squares and join them together.
- Pot Holder: Use a single, smaller square made with cotton yarn for a heat-resistant pot holder.
This simple solid square pattern is a gateway to a world of creative possibilities. By mastering this basic technique, you can create functional and beautiful items for your home and wardrobe.