 by
by Gemini said
Patchwork crochet is the art of turning “scraps into masterpieces.” A Patchwork Granny Square project is the ultimate expression of this—taking individual squares of different colors, textures, or even patterns and joining them into a cohesive, bohemian-style blanket, cardigan, or bag.
The secret to a great patchwork look is consistency in size despite the chaos in color.
🧶 The Patchwork Toolkit
To make a patchwork project look intentional rather than messy, you need a few “rules of engagement” for your materials.
| Item | Recommendation | Why? |
| Yarn | Various colors, but stick to the same weight (e.g., all Worsted). | Different weights will make your squares uneven, making joining impossible. |
| Hook | 5.0 mm (H/8) | The standard “Goldilocks” size for most patchwork yarns. |
| The “Anchor” Color | One solid neutral (Black, Cream, or Grey). | Using one consistent color to join the squares “anchors” the busy patchwork. |
Stitch Key (US Terms)
- ch: Chain
- sl st: Slip Stitch
- dc: Double Crochet
- Cluster: A group of 3 dc stitches.
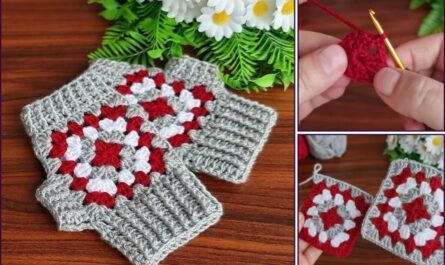
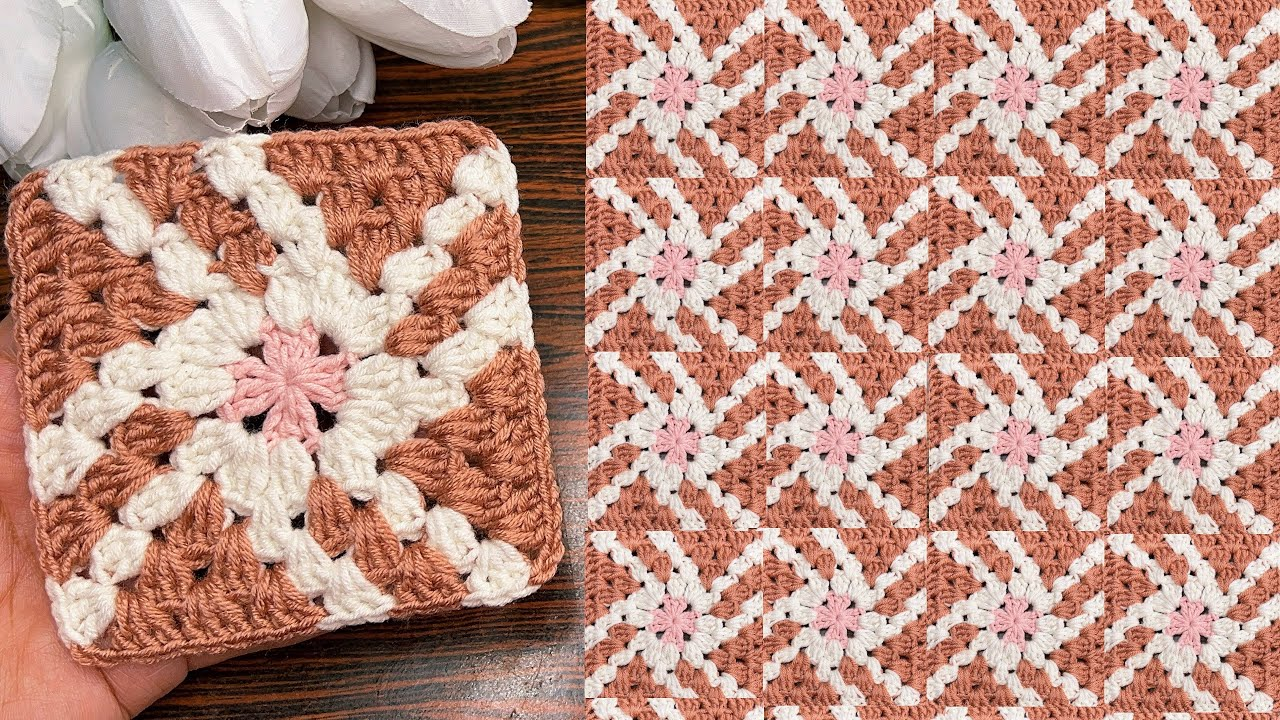
🛠 Step 1: The “Scrap-Buster” Square
For a true patchwork look, change your yarn color for every single round.
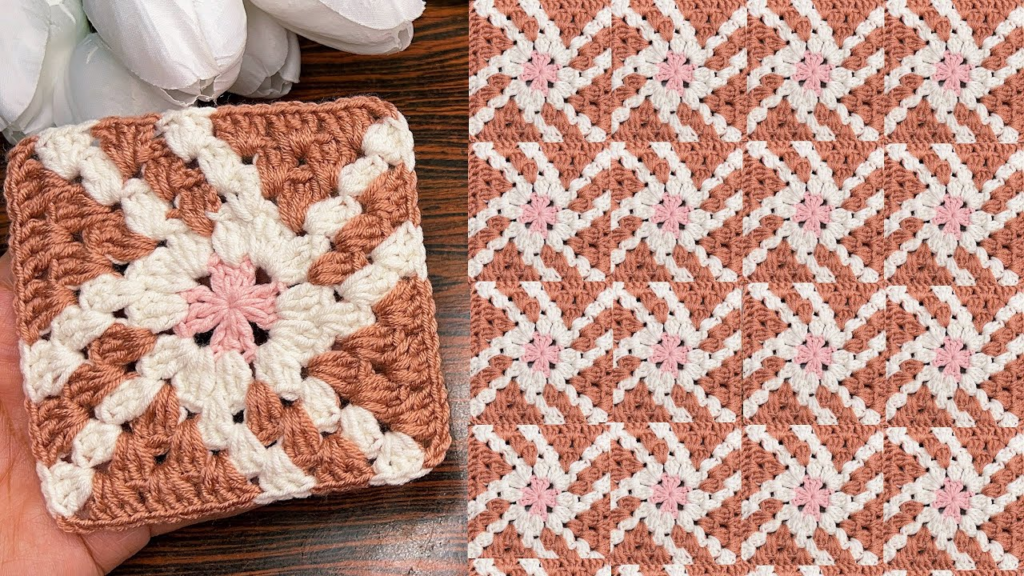
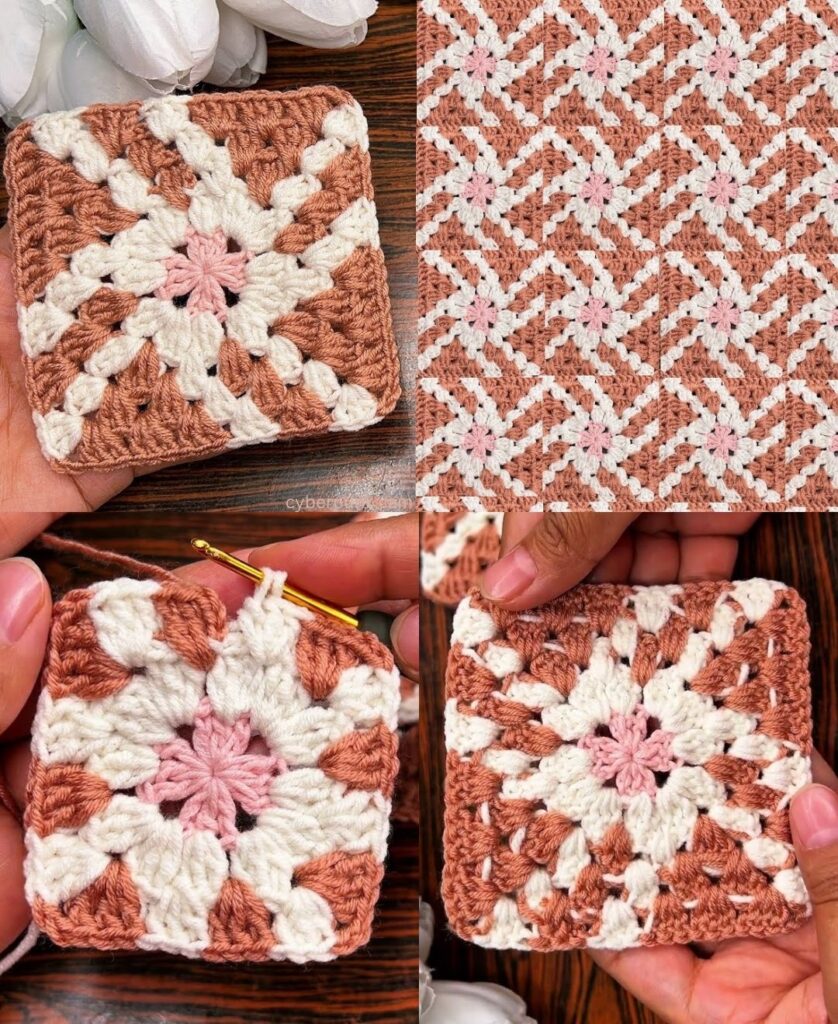
Round 1: The Heart
- Start: Make a Magic Ring (or ch 4 and sl st to form a ring).
- Stitches: ch 3 (counts as dc). Work 2 dc into the ring. ch 2.
- Repeat: [3 dc, ch 2] three more times.
- Finish: sl st to the top of ch 3. Fasten off.

Patchwork Tip: Don’t just carry the yarn. Cut it and weave it in so the next color starts fresh.
Round 2: The Expansion
- Join: Join a new color in any ch-2 corner space.
- Corner: ch 3, 2 dc, ch 2, 3 dc in the same space.
- The Side: ch 1.
- Repeat: Work a Corner (3 dc, ch 2, 3 dc) in the remaining three corners, with a ch 1 between them.
- Finish: sl st to join. Fasten off.
Round 3: The Frame
- Join: Join a third color in any corner space.
- Corner: Work a standard corner (3 dc, ch 2, 3 dc). ch 1.
- Side: Work 3 dc into the ch-1 side space. ch 1.
- Repeat: Continue the pattern around.
- Finish: Fasten off.
📐 Step 2: Designing Your Layout
Before you join your squares, lay them out on a flat surface (like a floor or bed). This is where the “Patchwork” magic happens.
- The Random Chaos: Place colors completely at random. This works best if you have 20+ different colors.
- The Gradient: Arrange squares from darkest in the center to lightest at the edges.
- The Checkerboard: Alternate a “busy” multicolored square with a “solid” neutral square.
The Math of Patchwork
If you want a standard throw blanket, here is the formula for your layout:
TotalSquares=(Width in Squares)×(Length in Squares)
Example: For a 50″ x 60″ blanket using 5″ squares, you would need 10×12=120 squares.

🔗 Step 3: Joining the Masterpiece
There are two popular ways to join patchwork squares. Your choice will change the “vibe” of the finished piece.
1. The Whip Stitch (The Invisible Look)
Thread your “Anchor” color onto a tapestry needle. Place two squares right-sides together and sew through the back loops only.
- Vibe: Very clean and flat. The focus remains entirely on the colors of the squares.
2. The Flat Slip Stitch Join (The Textured Look)
Use your crochet hook and the “Anchor” color. Slip stitch the squares together through the back loops.
- Vibe: This creates a beautiful “braid” or ridge between the squares, which frames each patchwork piece like a photo in a gallery.
💡 Gemini’s Professional Secrets
- Weave as you go: I know, I know. It’s boring. But in a patchwork project, you will have hundreds of ends. If you wait until the end to weave them in, you will want to hide the blanket in a closet forever. Weave them in after every 5 squares!
- The Weight Test: If you have a scrap yarn that feels “thinner” than the others, hold it double (use two strands at once) to match the thickness of your other squares.
- Blocking: Because patchwork uses different yarns, some squares might be slightly “wonky.” Pin them all to the same size on a blocking board and steam them. This makes joining a dream rather than a nightmare.
Would you like me to help you design a specific color palette using three complementary colors for a more “modern” patchwork look?