by
by How to Crochet an Easy Throw Pillow
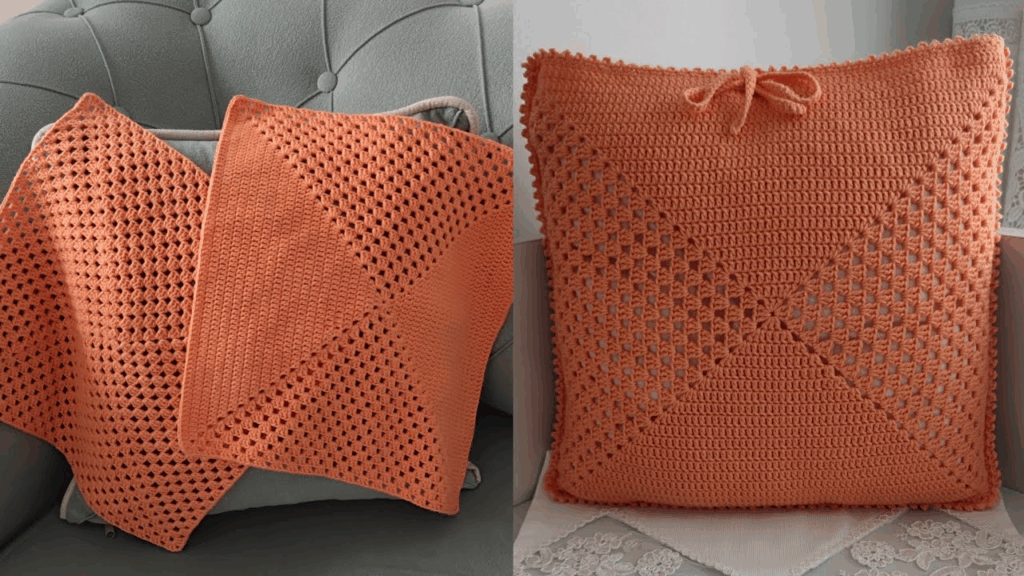
Crocheting a throw pillow is a wonderful project for beginners and experienced crafters alike! It’s a fantastic way to add a cozy, personalized touch to your home decor and practice some basic stitches. Plus, it’s quite satisfying to create something both decorative and functional.
Since you’re in Phnom Penh, where it’s generally warm, 100% cotton yarn or a soft cotton blend is an excellent choice for a throw pillow. Cotton is breathable, durable, and holds its shape well. It also has a lovely drape and stitch definition, making your pillow look great. If you want something super soft and squishy, a soft acrylic yarn would also work beautifully.
1. Essential Materials You’ll Need
- Yarn:
- Fiber: 100% Cotton, Cotton Blend, or soft Acrylic yarn are all great options.
- Weight: Worsted Weight (Aran / Medium / Category 4) is highly recommended. It’s versatile, works up quickly, and creates a nice, substantial fabric for a pillow.
- Color(s): Choose any color or combination of colors that match your decor! You’ll need enough to make two identical panels. For a standard 16×16 inch (40×40 cm) pillow, you’ll need roughly 300-500g of worsted weight yarn (about 600-1000 yards).
- Crochet Hook:
- For Worsted weight yarn, a 5.0mm (US H/8) or 5.5mm (US I/9) hook is usually appropriate. The goal is to create a fabric that’s dense enough to prevent the pillow insert from showing through, but still soft and flexible. If your stitches look too open, go down a hook size.
- Scissors: For cutting yarn.
- Yarn Needle (Tapestry Needle): Essential for weaving in ends and seaming the pillow panels together.
- Pillow Insert: A standard square pillow insert, typically 16×16 inches (40×40 cm) or 18×18 inches (45×45 cm). Make sure your crocheted panels will match the size of your insert.
- Stitch Markers (Optional but Recommended): Helpful for marking the beginning of rows or specific stitches.

2. Basic Crochet Stitches You’ll Use
This tutorial will use fundamental and straightforward crochet stitches to create a simple yet effective pillow cover. We’ll use the single crochet (sc) stitch for a dense, sturdy fabric, and the half double crochet (hdc) stitch for a slightly quicker and softer fabric. You can choose which one you prefer!
- Chain (ch): Used to start your project.
- Single Crochet (sc): Creates a tight, dense fabric.
- How to: Insert hook into stitch, YO, pull up a loop (2 loops on hook). YO, pull through both loops on hook.
- Half Double Crochet (hdc): A medium-height stitch, offering good coverage and a softer feel than sc.
- How to: YO, insert hook into stitch, YO, pull up a loop (3 loops on hook). YO, pull through all 3 loops on hook.
- Working in Rows: You’ll create flat rectangular panels.
- Fasten Off: Securely ending your work.
- Weaving in Ends: Hiding yarn tails for a neat finish.
Crochet Easy Throw Pillow Pattern
This pattern will guide you to make two identical square panels, which you’ll then seam together around a pillow insert. This pattern is for a 16×16 inch (40×40 cm) pillow insert.
Abbreviations (US Crochet Terms):
- ch: chain
- sc: single crochet
- hdc: half double crochet
- st(s): stitch(es)
- FO: Fasten Off
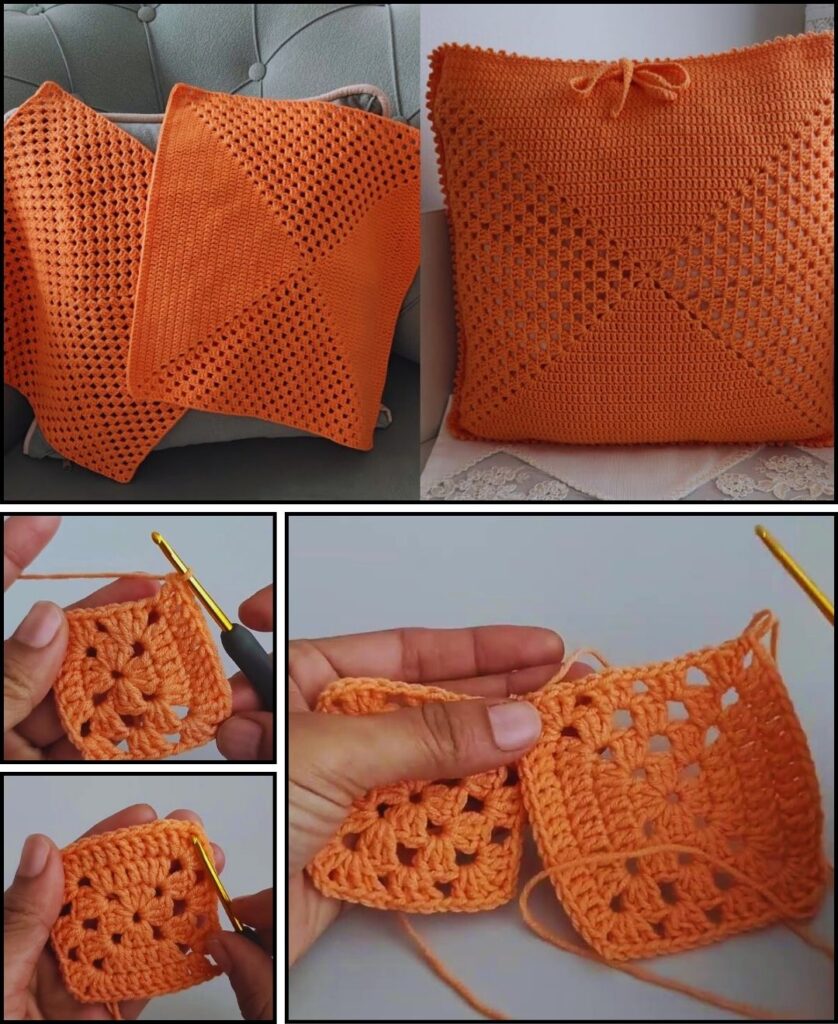
Part 1: Crocheting the Pillow Panels (Make 2 Identical Panels)
You’ll create two flat square pieces. Choose either the single crochet or half double crochet option below.
Option A: Using Single Crochet (for a very dense, firm pillow)
- Foundation Chain: Ch 46. (This chain length should create a width of approximately 16 inches. Adjust if your gauge is different – you want your finished work to be slightly smaller than the pillow insert so it fits snugly).
- Row 1: Sc in the 2nd ch from hook and in each ch across. (45 sc)
- Row 2: Ch 1 (does not count as a stitch), turn. Sc in each st across. (45 sc)
- Repeat Row 2 until your panel measures approximately 16 inches (40 cm) tall, or it is a perfect square. Count your rows as you go (it will likely be around 45-50 rows).
- FO, leaving a long tail (about 24-30 inches / 60-75 cm) on the second panel for seaming later. For the first panel, you can trim the tail to about 6 inches.
Option B: Using Half Double Crochet (for a slightly softer, quicker pillow)
- Foundation Chain: Ch 42. (This chain length should create a width of approximately 16 inches. Adjust if your gauge is different. Hdc stitches are taller, so you’ll need slightly fewer chains than with sc).
- Row 1: Hdc in the 2nd ch from hook and in each ch across. (41 hdc)
- Row 2: Ch 2 (does not count as a stitch), turn. Hdc in each st across. (41 hdc)
- Repeat Row 2 until your panel measures approximately 16 inches (40 cm) tall, or it is a perfect square. Count your rows as you go (it will likely be around 30-35 rows).
- FO, leaving a long tail (about 24-30 inches / 60-75 cm) on the second panel for seaming later. For the first panel, you can trim the tail to about 6 inches.

Part 2: Assembling Your Pillow
- Weave in All Initial Ends: Before seaming, use your yarn needle to weave in all the short tails from the beginning and end of both panels. Take your time to hide them neatly within the stitches so they don’t unravel.
- Align Panels: Place the two crocheted panels on top of each other, aligning the edges perfectly. You can choose to have the “right” sides facing out if you have a preferred side, or simply place them as they are if both sides look good.
- Seaming Three Sides:
- Using the long tail you left on your second panel and your yarn needle, begin seaming the panels together.
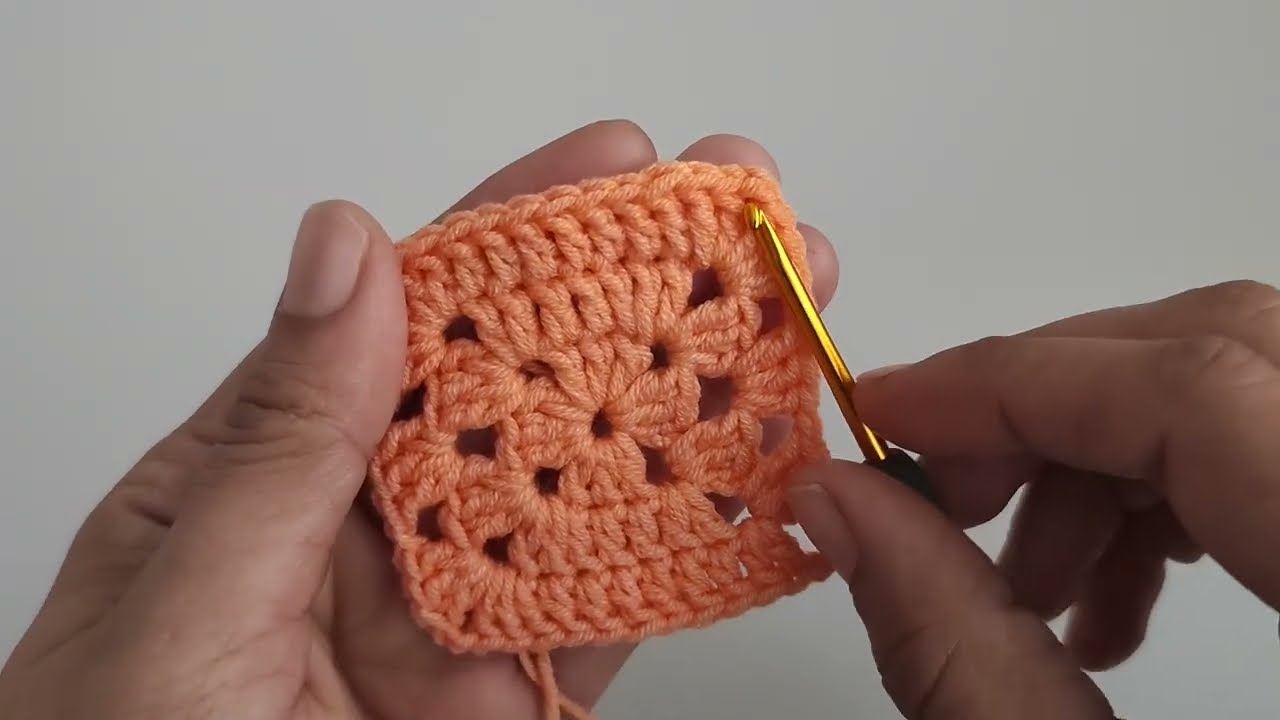
- Whip Stitch Method (Recommended for neat, invisible seam): Insert your needle through both loops of the corresponding stitch on the top panel and both loops of the corresponding stitch on the bottom panel. Pull the yarn through, forming a stitch. Continue this method all the way down the first side.
- Slip Stitch Method (with crochet hook): Insert your hook through both loops of the corresponding stitch on the top panel and both loops of the corresponding stitch on the bottom panel. Yarn over and pull through all loops to create a slip stitch. This creates a slightly raised seam.
- Continue seaming along three of the four sides of your pillow.
- Insert Pillow Form: Once you’ve seamed three sides, gently insert your pillow form into the crocheted cover through the open fourth side. Make sure it’s fully pushed into the corners.
- Seam the Fourth Side: Using your yarn needle (and possibly a new piece of yarn if your previous tail wasn’t long enough), carefully seam the remaining open side of the pillow closed, using the same method you used for the other three sides. Try to make the stitches neat and tight so the pillow insert doesn’t peek out.
- Final Weaving: Weave in any remaining yarn tails from the seaming process.
3. Tips for a Perfect Pillow
- Gauge Check: While not strictly necessary, checking your gauge (how many stitches and rows you get per inch with your yarn and hook) before starting can help ensure your panels will be the correct size. You want your finished panels to be the same size or slightly smaller than your pillow insert for a nice, plump fit.
- Consistent Tension: Try to maintain consistent tension throughout your crocheting to ensure your panels are evenly sized and shaped.
- Choose a Simple Stitch: For a first pillow, sticking to basic stitches like single crochet or half double crochet is easiest. These stitches create a solid fabric that works well for pillows.
- Borders (Optional): You can add a decorative border to each panel before seaming. A simple border of single crochet or a round of shell stitches could be lovely. Just make sure the border doesn’t make your panels too large for your insert.
- Invisible Seaming: The whip stitch through both loops, or a mattress stitch (which is more advanced but very invisible), are great for seamless-looking pillows.
- Wash Care: Use yarn that is easy to wash, especially for decorative items that might accumulate dust or spills. Cotton and acrylic are generally machine washable.
You now have all the details to crochet a lovely and easy throw pillow! What colors are you thinking of for your home?