by
by You’re interested in creating a crochet glove model using motifs! This is a fantastic idea, as it allows for immense creativity and customization. Just to be clear on terminology, crochet uses a single hook, while knitting uses two needles. This guide will focus entirely on how to crochet gloves, especially incorporating motifs.
Given the warm climate in Phnom Penh, fingerless gloves or short, lacy gloves are probably what you have in mind, rather than full, warm mittens. Using 100% cotton yarn or a cotton blend is ideal for breathability and stitch definition in a warmer climate.
What is a “Crochet Motif Glove Model”?
When you talk about a “motif glove model,” it can mean a few things:
- Gloves made entirely of joined motifs: Like granny squares or other small floral/geometric shapes that are crocheted separately and then sewn/joined together to form the glove’s shape.
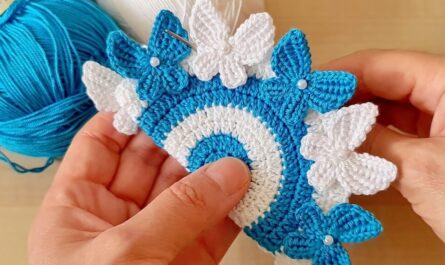
- Gloves with motifs as embellishments: A more simply constructed glove (e.g., worked in rows or rounds) with decorative crocheted motifs (like flowers, leaves, stars) sewn onto the surface.
- Gloves using a motif-inspired stitch pattern: The entire glove is crocheted, but the stitch pattern itself resembles a motif (e.g., a continuous shell stitch pattern that looks like scales or petals).
This guide will focus primarily on Option 1 (gloves made from joined motifs), as it’s the most common interpretation of “motif glove,” while also touching on the other approaches.
How to Crochet a Motif Glove Model (Focus on Joined Motifs)
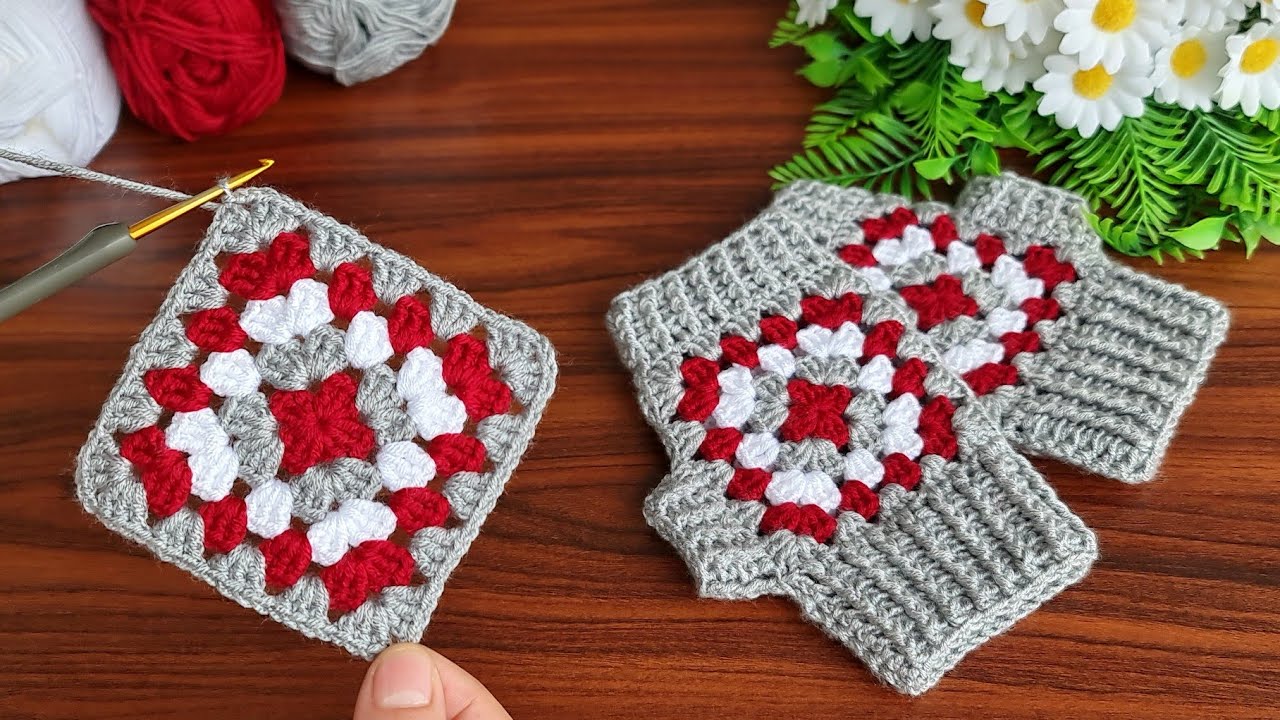
Creating gloves from joined motifs is a rewarding project that allows for unique designs and excellent use of color. Fingerless gloves are an excellent starting point for this technique.
1. Essential Materials You’ll Need
- Yarn:
- Fiber: 100% Cotton or Cotton Blend is excellent for breathability and stitch definition. A fine acrylic yarn can also work for drape.
- Weight: DK (Double Knitting / Category 3) or Sport (Category 2) weight yarns are often ideal for motif gloves, as they create a fabric that’s not too bulky for a glove.
- Colors: Get creative! You can use multiple colors for each motif, or a single color for motifs that are then joined with a contrasting color. This is a great stash-buster.
- Crochet Hook:
- Choose a hook size appropriate for your yarn weight. For DK or Sport weight, a 3.0mm (US C/2) to 4.0mm (US G/6) hook is common. A slightly smaller hook will create a denser fabric for structure, while a larger one will create a lacier, more open glove.
- Scissors: For cutting yarn.
- Yarn Needle (Tapestry Needle): Absolutely essential for weaving in ends and especially for joining your motifs securely.
- Stitch Markers: Helpful for marking the start of rounds or key stitches, especially when joining.
- Measuring Tape: To measure your hand for fit.

2. Basic Crochet Stitches You’ll Use (and how they apply to motifs)
You’ll need a solid grasp of basic crochet stitches:
- Chain (ch): For foundation and spaces within motifs.
- Slip Stitch (sl st): For joining rounds within motifs and for neat seams when joining motifs.
- Single Crochet (sc): For dense borders, joining, or small motif elements.
- Half Double Crochet (hdc): For slightly taller, denser elements.
- Double Crochet (dc): A very common stitch for classic motifs like granny squares.
- Triple/Treble Crochet (tr): For taller motif elements or lacier designs.
- Cluster Stitches (e.g., 3-dc cluster): Often used in motifs to create texture or a “petal” effect.
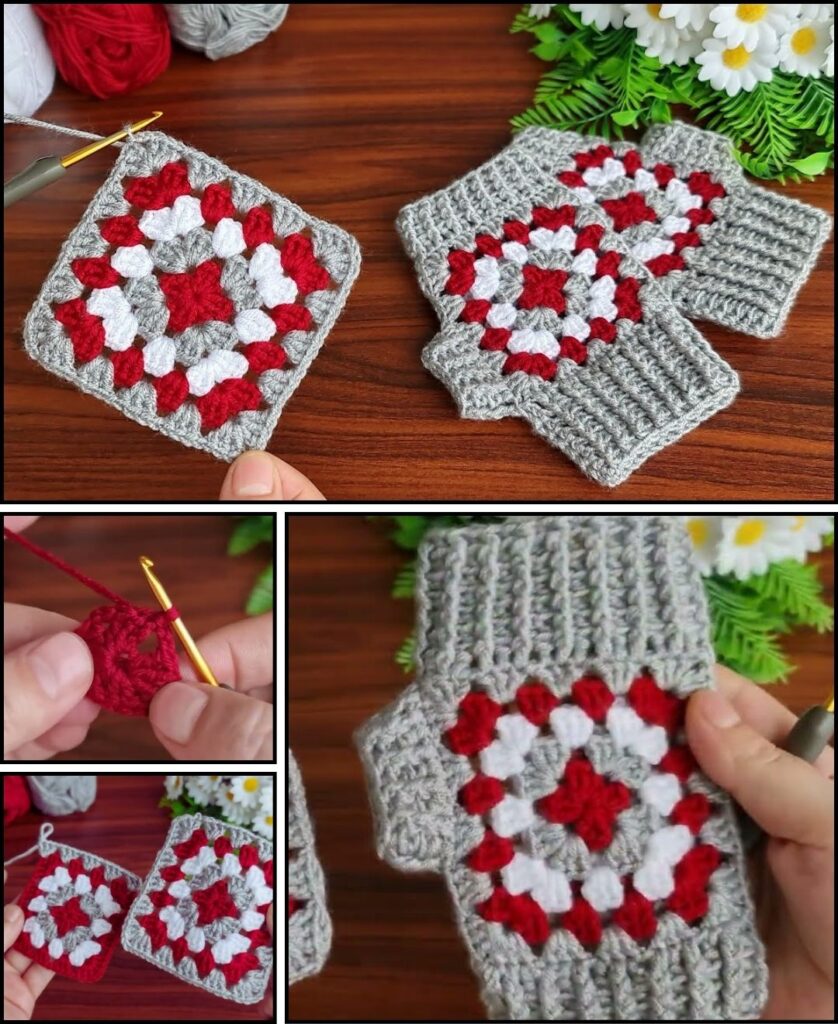
- Magic Ring (MR): Ideal for starting motifs with a tight, hole-free center.
3. General Construction Principles for Motif Gloves
Regardless of the specific motif, here’s how a glove generally takes shape:
- Determine Size: Measure the circumference of your hand around the knuckles (excluding the thumb). This will help you decide how many motifs you need to form the main body of the glove.
- Motif Choice:
- Granny Squares: Very popular. Can be solid, traditional, or even circular.
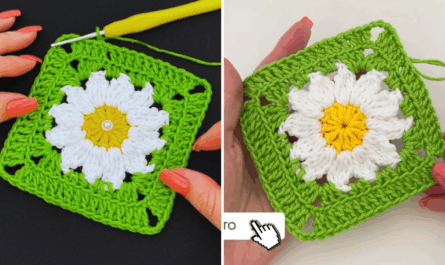
- Flower Motifs: Flat or layered flowers can be joined.
- Starburst Motifs: Offer a pointed, geometric look.
- Hexagon Motifs: Work well for shaping as they naturally curve.
- Thumb Hole Creation: This is the trickiest part. It’s usually created by:
- Leaving a gap in your joined motifs.
- Crocheting a separate thumb tube and joining it.
- Working stitches in the round from the main glove body to create the thumb.
- Cuff: A ribbed or simple band can be added at the wrist for a finished look and better fit.
- Finger Edging: The top edge of the glove (where the fingers emerge) can be finished with a simple border of sc or sl st for neatness.
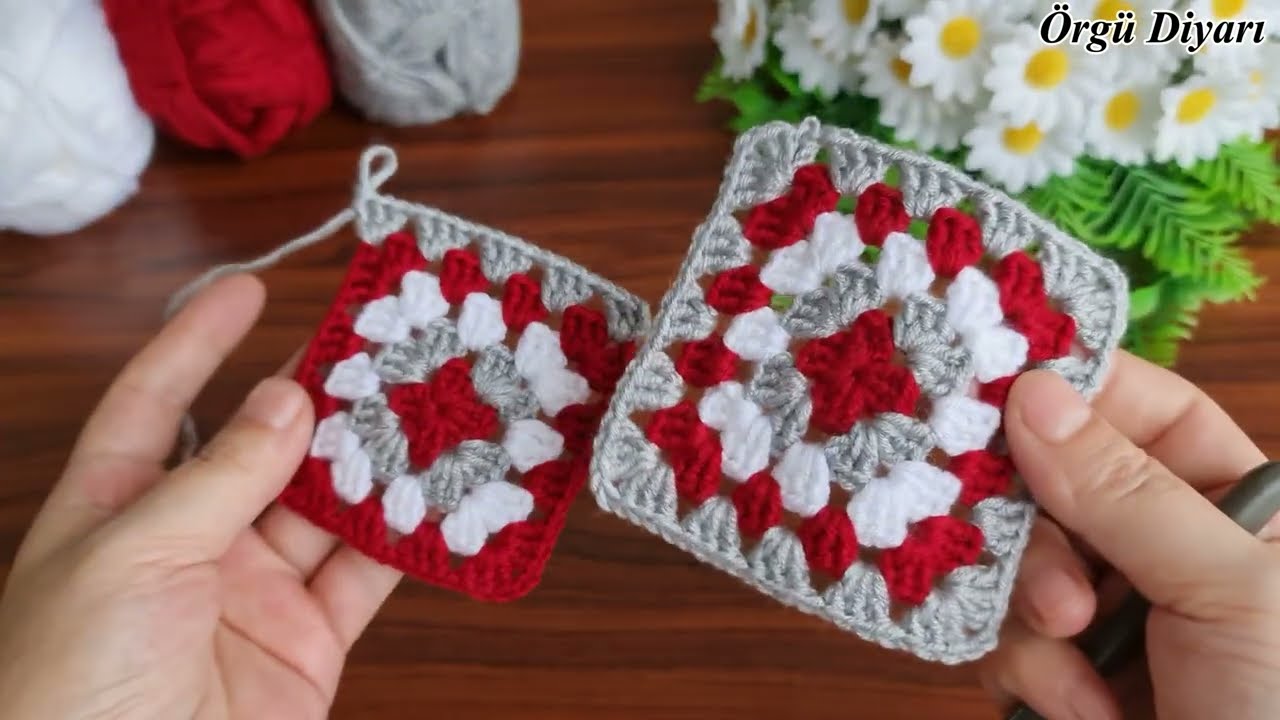
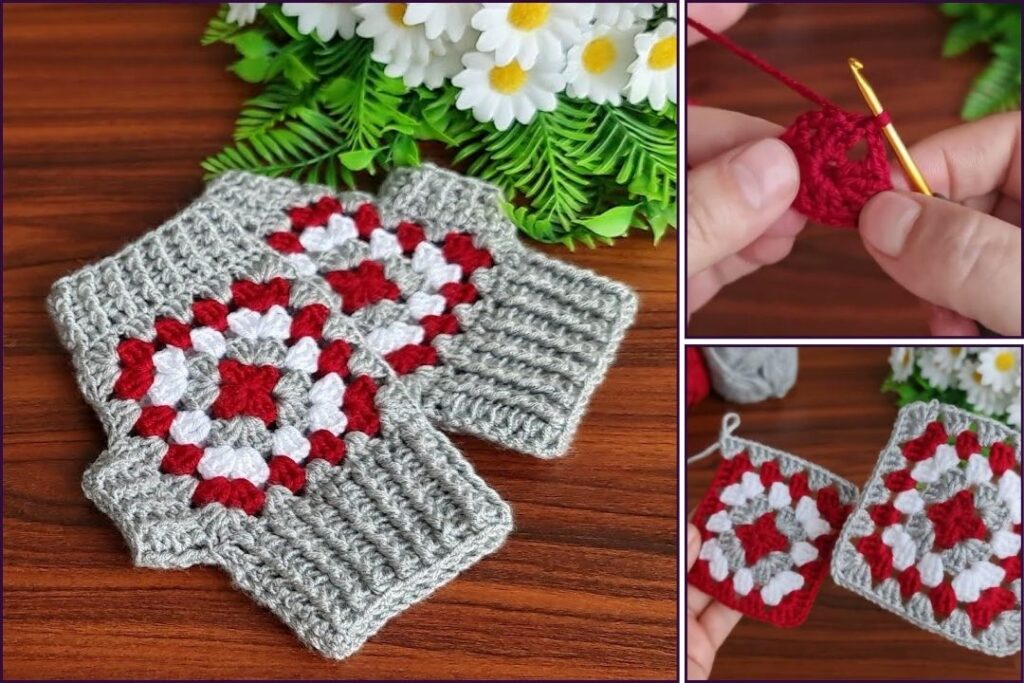
Method 1: Glove Model from Granny Squares (Beginner-Friendly & Classic)
Granny squares are excellent for this as they are easy to make and join.
A. Create Your Motifs:
- Choose a Granny Square Pattern: Start with a basic solid granny square or a traditional granny square pattern.
- Basic Solid Granny Square (Example):
- Round 1: MR, ch 2 (counts as 1st hdc), 9 hdc in ring. Join with sl st to top of ch 2. (10 hdc) OR MR, ch 3 (counts as dc), 2 dc, ch 2, 3 dc, ch 2, 3 dc, ch 2, 3 dc, ch 2. Join with sl st to top of ch 3. (12 dc, 4 ch-2 sp)
- Subsequent Rounds: Continue in a square pattern, adding
(2 dc, ch 2, 2 dc)or(3 dc, ch 2, 3 dc)in corners, and3 dcin side spaces.
- Basic Solid Granny Square (Example):
- Make Enough Motifs: You’ll likely need 4-6 motifs per glove, depending on their size and your hand circumference.
- Tip: Create one motif, hold it against your hand (palm or back), and estimate how many you’ll need to wrap around.
- Color Changes: Decide if you want each motif to be solid or multi-colored. Weave in ends as you go!
B. Layout and Joining the Motifs:
- Layout: Lay out your completed motifs flat in a rectangular or slightly tapered shape that would wrap around your hand.
- Example for Fingerless Glove: You might use 4 squares for the main hand (2 for front, 2 for back). If using a larger motif like a hexagon, you might need fewer.
- Joining Method (Crucial for appearance and durability):
- Slip Stitch Join: Fast and creates a subtle ridge. Line up two motifs, insert hook through loops of both, sl st across.
- Single Crochet Join: Stronger, creates a more pronounced seam.
- Whip Stitch (with yarn needle): A neat, flat seam. My personal preference for a clean look on garments.
- Join-As-You-Go (JAYG): More advanced, but eliminates endless sewing. You crochet the last round of a motif and join it to an already completed motif simultaneously.
- Forming the Glove Tube:
- Join your motifs together side-by-side to create a flat piece.
- Then, join the long edges of this flat piece to form a tube that fits your hand. Leave an opening for the thumb.

C. Creating the Thumb Hole & Finishing:
- Thumb Opening: When joining the main body of the glove, leave an unjoined gap along one of the side seams. This gap will be your thumbhole.
- Sizing: Try the tube on your hand and mark where your thumb naturally emerges.
- Working the Thumb (Optional, for a more defined thumb):
- Join yarn at the edge of the thumbhole.
- Work
scorhdcstitches around the opening of the thumbhole for a few rounds until it forms a small tube for your thumb. Join with sl st at the end of each round. - Fasten off and weave in ends.
- Cuff (Optional but recommended for fit):
- Join yarn to the bottom edge of the glove (wrist opening).
- Work a round of
scstitches evenly around. - Then, work a few rows of
scin the back loop only (BLO) or hdc in BLO to create a ribbed cuff. Join ends of cuff. - Alternatively, you can crochet a separate ribbed band and sew it on.
- Finger Edging:
- Join yarn to the top edge of the glove (finger opening).
- Work a round of
scorsl stfor a neat finish around the fingers.
- Weave in All Remaining Ends: This is critical for a professional finish.
Method 2: Gloves with Motifs as Embellishments
This is simpler in construction but still allows for motif creativity.
- Crochet a Basic Fingerless Glove:
- Work in rounds from the cuff up, or in rows and then seam.
- Use a sturdy, non-stretchy stitch like
sc,hdc, or even a simpledcfabric. - Create a thumbhole by skipping stitches and chaining over them, or by crocheting a separate thumb and joining.
- Many free patterns are available for basic fingerless gloves.
- Create Decorative Motifs:
- Crochet small flower motifs, leaf motifs, or any flat motif you like. (See previous tutorials on crochet flowers).
- Use contrasting colors for these motifs to make them stand out.
- Attach Motifs:
- Carefully position the motifs onto the surface of your crocheted glove.
- Using your yarn needle and matching thread (or the same yarn if it blends), stitch the motifs securely onto the glove. Make sure the stitches are invisible from the front.
Method 3: Gloves Using a Motif-Inspired Stitch Pattern (All-Over Texture)
This method incorporates the “motif” directly into the fabric’s stitch pattern.
- Choose a Textured Stitch Pattern:
- Shell Stitch: Creates a pretty, fan-like motif.
- Puff Stitch / Bobble Stitch: Adds lovely raised texture.
- Star Stitch / Jasmine Stitch: Creates intricate, dense patterns.
- Lace Patterns: Open, airy patterns can mimic floral motifs.
- Glove Construction:
- Work the glove directly in the round (or rows, then seam) using your chosen stitch pattern.
- Adjust stitch counts and shaping (increases/decreases) to form the hand and thumb opening.
- Styling: This method creates a cohesive, integrated design where the texture is the motif.
General Tips for Crocheting Motif Gloves
- Gauge Swatch: ALWAYS make a small swatch of your motif with your chosen yarn and hook. Measure it. This helps you calculate how many motifs you’ll need and ensures the glove fits your hand.
- Try On as You Go: Especially when joining motifs or shaping the thumb, try the glove on frequently to ensure a good fit.
- Mirror for Left/Right Hand: Remember to make two gloves! If your motif placement or thumb hole creation is asymmetrical, you’ll need to mirror the second glove for the opposite hand.
- Weave in Ends Diligently: With motifs, you’ll have many ends. Weave them in securely after each motif is finished, or as you join them, to avoid a messy interior.
- Blocking: For motif-based gloves, blocking (wetting and shaping) is incredibly helpful. It helps motifs lie flat, evens out tension, and often makes the joining seams blend better.
- Comfort for Warm Climates: For Phnom Penh, prioritize breathable yarns like cotton or bamboo. Consider looser stitch patterns or lace motifs for more airflow. Fingerless gloves are a practical choice.
Creating a crochet motif glove model is a fantastic way to showcase your crochet skills and make a truly unique accessory! Enjoy the process!