 by
by You’re looking to explore the exciting world of crochet flower designs! That’s a fantastic journey, as crocheted flowers are incredibly versatile, beautiful, and a joy to create. They range from simple, flat appliques to intricate, dimensional blooms, offering endless possibilities for embellishment and decoration.
Just to clarify terminology, crochet uses a single hook to create stitches, while knitting uses two needles. This guide will focus entirely on how to create various crochet flower designs.
Given that you’re in Phnom Penh, where it’s warm, 100% cotton yarn remains an excellent choice for crocheted flowers. Cotton offers:
- Superb Stitch Definition: Crucial for showcasing the intricate details of flower petals and textures.
- Durability and Shape Retention: Helps your finished flowers maintain their structure.
- Washability: Practical for items that might get handled or need cleaning.
- Breathability: Comfortable if using for wearable items.
However, for some softer, more delicate flowers, a soft acrylic yarn or a cotton blend can also be lovely.

Exploring Crochet Flower Designs: A Detailed Guide
Instead of just one pattern, let’s explore different types of crochet flower designs and the techniques that create them. This will empower you to understand how various stitches and structures lead to different floral looks.
1. Essential Materials (General for all designs)
- Yarn: 100% Cotton, soft Acrylic, or blends. Experiment with various weights (DK, Worsted, even Lace weight for very delicate flowers).
- Crochet Hook: Matches your chosen yarn weight (often a slightly smaller hook than recommended for a denser fabric).
- Scissors: For cutting yarn.
- Yarn Needle (Tapestry Needle): Essential for weaving in ends and assembling multi-part flowers.
- Optional: Stitch markers, small beads/buttons for centers, floral wire (for realistic stems), hot glue gun (for securing elements).
2. Core Crochet Stitches (Foundational to all designs)
You’ll encounter these stitches frequently in flower patterns:
- Chain (ch): For foundation and spaces.
- Slip Stitch (sl st): For joining rounds, neatening edges, and creating small elements.
- Single Crochet (sc): Creates dense, compact fabric, often used for flower centers or small, tight petals.
- Half Double Crochet (hdc): Medium height, offers a bit more drape than sc.
- Double Crochet (dc): Taller, creates more open fabric, commonly used for main petal sections.
- Triple/Treble Crochet (tr): Even taller, for long, dramatic petals.
- Double Triple/Treble Crochet (dtr/trtr): Very tall, for oversized petals.
- Magic Ring (MR): (Also Magic Circle or Adjustable Ring) – Creates a tight, hole-free center, essential for many flower designs.
3. Key Concepts for Flower Shaping
The “design” of a crochet flower comes from how stitches are grouped and how the fabric is manipulated:
- Working in the Round: Most flowers start from a central point and grow outwards in circular rounds.
- Petal Clusters: Most petals are formed by working a series of stitches (e.g.,
(dc, tr, dc)) all into a single stitch or chain space. This makes them puff out. - Chain Spaces: Creating
ch-spacesbetween petal clusters allows the petals to stand out and gives flexibility. - Working in the “Back Loops” or “Front Loops” only: Can create ridges or attach new layers of petals behind or in front of existing ones.
- Post Stitches: Working around the “post” of a stitch (front post or back post) can create texture, like for a sunflower center.
- Increases & Decreases: Used to shape leaves or 3D flower components.
- Layers: Many stylish flowers are created by crocheting multiple individual layers (or rounds) and then stacking them, either by stitching them together or by changing colors and working into specific previous stitches to create a new layer.
- Rolling: For roses, a long, wavy strip is crocheted and then rolled up and secured.

Popular Crochet Flower Designs & How They Work
Let’s break down how different types of flower designs are constructed.
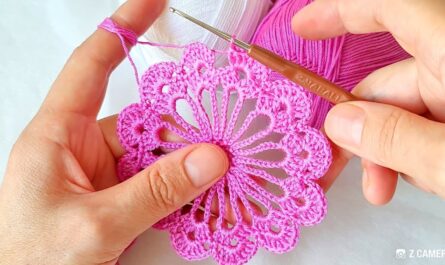
Design 1: The Simple Flat 5-Petal Flower (Beginner-Friendly Applique)
- Concept: A basic flower where all petals are worked from a single central ring.
- Structure:
- Center: Start with a Magic Ring (MR) or a
ch 4, sl st to joinring. Work a set number ofscstitches (e.g., 10-12 sc) into this ring. Join with sl st. - Petals: For each petal, you typically
(ch X, work Y stitches into same stitch/space, ch X, sl st into next stitch).- Example for 5 petals:
*Ch 2, (dc, ch 1, dc) in next sc, sl st in next sc.*Repeat 4 more times.
- Example for 5 petals:
- Center: Start with a Magic Ring (MR) or a
- Styling: Great for flat embellishments. Different stitch combinations (e.g.,
(sc, hdc, sc)for smaller petals,(tr, dc, tr)for taller ones) change the look.
Design 2: The Layered Flower (Adds Dimension)
- Concept: Building petals in distinct rounds, often working behind or into the previous round’s stitches to create a multi-level effect. This is what we discussed in the “Multicolor Flower” tutorial.
- Structure:
- Center (Color A): Same as above, e.g., 10-12 sc in a MR. Fasten off Color A.
- Inner Petals (Color B): Join new yarn into a stitch from the center. Work a petal cluster. Instead of moving to the “next stitch,” you often
sl stinto the next stitch from the center round to anchor the petal, but the actual stitches are worked into the same point. The key is that the “anchoring” stitch (sl st) in this layer often becomes the “base” for the next layer.- Example (building on previous layer’s sl sts): If your Round 2 had
sl stsbetween petals, Round 3 would join into thosesl stsand work taller petals (e.g.,(ch 3, 2 dc, 1 tr, 2 dc, ch 3, sl st)) into each of thosesl sts.
- Example (building on previous layer’s sl sts): If your Round 2 had
- Styling: Creates a more substantial, dimensional flower. Perfect for varying colors between layers.

Design 3: The Spiraling Rose (Elegant & Realistic)
- Concept: Creating a long strip with varying stitch heights that naturally curls into a rose shape when rolled.
- Structure:
- Foundation: Start with a long chain (e.g., 30-50 stitches, depending on desired rose size).
- Petal Strip: Work a single row back along the chain, but use a repeating sequence of increasing stitch heights to create waves.
- Example sequence (repeated along chain):
(sc, hdc, dc, tr, dc, hdc, sc)or similar, often with multipletrordcin the same stitch for the “peak” of a petal.
- Example sequence (repeated along chain):
- Assembly: Fasten off, leave a long tail. Starting from the short/flat end, roll the strip tightly for the center, then allow it to unfurl naturally for the outer petals. Secure by stitching through all layers at the base with your yarn needle.
- Styling: Very classic and versatile. Different chain lengths and stitch height sequences create different rose sizes and petal fullness.
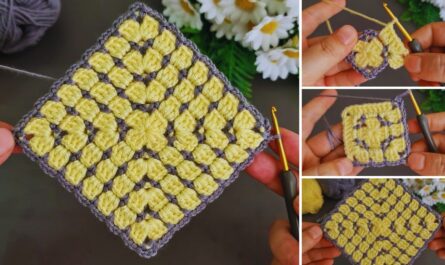
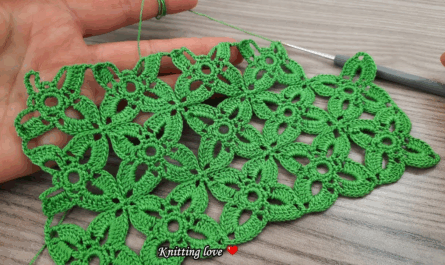
Design 4: The African Flower Motif (Geometric & Complex)
- Concept: A popular motif that combines solid sections with chain spaces to create a distinct, often hexagonal, floral shape. Used for “join-as-you-go” projects like blankets or bags.
- Structure: Involves clusters of dc stitches and chain spaces, often switching colors every round.
- Center: MR or ch-ring.
- Rounds: Each round builds on the previous, creating distinct “petals” and corner spaces.
- Typically
(2-3 dc cluster, ch 1-2)repeating. - Often ends with a border round in sc to square/shape it.
- Typically
- Styling: Not a literal flower, but a “flower motif.” Fantastic for tessellating designs. Highly popular for colorful projects.
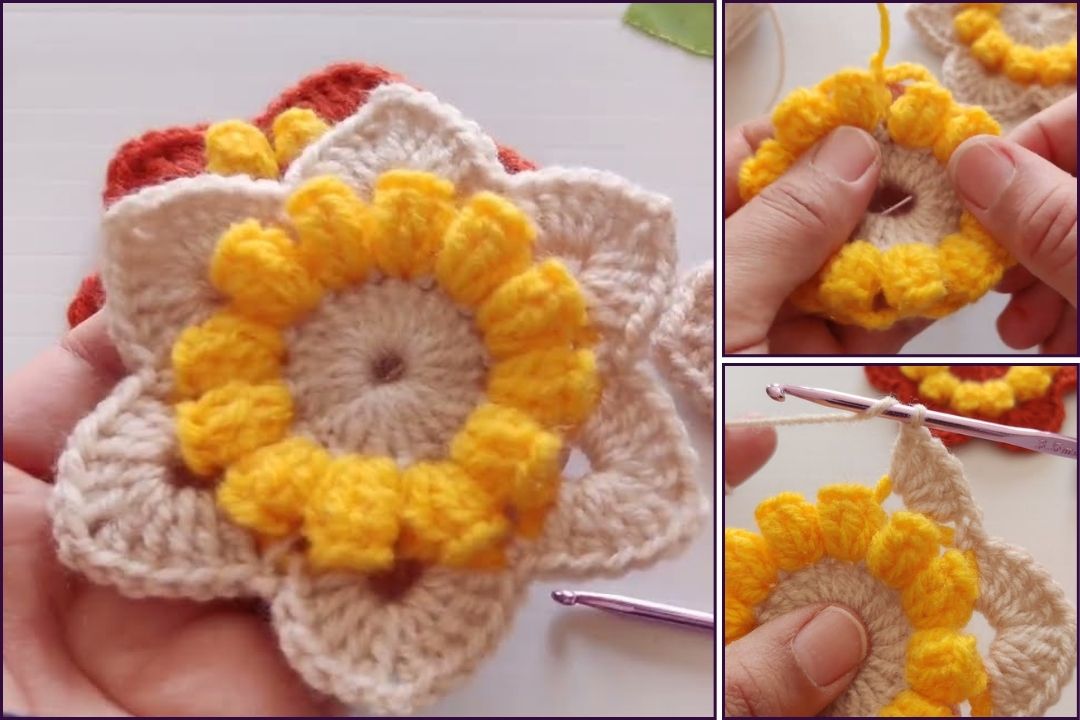
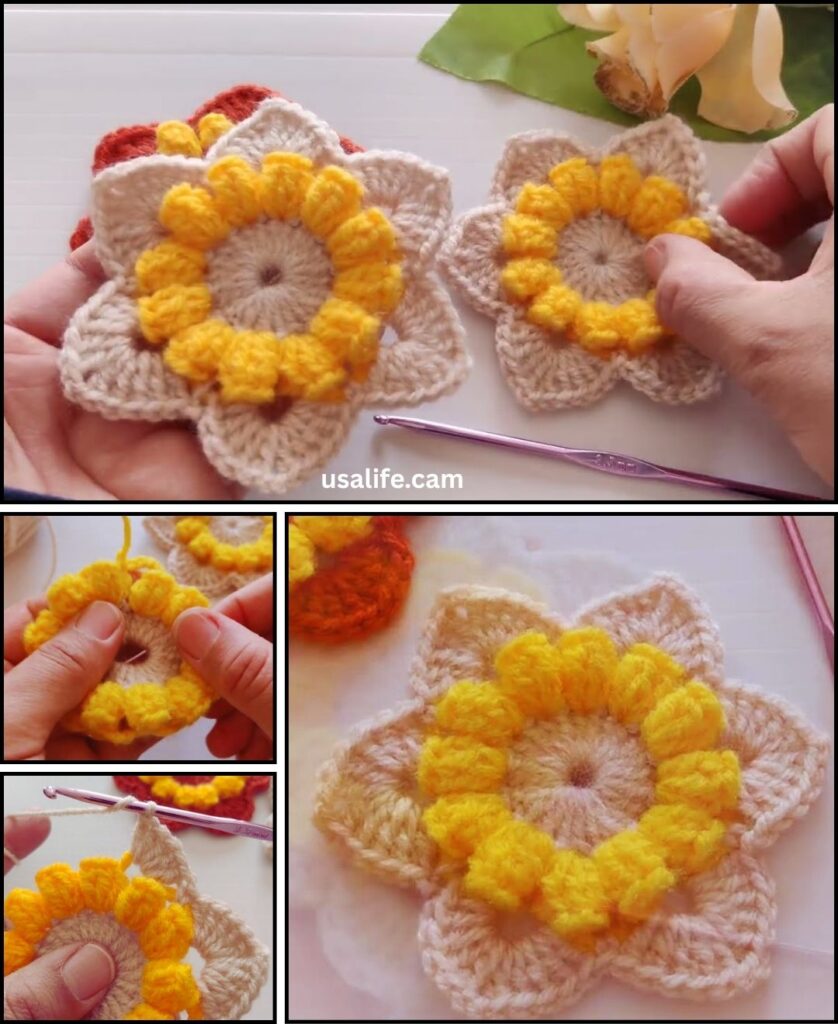
Design 5: The Puffed or Bobble Stitch Flower (Textured & 3D)
- Concept: Uses stitches like the puff stitch, bobble stitch, or popcorn stitch to create raised, textured petals.
- Structure: Similar to flat or layered flowers, but the petal clusters are replaced with these volumetric stitches.
- Center: Standard MR or ch-ring with sc.
- Petals:
*Ch X, work 1 Puff/Bobble/Popcorn stitch, ch X, sl st into next stitch.*
- Styling: Very tactile and cozy. Adds significant texture and dimension.

Advanced Techniques for Stylish Flower Designs
- Working in Back/Front Loops Only (BLO/FLO):
- Creates a ridge effect.
- Allows you to work a new round into the unworked loops of a previous round, creating seamless layers.
- Post Stitches:
FPdc(Front Post Double Crochet) orBPdc(Back Post Double Crochet) can be used to create textured, raised centers (like a sunflower seed center) or structural elements within a leaf. - Varying Yarn Weights: Combine different yarn weights in one flower for contrasting textures (e.g., a fine yarn for the center, a thicker yarn for the petals).
- Wire Edging: For realistic, posable flowers, you can crochet around thin floral wire on the last round of petals, allowing you to bend and shape them.
- Adding Stamens/Pistils: Use French knots, embroidered straight stitches, or small beads/buttons in the center.
- Leaves and Stems: Crochet separate leaves (simple chain-based shapes, or more complex worked flat shapes) and stems (I-cord or simple chains) and sew them onto the back of your flower.
General Tips for Crocheting Gorgeous Flower Designs
- Yarn Choice: As mentioned, cotton is excellent. Consider mercerized cotton for extra sheen and definition.
- Consistent Tension: This is key for all crochet, but especially for motifs that need to hold a specific shape. Practice to find your rhythm.
- Count Your Stitches: Always count at the end of each round/row to ensure your stitch count is correct and your flower grows evenly.
- Weave in Ends Meticulously: Nothing detracts from a beautiful motif like messy tails. Take your time with your yarn needle.
- Blocking: For most crochet flowers, especially flatter ones, a light wet block can make a huge difference in opening up stitches, evening out shape, and giving a professional finish.
- Experimentation: Don’t be afraid to change hook sizes, vary stitch combinations within petals, or combine elements from different patterns to create your own unique designs!
By understanding these fundamental design concepts and experimenting with stitches and techniques, you’ll be well on your way to creating an endless array of stunning crochet flower designs. What kind of flower are you most excited to try first?