by
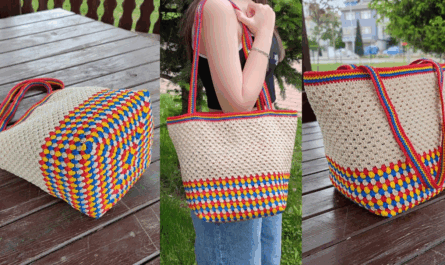
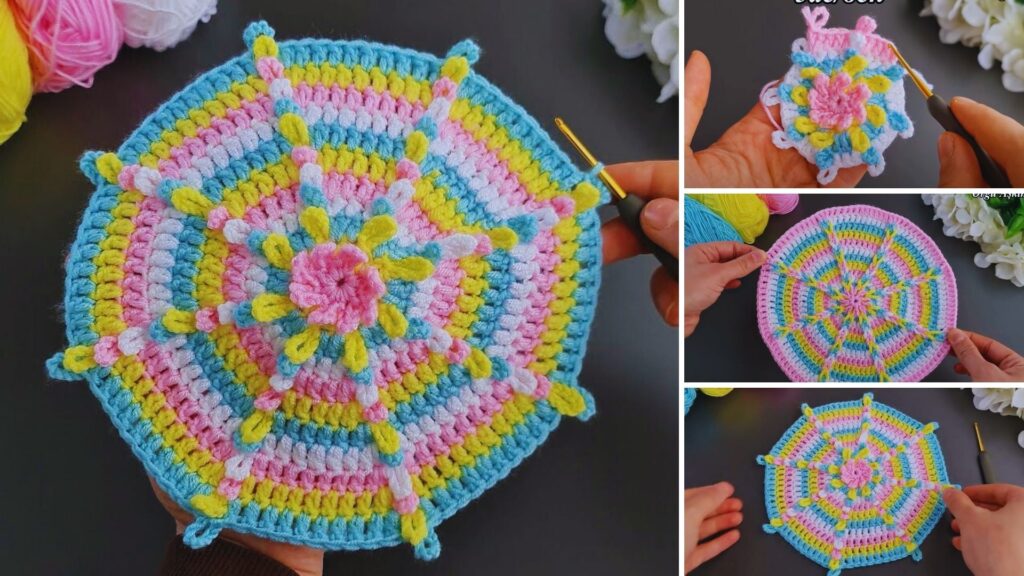
by Creating a large, multicolor square coaster supla motif is a fantastic way to add a vibrant and handmade touch to your home decor. These sturdy, decorative mats are perfect for placing under planters, candles, a small teapot, or even as a base for a centerpiece. The multicolor design makes them truly eye-catching and fun to crochet.
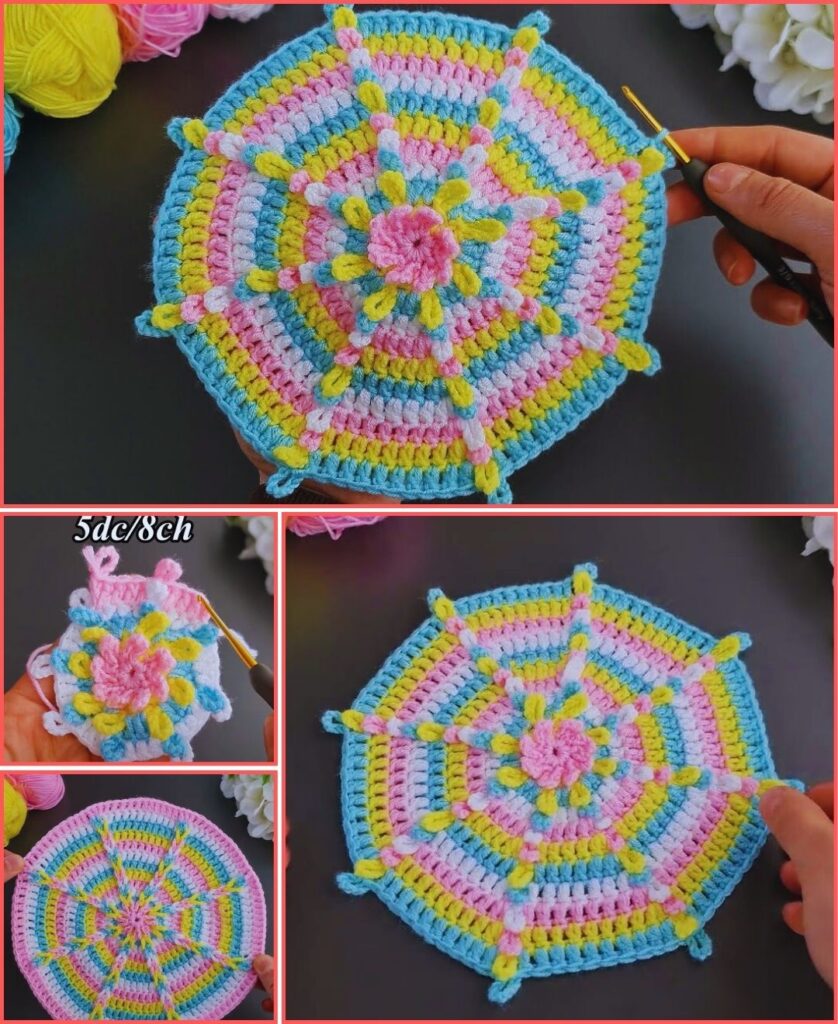
This tutorial will guide you through making a solid granny square that grows to the “coaster supla” size (approx. 7-8 inches square), emphasizing how to incorporate multiple colors effectively.
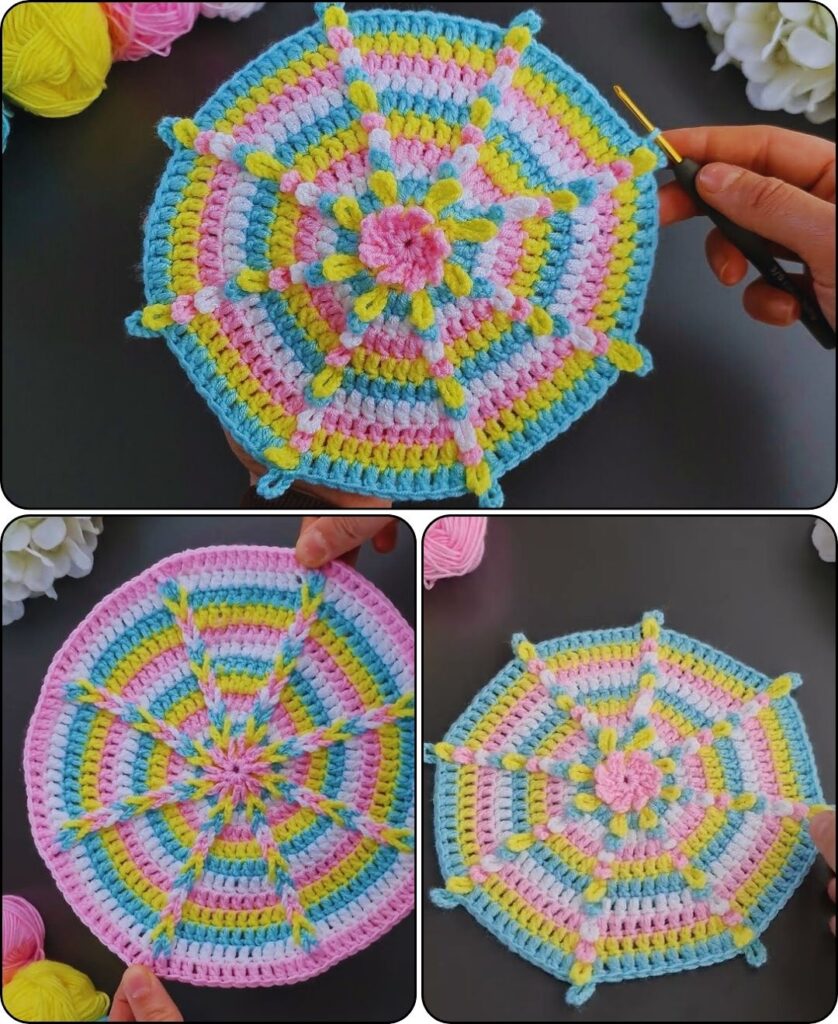
How To Crochet a Large Coaster Supla Motif (Multicolor Square Style)
This pattern creates a dense, flat square that can serve as a standalone decorative motif. Its multicolor design is achieved by changing yarn colors at the end of each round (or every few rounds), building a beautiful “painted” effect.
Skill Level: Advanced Beginner / Intermediate
You should be comfortable with:
- Basic crochet stitches (ch, sl st, dc).
- Working in the round.
- Making neat stitch joins.
- Performing clean color changes at the end of rounds.
Finished Motif Dimensions (Approximate):
- Size: 7-8 inches (18-20 cm) square
Materials You’ll Need:
- Yarn:
- Worsted Weight (Medium #4) Cotton Yarn: Approximately 80-120 yards (73-110 meters) per motif. Cotton is ideal for mats due to its durability, absorbency, and ability to hold shape well.
- Colors: Choose 3-5 different colors that complement or contrast beautifully. The more colors you use, the more vibrant your motif will be.
- Color 1 (Center)
- Color 2, 3, 4, etc. (Outer Rounds)
- Crochet Hook:
- Size H/5.0mm (or the hook size that gives you a firm, dense fabric that lies perfectly flat. Gauge is crucial here).
- Yarn Needle (Tapestry Needle): Essential for weaving in loose ends.
- Scissors
- Stitch Markers (Optional but Recommended): Very helpful for marking the corner chain spaces in each round.
Gauge (Crucial for Flatness and Size!):
Maintaining a consistent gauge is vital to ensure your motif lies perfectly flat without ruffling or cupping.
- After Round 4, your square should measure approximately 4 inches (10 cm) from side to side.
- If your square is smaller, try a larger hook. If it’s larger, try a smaller hook.
Abbreviations Used:
- ch: chain
- sl st: slip stitch
- dc: double crochet
- st(s): stitch(es)
- ch-sp: chain space
- MR: Magic Ring (also known as Magic Circle or Adjustable Ring)
- FO: fasten off
Understanding Multicolor in Motifs:
For this solid granny square motif, you’ll change colors at the end of almost every round. This creates distinct concentric squares of color.
How to Make a Clean Color Change (Recap):
- Work the last stitch of the round with the current color as normal, but stop when you have two loops left on your hook.
- Drop the current color.
- Pick up the new color, yarn over with the new color, and pull it through the remaining two loops on your hook to complete the stitch.
- You have now successfully changed colors. Sl st into the first stitch of the round (with the new color) to join.
- Always cut the old color yarn, leaving a 4-6 inch tail to weave in securely later. For motifs like this, carrying yarn is generally not recommended as it can add bulk or show through the stitches.
Let’s Start Crocheting Your Large Multicolor Coaster Supla Motif!
Part 1: Starting the Square (Color 1)
Option A: Magic Ring (Recommended for a tighter center)
- With Color 1, make a Magic Ring (MR).
- Round 1: Ch 2 (does NOT count as a stitch). Work (3 dc, ch 2) 4 times into the MR. Pull the tail tight to close the ring.
- Perform a clean color change to Color 2. Sl st to the top of the first dc to join. (Total: 12 dc and 4 ch-2 corner sps).
- Place a stitch marker in each ch-2 sp to easily identify your corners in subsequent rounds.
Option B: Chain 4 Method (Alternative)
- With Color 1, Ch 4, sl st into the 1st ch to form a ring.
- Round 1: Ch 2 (does NOT count as a stitch). Work (3 dc, ch 2) 4 times into the ring.
- Perform a clean color change to Color 2. Sl st to the top of the first dc to join. (Total: 12 dc and 4 ch-2 corner sps).
- Place a stitch marker in each ch-2 sp to easily identify your corners.
Part 2: Building the Square Body (Multicolor Rounds)
For each round, you will typically work dc stitches into the dc stitches from the previous round along the sides, and create new corners by working (3 dc, ch 2, 3 dc) into the ch-2 corner spaces.
- Round 2 (Color 2):
- With Color 2, Ch 2 (does NOT count as a stitch).
- Work 3 dc into each of the first 3 dc from Round 1.
- Work (3 dc, ch 2, 3 dc) into the first ch-2 corner sp. (This is your first corner).
- (Work 3 dc into each of the next 3 dc from Round 1. Work (3 dc, ch 2, 3 dc) into the next ch-2 corner sp). Repeat from * to * 3 more times.
- Perform a clean color change to Color 3. Sl st to the top of the initial dc to join. (Total: 36 dc and 4 ch-2 corner sps).
- Move your stitch markers up to the new ch-2 sps.
- Round 3 (Color 3):
- With Color 3, Ch 2. Work dc in each dc along the side until you reach the first ch-2 corner sp.
- Work (3 dc, ch 2, 3 dc) into the first ch-2 corner sp.
- (Dc in each dc along the side until you reach the next ch-2 corner sp. Work (3 dc, ch 2, 3 dc) into the next ch-2 corner sp). Repeat from * to * 3 more times.
- Perform a clean color change to Color 4. Sl st to the top of the initial dc to join. (Total: 60 dc and 4 ch-2 corner sps).
- Move your stitch markers up.
- Round 4 (Color 4):
- With Color 4, Ch 2. Work dc in each dc along the side until you reach the first ch-2 corner sp.
- Work (3 dc, ch 2, 3 dc) into the first ch-2 corner sp.
- (Dc in each dc along the side until you reach the next ch-2 corner sp. Work (3 dc, ch 2, 3 dc) into the next ch-2 corner sp). Repeat from * to * 3 more times.
- Perform a clean color change to Color 1 (or a new color). Sl st to the top of the initial dc to join. (Total: 84 dc and 4 ch-2 corner sps).
- Your square should now be about 4 inches (10 cm) from side to side.
- Round 5 (Color 1):
- With Color 1, Ch 2. Work dc in each dc along the side until you reach the first ch-2 corner sp.
- Work (3 dc, ch 2, 3 dc) into the first ch-2 corner sp.
- (Dc in each dc along the side until you reach the next ch-2 corner sp. Work (3 dc, ch 2, 3 dc) into the next ch-2 corner sp). Repeat from * to * 3 more times.
- Perform a clean color change to Color 2. Sl st to the top of the initial dc to join. (Total: 108 dc and 4 ch-2 corner sps).
- Round 6 (Color 2):
- With Color 2, Ch 2. Work dc in each dc along the side until you reach the first ch-2 corner sp.
- Work (3 dc, ch 2, 3 dc) into the first ch-2 corner sp.
- (Dc in each dc along the side until you reach the next ch-2 corner sp. Work (3 dc, ch 2, 3 dc) into the next ch-2 corner sp). Repeat from * to * 3 more times.
- Perform a clean color change to Color 3. Sl st to the top of the initial dc to join. (Total: 132 dc and 4 ch-2 corner sps).
- Round 7 (Color 3):
- With Color 3, Ch 2. Work dc in each dc along the side until you reach the first ch-2 corner sp.
- Work (3 dc, ch 2, 3 dc) into the first ch-2 corner sp.
- (Dc in each dc along the side until you reach the next ch-2 corner sp. Work (3 dc, ch 2, 3 dc) into the next ch-2 corner sp). Repeat from * to * 3 more times.
- Perform a clean color change to Color 4. Sl st to the top of the initial dc to join. (Total: 156 dc and 4 ch-2 corner sps).
- Your square should now be approximately 7-8 inches (18-20 cm) from side to side.
Part 3: Final Edge (Optional, Color 4 or your chosen last color)
This final round creates a very clean and firm edge for your motif.
- Round 8 (Color 4):
- With Color 4, Ch 1 (does NOT count as a stitch). Sc in each dc along the side.
- In each ch-2 corner sp, work (sc, ch 1, sc). (This creates a neat, square corner without too much bulk).
- Continue working sc in each dc along the sides and (sc, ch 1, sc) in each corner sp until you return to the start.
- Sl st to the first sc to join.
- FO, leaving a 6-inch tail.
Part 4: Finishing & Blocking (Crucial for Flatness!)
- Weave in All Ends: This is absolutely essential for a multicolor motif. You will have many tails from your color changes. Thread each yarn tail onto your yarn needle. Carefully weave it through several stitches on the back side of your motif, securing it invisibly. Take your time to ensure all tails are well-hidden and won’t unravel.
- Blocking: This step makes your motif lie perfectly flat, defines the stitches, and sharpens the corners.
- Method: Gently wet your finished motif (either by misting with water or a quick dip and gentle squeeze – do not wring). Lay it perfectly flat on a blocking mat or a clean, dry towel. Gently stretch and pin the square to its intended dimensions (e.g., 8×8 inches), making sure the sides are straight and the corners are sharp. Allow it to air dry completely.
Your beautiful and sturdy large multicolor square coaster supla motif is now complete! It’s a fantastic addition to any table and showcases your vibrant crochet skills.
Customization Ideas:
- Color Sequence: Experiment with different color combinations and how often you change colors. You could do a rainbow effect, a gradient, or random color changes.
- Size: To make a larger supla, simply add more repeat rounds from Part 2, following the pattern of working
dcin each stitch along the sides and(3 dc, ch 2, 3 dc)in the corners. - Joining Motifs: You can make several of these motifs and join them with a simple slip stitch or single crochet seam to create larger table runners, placemats, or even blankets!
- Different Stitches: While dc creates a classic granny look, you could use hdc throughout for a denser, tighter square. Adjust corner counts if switching stitches (e.g., (2 hdc, ch 2, 2 hdc) in corners).