by
by Absolutely! Here’s a long, detailed, step-by-step guide on how to make cute crochet bag keychains — perfect for beginners, quick to make, and great for gifting, decorating, or selling. This tutorial will walk you through everything from supplies to stitches to finishing touches, with helpful tips and customization ideas!
🧶 How to Make Cute Crochet Bag Keychains | Step-by-Step Pattern for Beginners
Crochet bag keychains are adorable miniature accessories that combine style and charm with creativity. Whether you want to decorate your own handbag, give them as gifts, or sell them at craft fairs, these tiny bags make for a fun and rewarding project. Plus, they’re perfect for using up scrap yarn and practicing your crochet skills!
✨ Why You’ll Love This Project
- ✅ Beginner-friendly and quick to complete
- 🧵 Great for using leftover yarn
- 🎁 Perfect as gifts, party favors, or market items
- 🌈 Fully customizable — size, shape, color, and embellishments!
- 🧸 Makes a cute accessory for bags, backpacks, and key rings
📦 Materials You’ll Need
- Yarn: Worsted weight cotton or acrylic yarn (scraps work great!)
→ Lighter yarns will give a daintier look; cotton holds shape best - Crochet Hook: 3.5 mm – 4.5 mm (E–7) depending on yarn
- Metal keychain ring or lobster clasp
- Yarn needle (for sewing and weaving in ends)
- Scissors
- Small button or snap (optional, for closure or decoration)
- Stitch marker (optional)
🧶 You can make several of these in under an hour!
🧵 Crochet Stitches & Abbreviations Used (US Terms)
- ch = chain
- sl st = slip stitch
- sc = single crochet
- hdc = half double crochet
- dc = double crochet
- st(s) = stitch(es)
- inc = increase (2 stitches in one stitch)
💡 Only basic stitches are used — great for beginners.
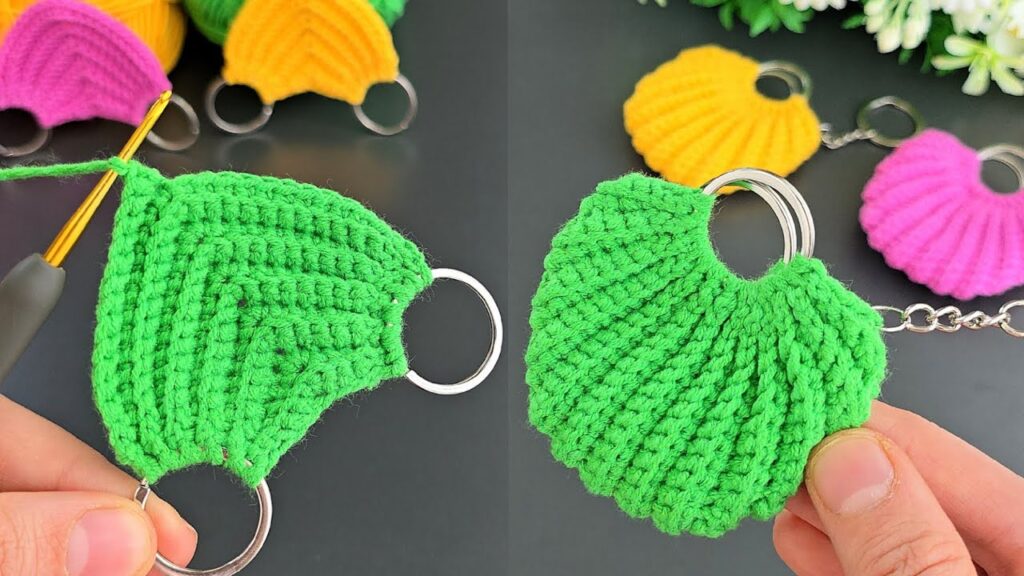
👜 How to Crochet a Cute Bag Keychain – Step-by-Step Pattern
In this tutorial, we’ll make a mini tote-style bag that’s about 2.5–3 inches wide and includes a handle or strap to attach to a keyring.
🔹 Step 1: Make the Base (Bottom of the Bag)
We’ll start by crocheting a flat rectangular base in rows, then work around it in the round.
Row 1:
- Ch 9 (or adjust depending on desired width)
- Sc in 2nd ch from hook and across. (8 sc)
- Ch 1, turn.
Rows 2–4:
- Sc in each st across. (8 sc)
- Ch 1, turn.
🧺 This gives you a rectangle base, approx. 2.5 inches wide.
🔹 Step 2: Build the Bag Body
Now we’ll crochet in the round around the base to build up the sides.
Round 1:
- Sc evenly around all four sides of the rectangle.
- Place 2 sc in each corner.
- Sl st to join. (Approx. 28–32 sts, depending on spacing)
Rounds 2–8:
- Ch 1, sc in each st around.
- Sl st to join.
📏 You can make the bag taller or shorter by adding or removing rounds.
🧶 Change colors after a few rounds for stripes or color blocking!
🔹 Step 3: Create the Opening or Flap
You can choose between two styles:
Option A: Open Tote Style
- After last round, fasten off and weave in ends.
- Skip to handle instructions.
Option B: With Flap
- After Round 8, do not join.
- Turn, ch 1, sc in next 6–8 sts (across one side only).
- Turn and repeat for 3–4 rows to create a flap.
- Optional: Add a buttonhole row by doing:
→ Row 4: sc 2, ch 2 (skip 2), sc 2.
Add a small button on the front center of the bag to secure the flap.
🔹 Step 4: Add the Handle or Strap
Now add a strap to hang the bag from the keyring.
Option 1: Basic Strap
- Attach yarn to one side of the opening.
- Ch 15–20 (depending on desired length).
- Sl st to opposite side.
- Fasten off, weave in ends.
Option 2: Mini Tote Handles
- Attach yarn to one side, ch 7, sl st to opposite side (front and back)
- Repeat on both sides for two mini handles.
- These mimic tiny tote bag handles!
🔹 Step 5: Attach to Keychain
- Slide your strap or handle loop through a keyring or lobster clasp.
- If needed, sew it closed with your yarn needle for extra security.
✅ You can also use a metal jump ring or split ring for a sleek look.
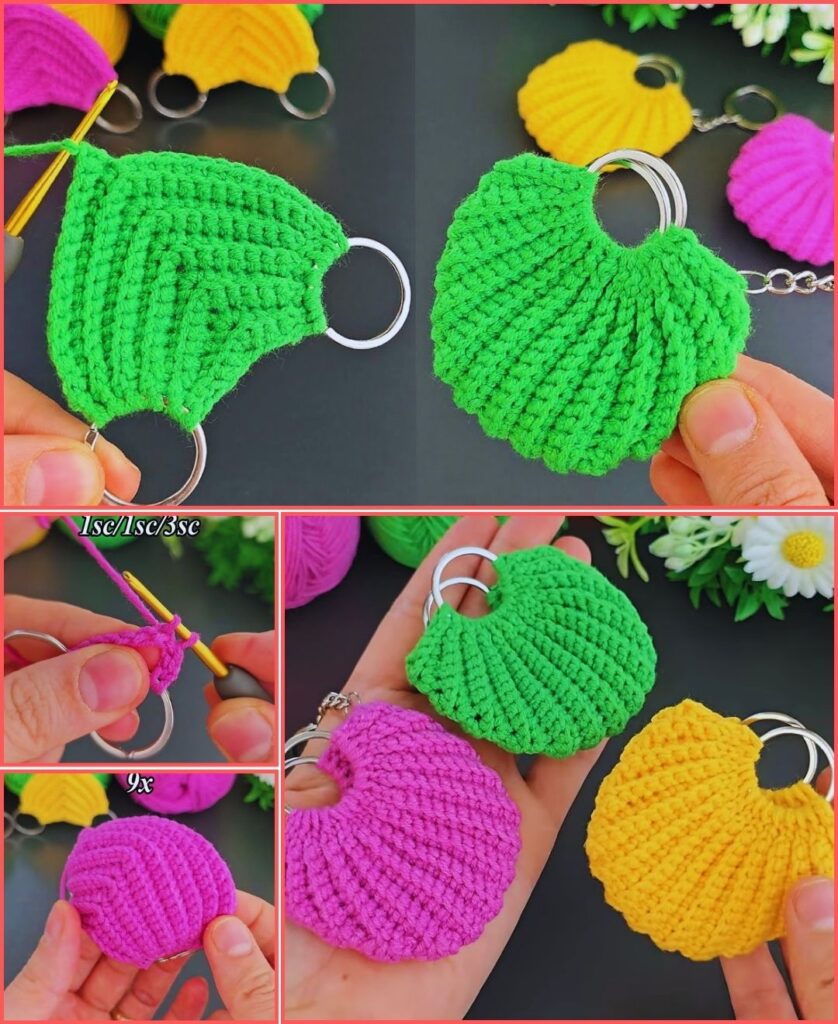
🔹 Step 6: Embellish (Optional but Fun!)
Add your creative touch:
- 🌸 Sew a small crochet flower or heart to the front
- 🎀 Add a mini bow or charm
- 🧷 Use embroidery thread to sew initials or shapes
- ✨ Add beads, sequins, or small decorative buttons
This is your chance to make it cute, quirky, elegant, or personalized.
🧼 Finishing Touches
- Use your yarn needle to secure all ends neatly on the inside.
- Shape your bag gently by hand.
- If it seems floppy, lightly spray with water and block it into shape.
💡 Customization Ideas
- 🔄 Change the shape: Try making a round base, triangle flap, or square mini backpack style.
- 🧶 Use textured stitches: Try using half double crochet (hdc) or puff stitches for added style.
- 🎨 Mix colors: Do stripes, ombre, or rainbow sections using scrap yarn.
- 📐 Adjust the size: Want to hold earbuds, coins, or tiny notes? Just increase the base chain and rows.
📏 Sample Dimensions
| Bag Type | Width | Height | Strap |
|---|---|---|---|
| Mini Tote | 2.5 in | 2.5 in | 2.5–3 in loop |
| Flap Bag | 2.5 in | 2.5 in + 1 in flap | 3–4 in |
🧼 Care Instructions
- Washing: Hand wash gently in cool water.
- Drying: Lay flat to dry.
- Storage: Store flat or hanging to avoid misshaping.
🎉 Final Thoughts
You’ve just made a cute, functional, and totally unique crochet bag keychain! This quick project is perfect for:
- 🎁 Gifting — Think birthdays, bridesmaids, teachers
- 🧶 Craft fairs — Popular and easy to batch
- 👜 Bag decor — Add charm to backpacks, purses, and totes
- ✨ Creative expression — Play with colors, textures, and designs
Making crochet keychains is not just fun — it’s addictive. After your first one, you’ll want to create a whole collection in every color!