 by
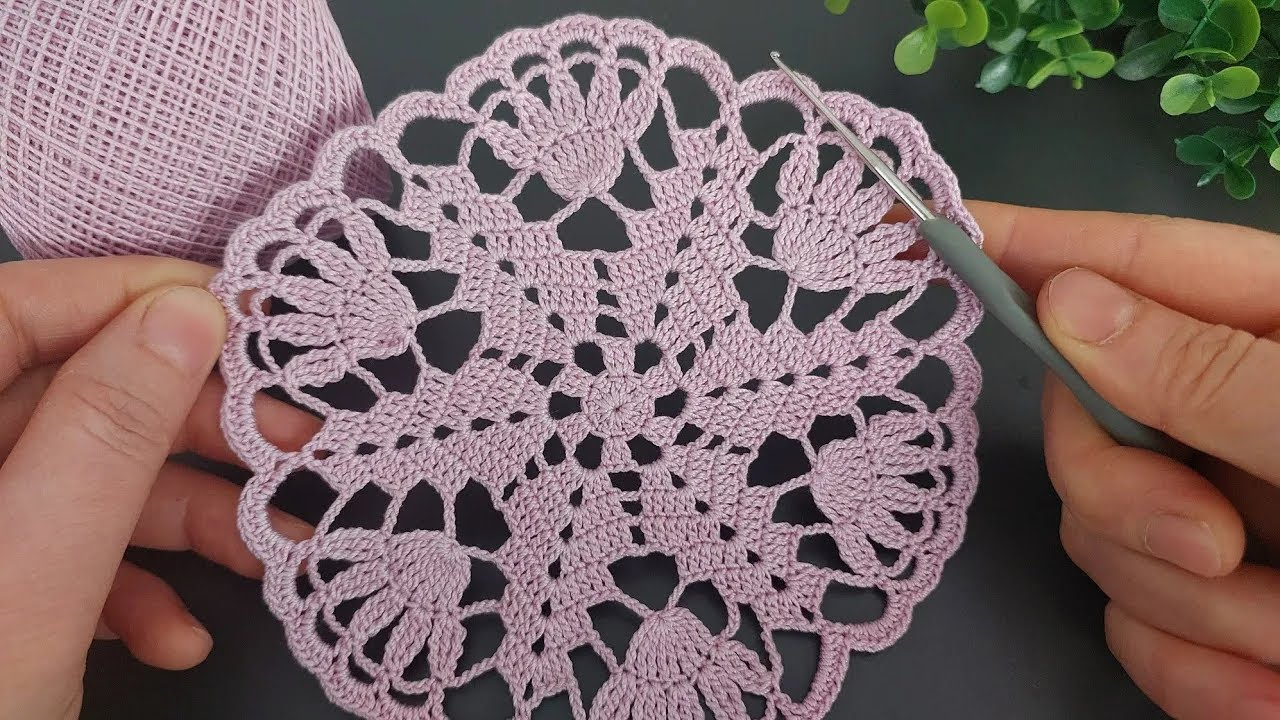
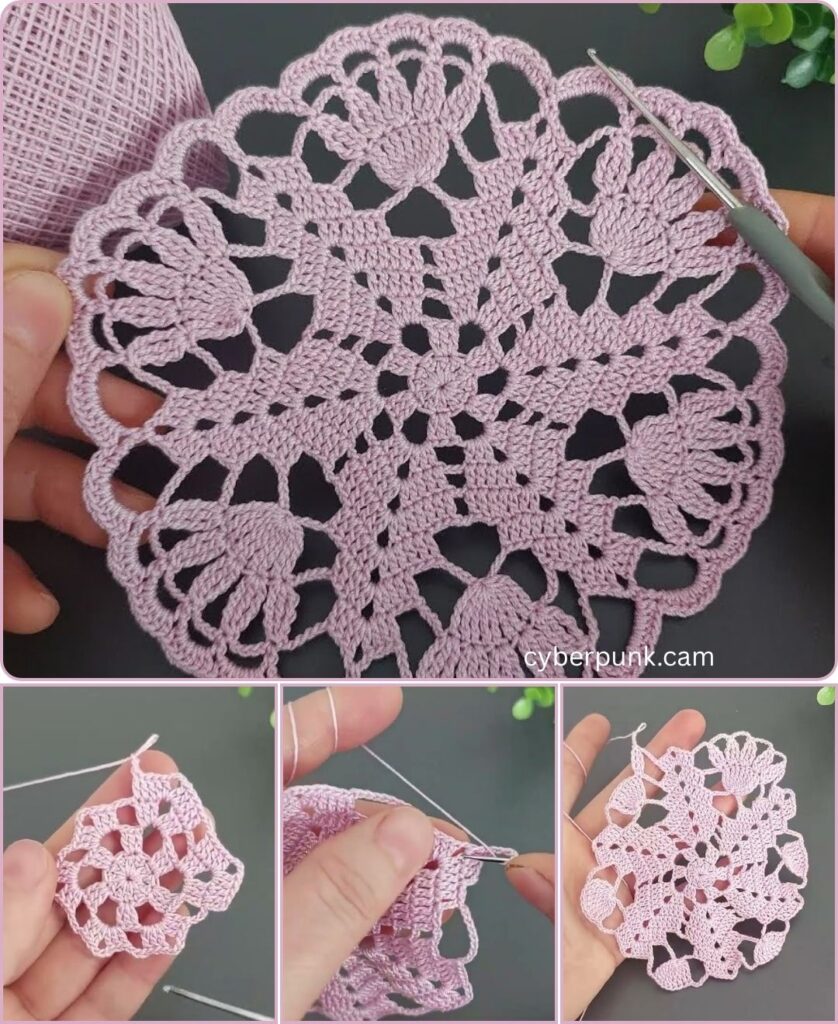
by That sounds like a beautiful project! Combining a classic circular doily with delicate, petal-like motifs creates a gorgeous, intricate lace piece. This tutorial details a pattern that achieves this effect using a progression of stitches to form pronounced “petals” around the perimeter.
We will use a shell stitch variation to create the petal shapes and higher chain counts to build the open lace.

🌸 Crocheted Doily: Circular Lace Pattern with Petal Motifs
Materials Needed
- Thread/Yarn: For delicate lace, use Size 10 Cotton Thread. For a larger, sturdier doily, use Sport or DK weight cotton yarn (Size 3).
- Crochet Hook: The size recommended for your chosen thread (e.g., 1.75 mm for thread, 3.0 mm for yarn).
- Scissors
- Tapestry Needle: For weaving in ends.
Key Crochet Terms
| Abbreviation | Stitch Name |
| ch | Chain |
| sl st | Slip Stitch (used to join rounds) |
| sc | Single Crochet |
| dc | Double Crochet |
| tr | Treble Crochet (Triple Crochet) |
| sp | Space (refers to a chain space) |
| st(s) | Stitch(es) |
Part 1: Solid Center and Anchor Points
We start with a solid center circle and then create the foundation for the petal sections.
- Round 1 (Center): Make a Magic Ring. ch 3 (counts as first dc). Work 15 dc into the ring. Join with a sl st to the top of the beginning ch 3. (16 sts)
- Round 2 (Mesh): ch 1 (does not count as st). sc in the same st. ch 3. Skip 1 st. Repeat [sc in the next st, ch 3, sk 1 st] around. Join with a sl st to the first sc. (8 sc anchors, 8 ch-3 loops).
- Round 3 (Increase): sl st into the first ch-3 loop. ch 3 (counts as dc). Work 2 dc into the same loop. ch 2. Repeat [3 dc in the next ch-3 loop, ch 2] around. Join with a sl st to the top of the beginning ch 3. (8 clusters of 3 dc).

Part 2: Forming the Petal Bodies
We will use shell stitches and treble crochets to give the motif height and a pronounced, curved shape, resembling petals.
- Round 4 (Petal Base):sl st into the next 2 dc’s and into the ch-2 space.
- ch 1. Work sc into the ch-2 space.
- ch 4 (creates a high loop between petals).
- Repeat [sc in the next ch-2 space, ch 4] around. Join with a sl st to the first sc.
- Round 5 (Petal Build-Up):sl st into the ch-4 loop.
- ch 3 (counts as dc). Work [2 dc, ch 1, 3 dc] into the same ch-4 loop. (This is a shell).
- ch 2.
- Repeat [Shell (3 dc, ch 1, 3 dc) in the next ch-4 loop, ch 2] around. Join with a sl st to the top of the beginning ch 3. (8 shells).
- Round 6 (Petal Height):sl st into the next 3 dc’s, and into the ch-1 peak of the shell.
- ch 4 (counts as tr). Work [4 tr, ch 2, 5 tr] into the same ch-1 space. (This creates a larger, taller shell).
- sc into the ch-2 space between the shells.
- Repeat [Large Shell (5 tr, ch 2, 5 tr) in the ch-1 peak, sc in the ch-2 space] around. Join with a sl st to the top of the beginning ch 4. (8 large petals).

Part 3: The Final Lace Edging
The final rounds focus on opening up the space between the large petals and finishing the edge with picots.
- Round 7 (Separation):sl st into the next 4 tr’s, and into the ch-2 peak of the large shell.
- ch 6 (creates a large space).
- Work sc into the next sc anchor stitch.
- ch 6.
- Repeat [sc into the ch-2 peak of the large shell, ch 6, sc into the sc anchor stitch, ch 6] around. Join with a sl st to the first sl st.
- Round 8 (Picot Edge):sl st into the first ch-6 loop.
- ch 1. Work 3 sc into the ch-6 loop.
- Picot: ch 3, sl st into the first ch.
- Work 3 sc into the same loop.
- Repeat [3 sc, picot, 3 sc] into every ch-6 loop around.
- Finish: Join with a sl st to the first sc. Fasten off.

Finishing and Blocking (Essential)
For the doily to display the lace pattern and the petal shapes correctly, blocking is crucial.
- Weave in Ends: Use your tapestry needle to securely weave in all ends on the back of the doily.
- Soak: Submerge the doily in lukewarm water (or a mild starch solution).
- Pin: Gently squeeze out excess water. Lay the doily on a foam or cork board and pin every single point (the picots and the centers of the large shells) outward, stretching the motif into a perfect circle.
- Dry: Allow it to dry completely before unpinning.
Your elegant crocheted doily with beautiful petal-like motifs is complete! Would you like a pattern for a coordinating coaster?
Video tutorial: