 by
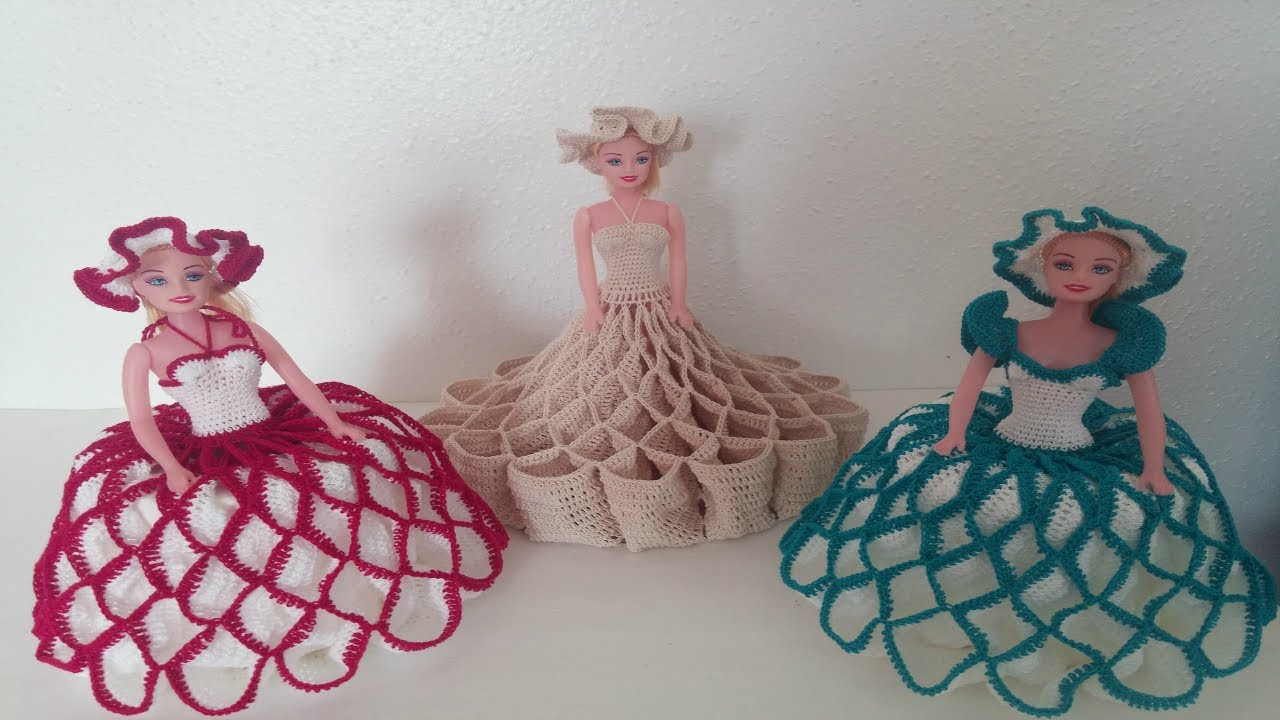
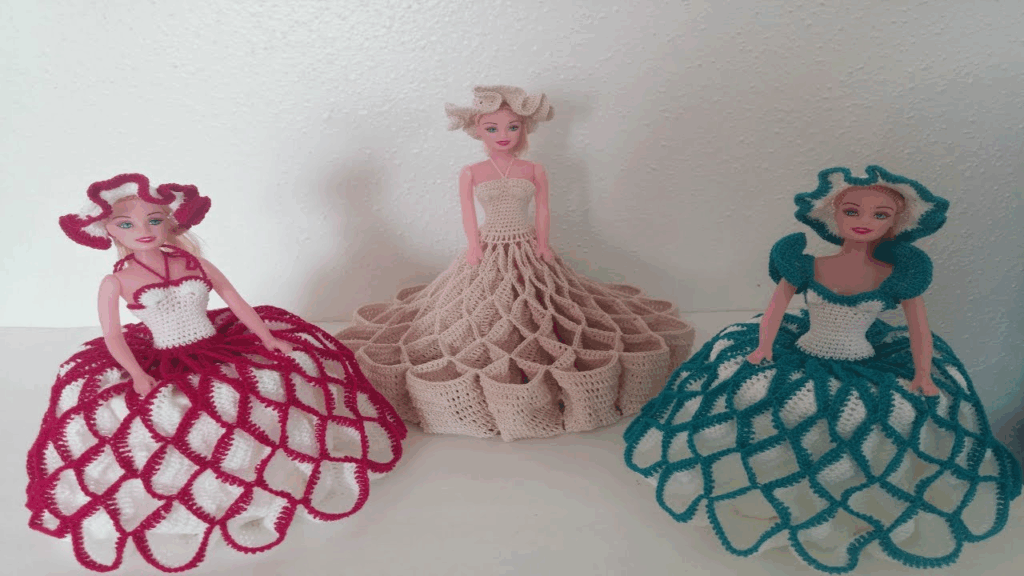
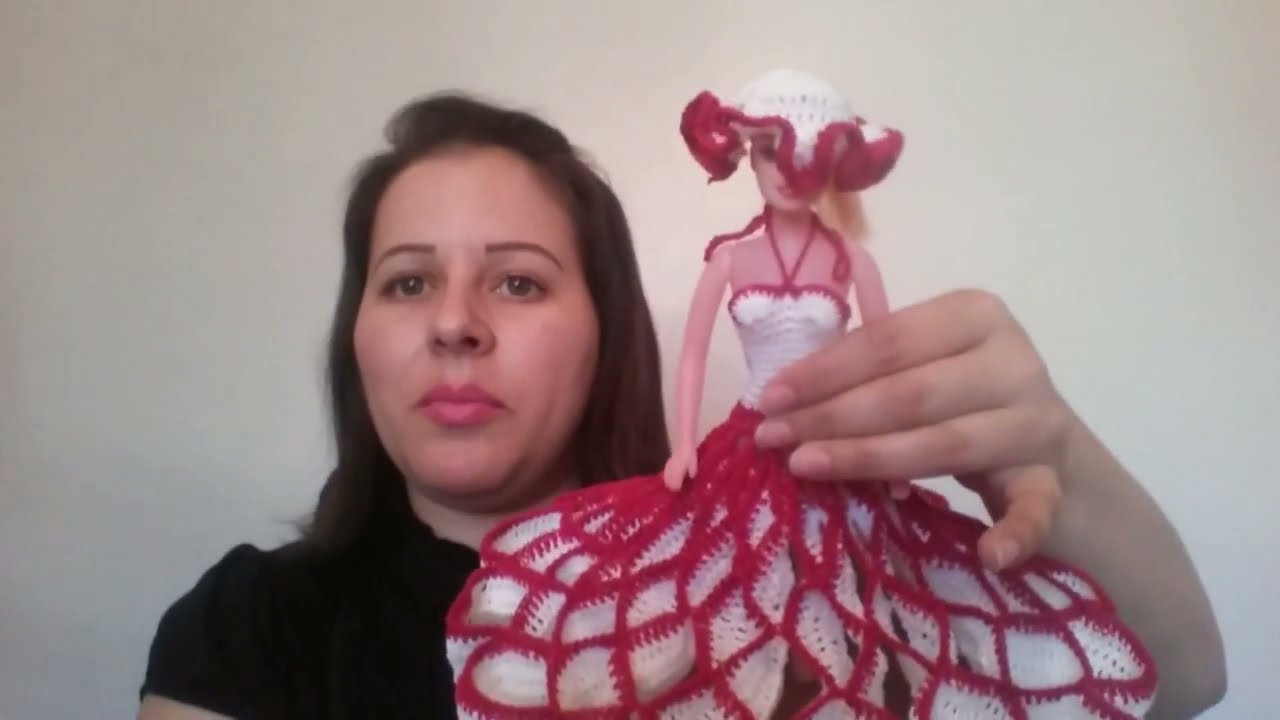
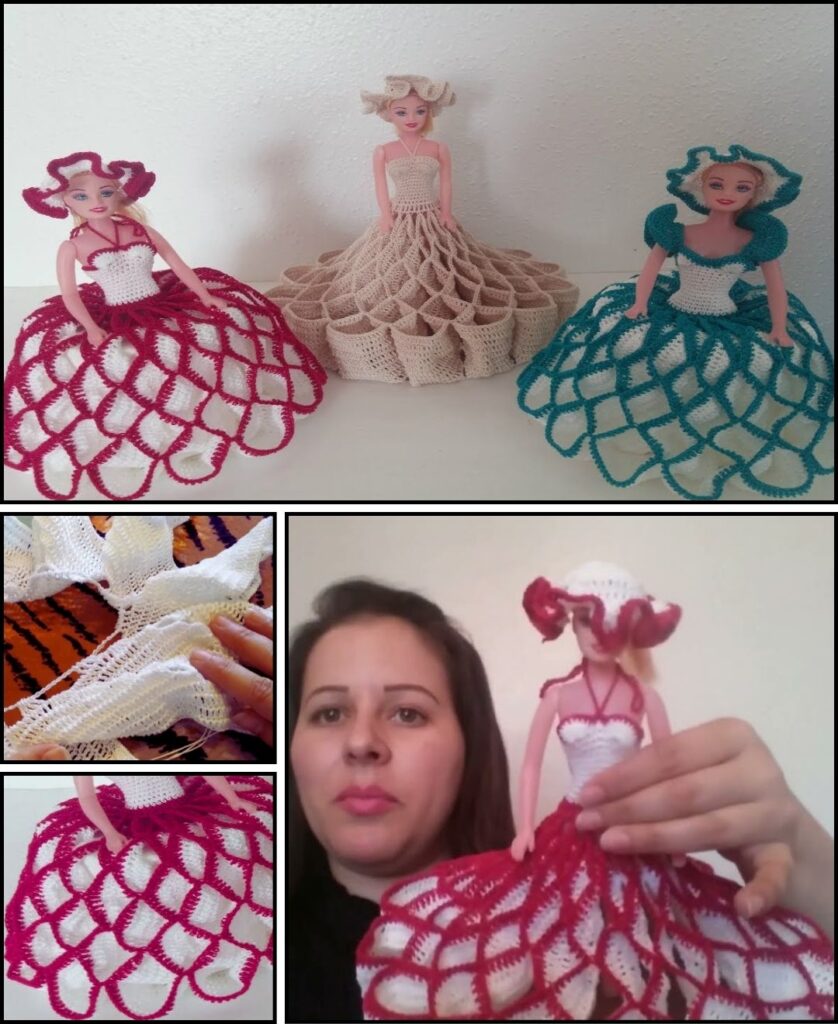
by Crocheting a dress and hat for your doll is a delightful and rewarding project! It’s a fantastic way to practice various stitches, shaping techniques, and garment construction on a smaller, more manageable scale. Plus, you get to create a custom, adorable outfit for your beloved doll.
Given that it’s warm in Phnom Penh, the choice of yarn isn’t critical for warmth. However, for doll clothes, you’ll want something that drapes nicely and is easy to work with in small sizes.
Choosing the Right Yarn and Hook for Doll Clothes
- Yarn Weight: For most common dolls (like Barbie, Fashion Dolls, or small baby dolls), sport weight (fine / Category 2) or DK (Double Knitting) weight (light worsted / Category 3) yarn is usually ideal. This allows for finer detail and a more appropriately scaled fabric. Worsted weight (medium / Category 4) can work too, but might make the clothes a bit bulkier depending on the doll size.
- Fiber Content:
- Acrylic: Very popular for doll clothes. It’s inexpensive, comes in a vast array of colors, is easy to care for (machine washable), and has good stitch definition.
- Cotton: Excellent for a more natural feel and crisp stitch definition. It’s also durable.
- Blends: Cotton/acrylic or similar blends offer a good balance of properties.
- Crochet Hook: A smaller hook is generally preferred for doll clothes to create a tighter fabric that holds its shape and prevents gapping.
- For Sport Weight: 2.5mm (C/2) to 3.0mm (D/3)
- For DK Weight: 3.0mm (D/3) to 3.5mm (E/4)
- For Worsted Weight: 3.5mm (E/4) to 4.0mm (G/6)
- Always check your gauge (if provided in a specific pattern) or choose a hook that creates a fabric you like.
How to Crochet a Dress and Hat for Your Doll: A Step-by-Step Tutorial
This tutorial will provide a general framework for a top-down raglan dress and a simple hat. Doll sizes vary greatly, so you will need to measure your doll frequently and adjust stitch counts as you go.
Before You Start: Measure Your Doll!
- Head Circumference: For the hat.
- Neck Circumference: For the starting chain of the dress.
- Shoulder/Chest Circumference: For the yoke and body.
- Armhole Depth: For separating the sleeves.
- Length (Neck to waist, waist to hem): For the dress.
1. Essential Materials You’ll Need
- Yarn: Your chosen yarn color(s) for the dress and hat.
- Crochet Hook: Size appropriate for your yarn and desired fabric.
- Scissors: For cutting yarn.
- Yarn Needle (Tapestry Needle): For weaving in ends and sewing on fasteners.
- Small Fasteners (for dress): Small buttons, snaps, or hook-and-loop tape.
- Stitch Markers (at least 4): Crucial for marking raglan increase points on the dress.
2. Basic Crochet Stitches You’ll Use
- Chain (ch): Foundation and spacing.
- Slip Stitch (sl st): Joining and neatening.
- Single Crochet (sc): Dense stitch, good for borders or bodice details.
- Half Double Crochet (hdc): Medium height, good for basic fabric.
- Double Crochet (dc): Taller stitch, works up quickly, good for skirts.
- Increase (inc): Work 2 stitches into one to expand the fabric.
- Working in Rows (Dress Yoke/Skirt): Turning at the end of rows.
- Working in Rounds (Hat/Dress Skirt): Continuous spiral or joined rounds.
- Fasten Off: Securely ending work.
- Weaving in Ends: Hiding yarn tails.
Part 1: The Doll Dress (Top-Down Raglan)
This method starts at the neck and works downwards, separating for arms. It’s very adaptable!
Main Stitch for Yoke: Half Double Crochet (hdc) or Single Crochet (sc) for a tighter fit. Main Stitch for Skirt: Double Crochet (dc) for drape, or hdc for a firmer skirt. Raglan Increase: (Stitch, ch 1, Stitch) in one stitch/space, or 3 stitches in one. We’ll use (hdc, ch 1, hdc) in ch-1 spaces.
A. The Yoke (Top of the Dress)
- Foundation Chain (Neckline):
- Measure doll’s neck circumference. Chain a number of stitches slightly more than this measurement to ensure it fits over the doll’s head. Make sure the number is divisible by 4 (for 4 raglan sections).
- Example (adjust for your doll): Ch 24. Sl st to the first ch to form a ring (be careful not to twist!).
- Ch 1 (does not count as a stitch).
- Row 1 (Working in the round, or as a flat piece if you add an opening later):
- Work sc (or hdc for a looser top) in each ch around. Join with a sl st to the first st. (24 sc/hdc)
- If you want a back opening, DO NOT join the round. Work in rows, chaining 1 and turning at the end of each row. You’ll add button bands later.
- Raglan Set Up (This determines size!):
- If working a flat yoke (with opening): Ch 2 (counts as hdc). Hdc in the first X stitches (Front Panel 1). Mark this stitch. (Hdc, ch 1, hdc) in the next stitch (Sleeve 1). Mark this stitch. Hdc in the next Y stitches (Back). Mark this stitch. (Hdc, ch 1, hdc) in the next stitch (Sleeve 2). Mark this stitch. Hdc in the remaining Z stitches (Front Panel 2). Ch 2, turn.
- Example for 24 stitches (approx. division):
- Front Panel 1: 4 sts
- Raglan Inc 1
- Sleeve 1: 4 sts
- Raglan Inc 2
- Back: 8 sts
- Raglan Inc 3
- Sleeve 2: 4 sts
- Raglan Inc 4
- Front Panel 2: 4 sts
- Your starting chain stitches (e.g., 24) should be distributed among these sections before the increases. Use stitch markers to identify the 4 increase points.
- Yoke Rows (Increase Rows):
- Ch 2 (counts as 1st hdc). Turn.
- Hdc in each st until you reach the ch-1 space of your first marked raglan increase.
*(Hdc, ch 1, hdc)into the ch-1 space (this is your increase). Hdc in each st until you reach the next ch-1 space.*Repeat from*to*3 more times.- Hdc in each remaining st until the end of the row.
- Ch 2, Turn.
- Continue these rows, making increases in the 4 ch-1 spaces, until the yoke (measured from neck to underarm) fits your doll’s upper chest and shoulders. Try it on!
B. Separating for Body and Sleeves
Once the yoke is wide enough, you’ll create the armholes.
- Dividing Row:
- Ch 2, Turn.
- Hdc in each st across the first front panel until you reach the first ch-1 space.
- Skip the stitches of the first sleeve: Ch 2 (or 3, depending on armhole size), skip all hdc stitches until the next ch-1 space.
- Hdc in each st across the back panel until you reach the next ch-1 space.
- Skip the stitches of the second sleeve: Ch 2 (or 3), skip all hdc stitches until the next ch-1 space.
- Hdc in each st across the second front panel until the end of the row.
- You have now created the armholes. The body stitches are connected.
C. The Skirt
Now you’ll create the skirt of the dress.
- Row 1 (Skirt Foundation): Ch 2, Turn. Hdc (or dc for more flare) in each st across the entire body section (including the chains you made for the underarm).
- Skirt Rows (Flare or Straight):
- For a flared skirt: Ch 3 (counts as 1st dc). Turn.
*Dc in the next st, inc dc in the next st.*Repeat around. Or simplyinc dcin every 2nd or 3rd stitch to add fullness gradually. - For a straight skirt: Ch 2 (or 3). Turn. Hdc (or dc) in each st across.
- Repeat these rows until the dress reaches the desired length for your doll. You can add more increase rows for a fuller skirt.
- For a flared skirt: Ch 3 (counts as 1st dc). Turn.
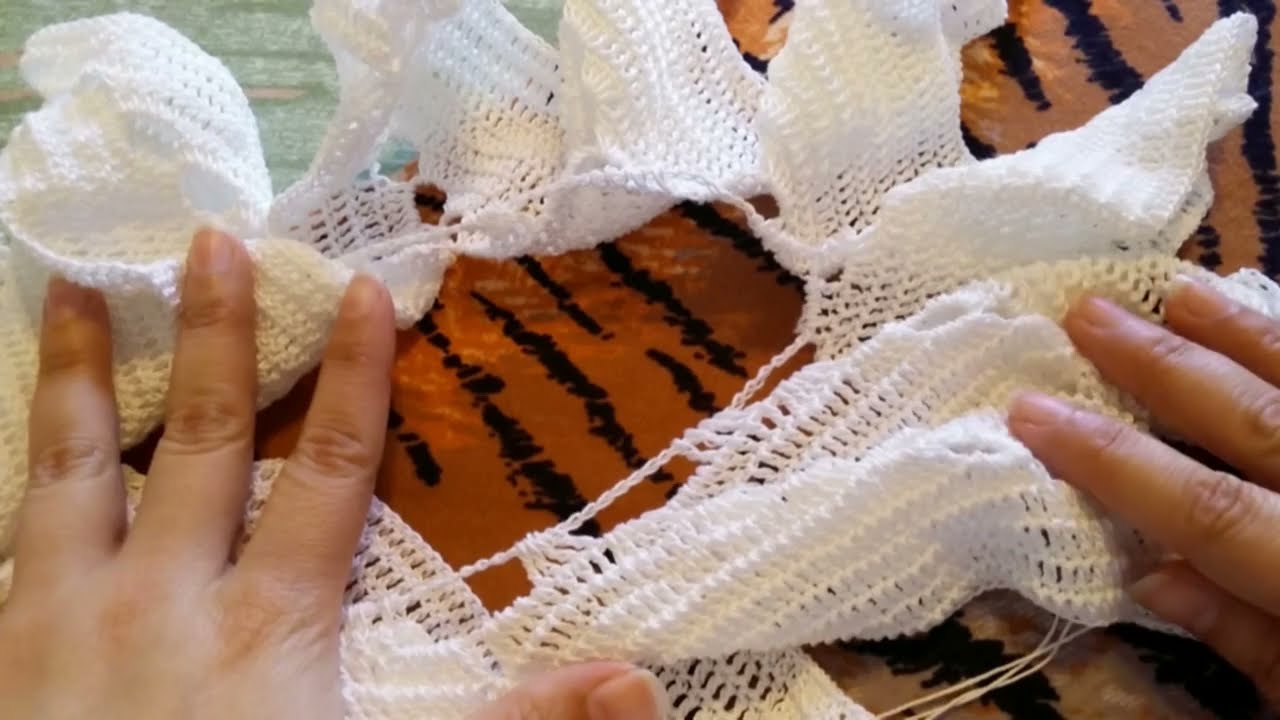
- Optional Bottom Border: Add a row or two of sc, or a decorative shell/picot stitch border.
- Fasten Off and weave in ends.
D. Finishing the Dress
- Back Opening (if applicable):
- Button Bands: If you created a back opening, rejoin yarn to one side of the opening. Ch 1, work sc evenly up the raw edge. Turn, work another row of sc. On one side, create small buttonholes (ch 1, skip 1 st) at regular intervals.
- Sewing: Overlap the buttonhole band over the plain band. Sew on your small buttons (or snaps/hook-and-loop tape) securely.
- Sleeves (Optional – if you want sleeves):
- Rejoin yarn to the underarm space of an armhole. Ch 2. Hdc evenly around the armhole opening. Join with sl st.
- Continue working hdc in rounds until sleeve is desired length.
- Fasten Off and weave in ends. Repeat for second sleeve.
- Weave in ALL Remaining Ends: Crucial for a neat finish.
Part 2: The Doll Hat (Simple Beanie)
This is a classic top-down beanie construction.
- Round 1: With your chosen yarn, create a Magic Ring (MR). Ch 1. Work 8 sc into the MR. (8 sc)
- Place your stitch marker in the first sc. Work in continuous spirals, moving the marker up each round.
- Round 2: Inc in each st around. (16 sc)
- Round 3:
*Sc in the next st, inc in the next st.*Repeat from*to*around. (24 sc) - Round 4:
*Sc in the next 2 sts, inc in the next st.*Repeat from*to*around. (32 sc) - Round 5:
*Sc in the next 3 sts, inc in the next st.*Repeat from*to*around. (40 sc)- Check Size: At this point, the diameter of your flat circle should be approximately 1/2 of your doll’s head circumference. If it’s too small, add another increase round (e.g., Round 6:
*Sc in next 4 sts, inc*). If too big, remove a round or use a smaller hook.
- Check Size: At this point, the diameter of your flat circle should be approximately 1/2 of your doll’s head circumference. If it’s too small, add another increase round (e.g., Round 6:
- Subsequent Rounds (Sides of Hat):
- Sc in each st around. (No more increases.)
- Repeat these rounds until the hat reaches the desired depth for your doll’s head (e.g., just covering the ears, or a bit slouchier). Try it on the doll as you go!
- Optional Brim/Border: For the last round or two, you can do sc in the back loop only (BLO) for a rolled brim, or switch to a different stitch.
- Fasten Off: Sl st into the next st to create a neat join. Cut yarn, leaving a tail.
- Weave in Ends: Use your yarn needle to hide the tails securely.
General Tips for Crocheting Doll Clothes
- Measure, Measure, Measure! Dolls are not one-size-fits-all. A ruler and trying the garment on the doll frequently are your best friends.
- Smaller Hook, Tighter Fabric: A slightly smaller hook than recommended for your yarn often works best for doll clothes, giving a more structured and less “holey” fabric.
- Fasteners: Opt for small, flat fasteners that won’t irritate the doll or catch on other items. Snaps or tiny buttons are great.
- Simple is Best: Start with basic shapes and stitches. Once comfortable, you can experiment with lace patterns, cables, or more complex designs.
- Yarn Scraps: Doll clothes are perfect for using up those leftover bits of yarn!
- Weave in Ends Thoroughly: Small garments show mistakes more easily, so take your time with finishing.
Enjoy creating a beautiful, custom wardrobe for your doll!
Video tutorial:
https://www.youtube.com/watch?v=rt4Eb7GYPCk&list=PLgpxY5JsCKjBAeaLyqebs5ojqcg9BFGId&index=10