 by
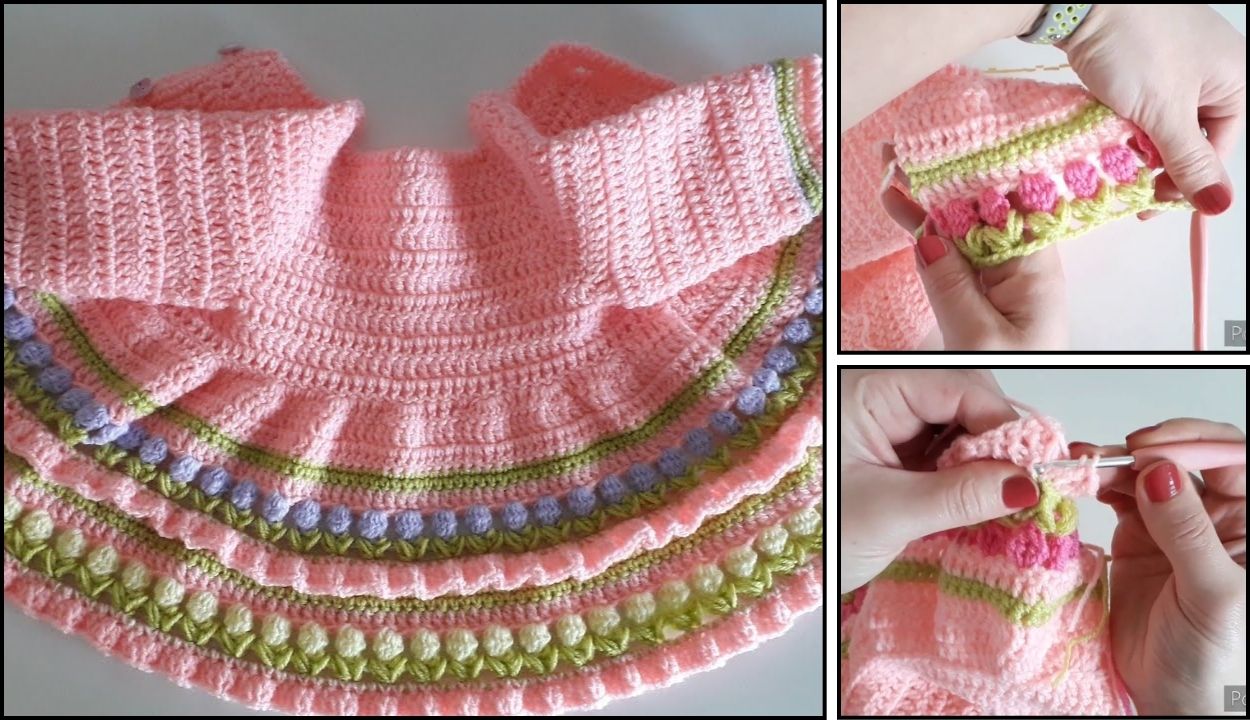
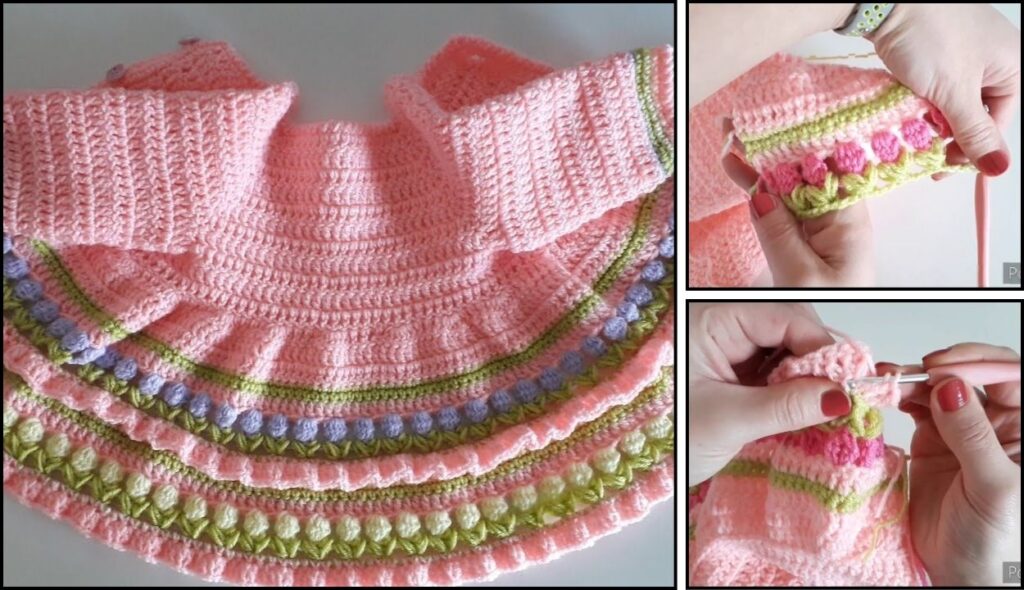
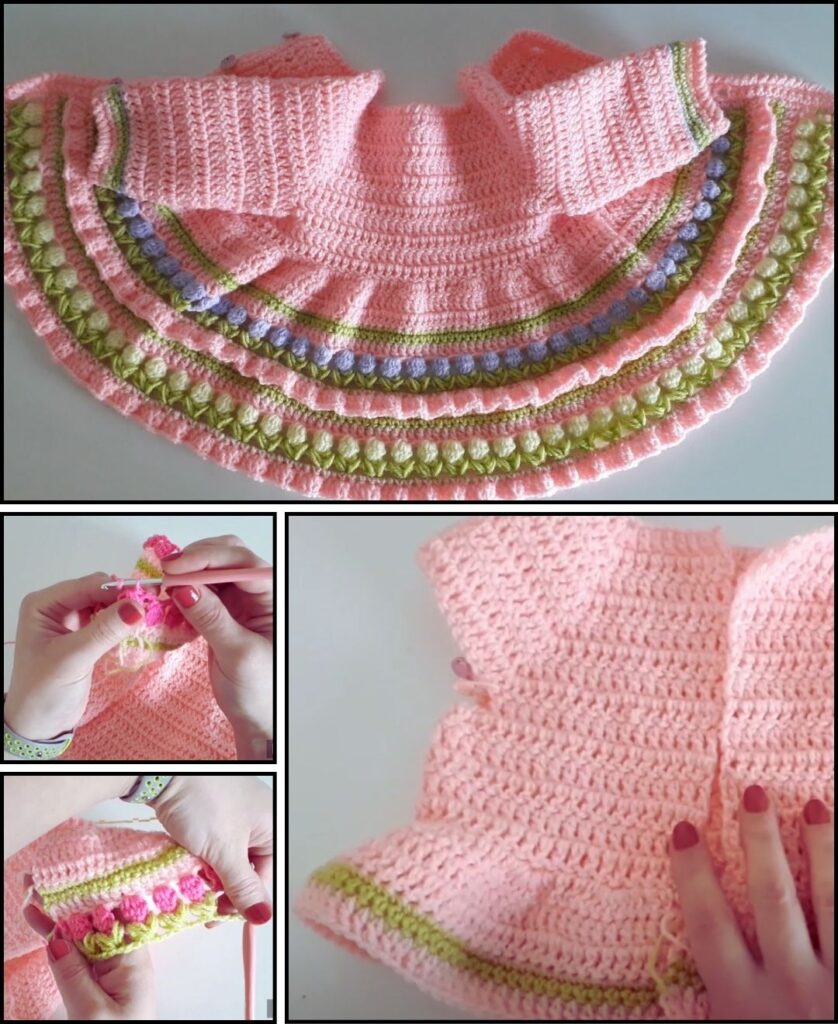
by Crocheting a “Carnival” baby cardigan sounds absolutely delightful! The name itself suggests a vibrant, playful, and possibly colorful design, perfect for a little one. Such a cardigan would be a cherished handmade item, offering warmth and style.
Given that it’s currently warm in Phnom Penh, selecting the right yarn for a baby garment is crucial. You’ll want something that ensures the cardigan is soft, breathable, and comfortable against delicate skin, preventing any overheating.
Choosing the Right Yarn for a “Carnival” Baby Cardigan
For a baby cardigan in a warm climate, it’s best to avoid heavy wools or very thick acrylics. Focus on fibers that offer breathability and softness:
- 100% Cotton: This is an excellent choice.
- Pros: Highly breathable, absorbent, wonderfully soft, durable, easy to wash, and provides excellent stitch definition. Cotton keeps babies comfortable without overheating and is gentle on sensitive skin.
- Cons: Less elastic than some other fibers, which can sometimes make achieving gauge specific to a pattern more crucial, and might result in a slightly less “stretchy” fabric than blends.
- Cotton/Bamboo Blend:
- Pros: Combines the breathability and strength of cotton with the incredible softness, luxurious drape, and natural coolness of bamboo. Bamboo is also often naturally antibacterial and hypoallergenic.
- Cons: Can be a bit more expensive than pure cotton or acrylic.
- Lightweight Acrylic (Baby Acrylic):
- Pros: Widely available, very affordable, often comes in a vast array of bright, carnival-like colors. Many baby-specific acrylics are incredibly soft and designed to be gentle for infants. Easy to care for, as most are machine washable and dryable.
- Cons: Less breathable than natural fibers, so it might feel warmer in very high humidity. If choosing acrylic, opt for a DK (Double Knitting/Light Worsted/Category 3) or Sport Weight (Category 2) to ensure it’s not too bulky.
- Yarn Weight: For a baby cardigan, DK (Double Knitting / Light Worsted / Category 3) is often ideal. It strikes a good balance between warmth and lightness. If you want a very light, airy cardigan, Sport Weight (Category 2) would also be suitable.

How to Crochet a “Carnival” Baby Cardigan: General Principles & Step-by-Step Outline
Important Note: To successfully crochet a well-fitting and visually appealing garment like a baby cardigan, you will need to find and follow a detailed, tested pattern. The “Carnival” aspect might refer to specific stitch patterns (like bobbles, puff stitches, or popcorn stitches for texture, or possibly stripe work for color), specific color combinations, or a unique construction. This guide provides the general steps and considerations involved in crocheting a baby cardigan, which can be adapted with a pattern’s specific “Carnival” details.
1. Essential Materials You’ll Need
- Yarn: Your chosen yarn type and colors. The amount will depend on the size of the cardigan and the specific pattern, but generally, expect 200-400 grams for a 0-12 month size.
- Crochet Hook: The size recommended by your chosen pattern, appropriate for your yarn weight (e.g., 3.5mm-4.5mm, US E/4 to G/6).
- Scissors: For cutting yarn.
- Yarn Needle (Tapestry Needle): Essential for weaving in ends and seaming.
- Stitch Markers: Very helpful for marking armholes, necklines, buttonhole placement, and for keeping track of pattern repeats, especially with textured stitches.
- Buttons: (2-6 buttons, depending on pattern and size) Choose flat, child-safe buttons that are too large to be a choking hazard.
- Measuring Tape: Crucial for checking your gauge swatch and the dimensions of your growing cardigan.

2. Key Crochet Stitches & Techniques You’ll Likely Use
Beyond the basic stitches, a “Carnival” cardigan might involve:
- Basic Stitches: Chain (ch), Slip Stitch (sl st), Single Crochet (sc), Half Double Crochet (hdc), Double Crochet (dc). These are the foundation of any crochet garment.
- Textured Stitches (for the “Carnival” look):
- Bobble Stitch: Creates a raised “bubble” on the fabric.
- Puff Stitch: Similar to a bobble but often softer.
- Popcorn Stitch: Another raised, rounded stitch.
- Shell Stitch: Creates a fan-like, open texture.
- Colorwork Techniques (for a “Carnival” look):
- Stripes: Changing colors at the end of rows or every few rows.
- Intarsia or Tapestry Crochet: If the “Carnival” design involves specific motifs (like balloons or stars), though these are more advanced.
- Post Stitches (fpdc/bpdc or fphdc/bphdc): Often used for ribbed cuffs, hems, and necklines, providing elasticity and a neat finish.
- Increases (inc): Working multiple stitches into one to widen a piece (e.g., for shaping the yoke or adding fullness).
- Decreases (dec): Combining stitches to narrow a piece (e.g., for armholes, neckline shaping).
- Working in Rows: Most of the cardigan panels will be worked flat.
- Working in the Round: Sleeves might be worked in the round to avoid a seam.
- Seaming: Techniques to join pieces together neatly (e.g., mattress stitch for an invisible seam, slip stitch seam).
- Buttonholes: Creating openings for buttons.
- Attaching Buttons: Securely sewing on buttons.
3. General Construction Steps (Most Common Methods)
Baby cardigans are typically constructed using one of two main methods:
- 1. Bottom-Up (Panel-Based):
- Concept: You crochet the Back Panel, two Front Panels, and two Sleeves as separate flat pieces. These pieces are then seamed together.
- Pros: Often easier for beginners to manage as you’re working flat sections. Good for practicing stitch consistency.
- Cons: Involves seaming, which creates bulk. More ends to weave in, especially with color changes.
- 2. Top-Down (Yoke First):
- Concept: You start at the neckline and work outwards, increasing stitches to create the yoke (upper body including shoulders). Once the yoke is complete, the work is divided for the body and sleeves, which are then worked separately, often in the round.
- Pros: Minimal seaming (usually just underarm gaps), allows for easy trying-on for sizing, can be less cumbersome to handle.
- Cons: Can be more challenging for beginners due to simultaneous increases for multiple sections.
We’ll outline the Top-Down (Yoke First) method here, as it’s very popular for baby cardigans due to less seaming and often a nicer drape.

Step 1: Choose Your Size & Gauge Swatch (ABSOLUTELY ESSENTIAL!)
- Baby Sizing: Patterns will specify ages (e.g., 0-3 months, 3-6 months, 6-12 months, 12-18 months). Always check the actual garment measurements (chest circumference, sleeve length, overall length) provided in the pattern against standard baby size charts or the actual baby’s measurements.
- Gauge Swatch! This is the single most important step for a garment to fit correctly.
- Chain about 20-30 stitches.
- Work about 10-15 rows in the main stitch pattern (including any cluster stitches or specific texture patterns) the cardigan will use.
- Measure a 4×4 inch (10×10 cm) square within your swatch.
- Compare your stitch and row count to the pattern’s gauge. If you have too many stitches/rows in 4 inches, go up a hook size. If you have too few, go down a hook size. Adjust until your gauge matches the pattern. Do not skip this step!
Step 2: Create the Yoke (Top-Down Construction)
- Foundation Chain: Chain the specified number of stitches for the neckline. This chain should be a multiple that works with your chosen cluster stitch pattern.
- First Row(s) (Neckline Shaping): Work in your main stitch pattern, often with increases at specific points to begin shaping the yoke.
- Yoke Rounds/Rows: Continue working in rounds (or rows, depending on pattern), increasing stitches evenly at specific points (usually 4 “increase points” that define the corners for the front, sleeves, and back sections). The pattern will dictate where and how many increases to make in each round/row to ensure the yoke lies flat and expands correctly.
- Colorplay: If your “Carnival” design involves stripes, this is where you’ll change colors at the end of designated rows/rounds.
- Textured Stitches: Integrate your cluster stitches or other textured stitches according to the pattern.
- Reach Armhole Depth: Continue increasing until the yoke reaches the desired armhole depth. Your pattern will provide measurement guides.

Step 3: Divide for Body and Sleeves
- At the end of the yoke, the pattern will instruct you to divide the stitches:
- Work across one Front section.
- Chain a few stitches for the underarm (e.g., 2-4 chains).
- Skip the stitches for the first Sleeve.
- Work across the Back section.
- Chain a few stitches for the second underarm.
- Skip the stitches for the second Sleeve.
- Work across the second Front section.
- Join the round (or continue working across the remaining stitches if working flat) to connect the front and back sections.
Step 4: Work the Body of the Cardigan
- Work in Rows: Continue working in your main stitch pattern (including color changes and texture stitches) back and forth in rows on the stitches for the body (fronts and back combined).
- Length: Continue until the cardigan body reaches the desired length.
- Hem (Optional): Add a decorative or ribbed border to the bottom edge.
- Fasten Off.
Step 5: Work the Sleeves (Make Two)
- Rejoin Yarn: Rejoin your yarn at one of the armhole openings (e.g., in the middle of the underarm chain space).
- Work in the Round: Work in your main stitch pattern around the armhole, usually in continuous rounds or joined rounds. This avoids a sleeve seam.
- Decrease (if necessary): Gradually decrease stitches as you work down the sleeve to create a slight taper towards the wrist.
- Cuff: Add a finished cuff (e.g., ribbed cuff using FPhdc/BPhdc for stretch, or a simple border) at the end of the sleeve.
- Fasten Off.
- Repeat for the Second Sleeve.
Step 6: Finishing Touches (Borders, Buttonholes, Buttons)
- Front Edging & Button Bands:
- Work a consistent border along the entire front opening (from the bottom hem, up one front, around the neckline, and down the other front to the bottom hem). This typically involves several rows of single crochet (sc) or half double crochet (hdc) to create a neat, sturdy edge for buttons.
- Buttonholes: On one of the front bands (usually the right front for girls, left for boys, but check your pattern!), you’ll create buttonholes. This is commonly done by
ch 1-2(depending on button size), skipping 1-2 stitches, and then continuing your sc/hdc. In the next row, you work into the chain space. Mark buttonhole positions evenly beforehand. - Button Band: The other front band will be a solid band where the buttons are sewn.
- Weave in All Ends: This is a crucial step for a professional and tidy finish. Use your yarn needle to securely weave in every single yarn tail (especially from color changes).
- Attach Buttons: Carefully sew the buttons onto the solid button band, directly opposite the buttonholes. Choose flat, child-safe buttons and sew them on very securely.
- Blocking: Wet block your finished cardigan. Gently wet it, shape it to the correct dimensions (chest, length, sleeve length, opening) on a flat surface (using rust-proof pins if needed), and allow it to air dry completely. Blocking will relax the stitches, open up the cluster pattern, even out any inconsistencies, and make the cardigan look beautifully professional.
Tips for Crocheting Your “Carnival” Cardigan
- Find a Pattern First! For garments, a detailed pattern is your best friend. Look for ones specifically named “Carnival,” or choose a basic cardigan pattern and adapt it with colorful stripes, or add a textured “Carnival-like” stitch.
- Embrace Color: Don’t be afraid to use bold and playful color combinations that evoke a carnival atmosphere! Stripes, color blocks, or even multi-colored “cluster” stitches can add to the theme.
- Child Safety: Always choose yarns that are soft and non-irritating for baby skin. Ensure any buttons or embellishments are securely attached and too large to be a choking hazard.
- Patience: Crocheting a garment takes time. Break it down into smaller, manageable sections, and celebrate each completed piece!
- Enjoy the Process: This is a labor of love. Have fun creating a unique and special “Carnival” cardigan for a little one!