 by
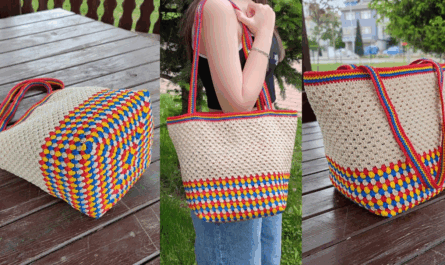
by One of the biggest problems with crocheted bags is the handles. Standard crochet stitches (like single or double crochet) tend to be elastic, meaning once you load your bag with a phone, wallet, and water bottle, the strap stretches out and the bag sags down to your knees.
The solution? Tunisian Crochet.
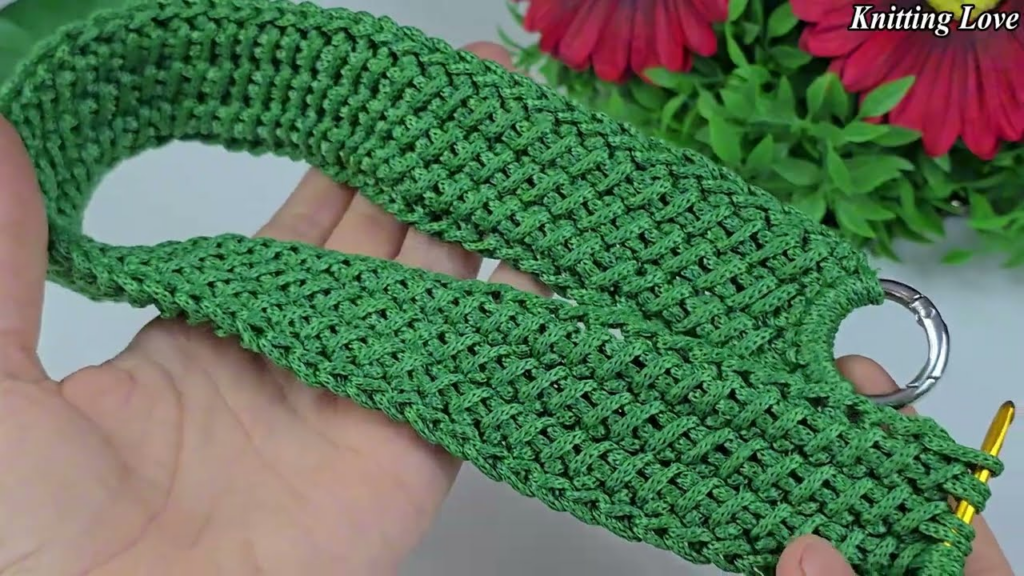
Tunisian crochet creates a fabric that is thick, dense, and woven-like. It has almost zero stretch, making it the absolute best choice for bag handles. The best part? For a narrow strap like this, you do not need a special Tunisian hook—your regular crochet hook will work perfectly!
Here is a detailed, step-by-step guide to making a professional-looking Tunisian Simple Stitch (TSS) bag strap.
Materials You’ll Need
- Yarn: For a sturdy strap, use Cotton (worsted weight/Aran) or Polyester Cord/Macrame Cord (2mm or 3mm). These fibers have minimal stretch.
- Crochet Hook: A 4.0mm (G/6) or 5.0mm (H/8) hook.
- Note: Since the strap is narrow, a regular hook is fine. However, try to use a hook without a bulky rubber handle, or one with a long shaft, so the loops have room to sit.
- Hardware (Optional but Recommended): 2 Swivel Snap Hooks or D-Rings (approx. 1 inch wide).
- Yarn Needle: For sewing and weaving in ends.
- Scissors
Key Concepts: Understanding Tunisian Crochet
Unlike standard crochet where you finish a stitch before moving to the next, Tunisian crochet works in two passes:
- Forward Pass (FwP): You keep all loops on your hook (like knitting).
- Return Pass (RetP): You work the loops off the hook one by one.
- TSS: Tunisian Simple Stitch
- YO: Yarn Over
Step-by-Step Pattern
Step 1: The Foundation
Decide how wide you want your strap. A good width for a tote or crossbody bag is usually 6 to 8 stitches.
- Attach to Hardware (Optional): If using a swivel snap hook, make a slip knot and place it on your hook. Hold the snap hook next to your crochet hook. Insert your hook through the metal ring of the snap, YO, and pull up a loop. Do this 6 times (or however wide you want the strap).
- If not using hardware: simply Chain 6.
- Foundation Forward Pass: Insert hook into the 2nd chain from hook (or back bump of the chain), YO and pull up a loop. Keep this loop on your hook. Repeat across the chain.
- You should now have 6 loops on your hook.
Step 2: The Standard Return Pass (RetP)
You will do this exact same return pass after every row.
- YO and pull through 1 loop only. (This creates the edge stitch).
- *YO and pull through 2 loops.* Repeat from * to * until only one loop remains on your hook.
- Congratulations, you have completed Row 1!
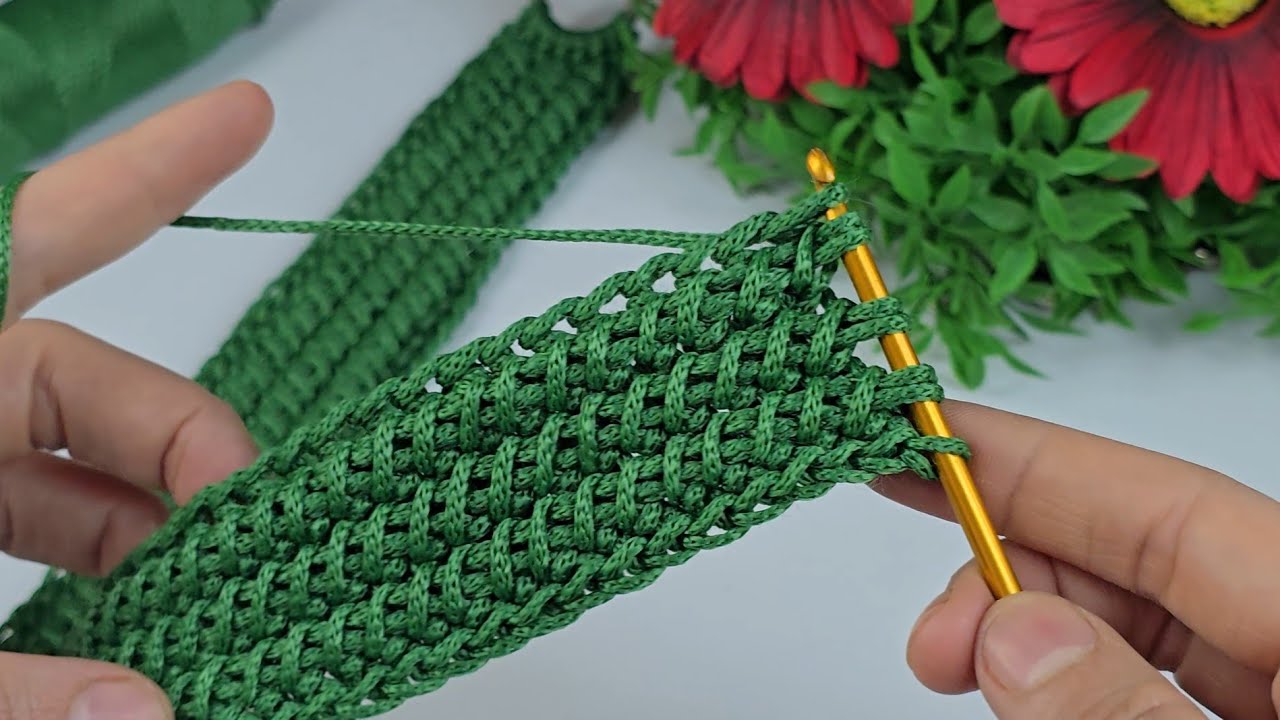
Step 3: The Tunisian Simple Stitch (Row 2 and beyond)
Now you will see “vertical bars” standing up on the front of your work.
- Forward Pass:
- Skip the very first vertical bar (the one directly under your hook).
- Insert your hook from right to left behind the next vertical bar.
- YO and pull up a loop. Keep it on the hook.
- Repeat this for every vertical bar across.
- The Last Stitch (Crucial for neat edges):
- When you reach the very last stitch on the left edge, do not just go under the vertical bar.
- Turn your work slightly sideways. You will see two loops of yarn on the edge. Insert your hook through both of these edge loops.
- YO and pull up a loop.
- Count your loops: You should still have 6 loops on your hook.
- Return Pass:
- Repeat Step 2 (YO pull through 1, then YO pull through 2 until the end).
Step 4: Building the Length
Repeat Step 3 over and over.
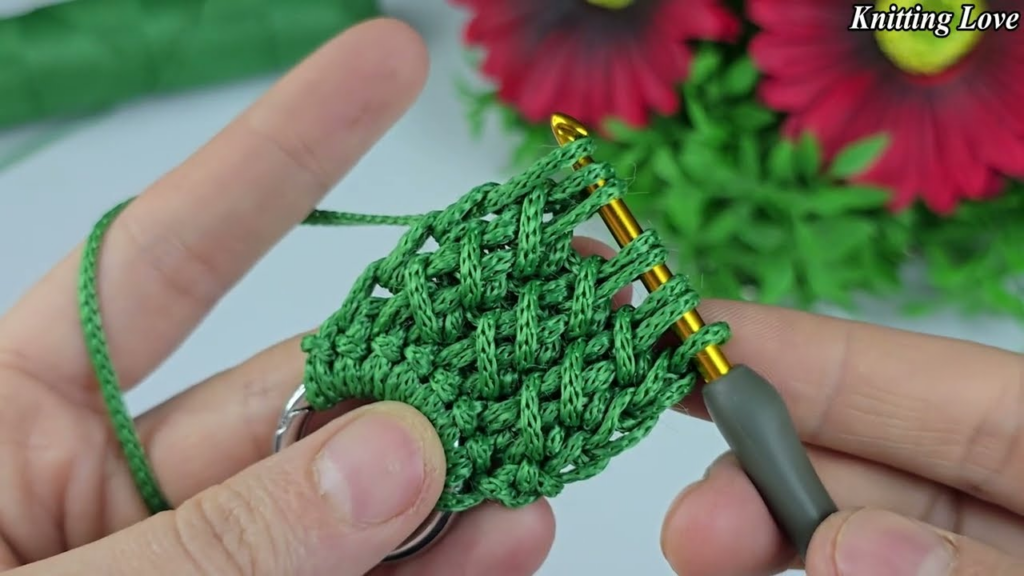
You will notice the fabric growing very thick and sturdy. It will look like a grid on the front and will look almost like purled knitting on the back. Continue until the strap reaches your desired length (approx. 40-50 inches for a crossbody bag, or 20 inches for a shoulder bag).
Step 5: Binding Off
You cannot just stop after a return pass, or you will have gaps at the top. You need to finish with a slip stitch row.
- Insert your hook under the next vertical bar (just like a normal TSS).
- YO and pull up a loop.
- Pull that loop directly through the loop on your hook (Slip Stitch).
- Repeat across all vertical bars.
- If using a D-ring or Snap Hook on the other end: When you slip stitch, insert your hook through the vertical bar AND the metal ring of the hardware at the same time to attach it securely.
Why This Strap is “Perfect”
- The “No-Stretch” Factor: Because you are pulling up loops and locking them in place with the return pass, the vertical tension is very tight. This strap will maintain its length even with a heavy bag.
- Comfort: The fabric created is almost double the thickness of standard single crochet. This creates a natural cushioning that sits comfortably on your shoulder without digging in.
- Aesthetics: It looks professional. The texture resembles a store-bought woven strap rather than a typical “crafty” crochet chain.
Assembly Tips
- Direct Sewing: If you didn’t use metal hardware, simply place the ends of the strap inside your bag (about 1 inch deep). Sew a square box with an “X” inside it through the bag and strap. This is the strongest way to sew a handle.
- Blocking: Tunisian crochet tends to curl slightly. However, for a narrow strap, this is actually an advantage as it makes the strap curve inward into a tube shape. If you want it perfectly flat, give it a quick steam with an iron before attaching it.