 by
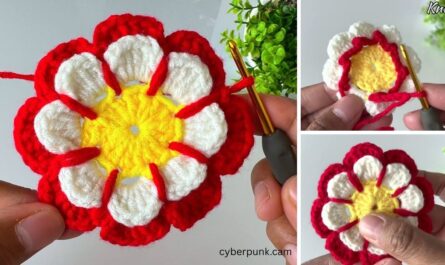
by That’s a fantastic idea! Combining a beautiful motif with a 3D flower for a crochet coaster creates a truly special and decorative piece. This project focuses on building a lovely multi-petal flower motif that inherently has a 3D quality, and then using it as a coaster.
For a functional coaster in Phnom Penh’s climate, 100% cotton yarn is always the best choice. It’s absorbent, heat-resistant, durable, and easy to wash.

How to Make a Beautiful Motif Crochet Coaster – 3D Flower Motif
This pattern will guide you through creating a charming layered flower motif that serves as a coaster. We’ll build the flower in rounds, creating its 3D effect as we go.
1. Essential Materials You’ll Need
- Yarn:
- Main Flower Color: 100% Worsted Weight Cotton Yarn (approx. 20-30 yards / 18-27 meters). This will be for most of your petals.
- Center Color (Optional, but recommended for contrast): Very small amount of 100% Worsted Weight Cotton Yarn (e.g., yellow, brown, or a contrasting color to your petals).
- Accent Color (Optional, for outer round if desired): Small amount of 100% Worsted Weight Cotton Yarn.
- Crochet Hook: 4.0mm (US G/6) or 4.5mm (US 7). Choose a size that gives you a firm, dense fabric for the coaster without being too stiff.
- Scissors: For cutting yarn.
- Yarn Needle (Tapestry Needle): Essential for weaving in ends.

2. Basic Crochet Stitches You’ll Use
This beautiful motif primarily uses the following stitches:
- Chain (ch): To begin and create spaces.
- Slip Stitch (sl st): For joining rounds and neatening.
- Single Crochet (sc): A short, dense stitch.
- Half Double Crochet (hdc): A medium-height stitch.
- Double Crochet (dc): A taller stitch, used for most petals.
- Triple/Treble Crochet (tr): An even taller stitch, used for some petals for added height/dimension.
- Magic Ring (MR): (Also called Magic Circle) This is the best way to start small, tight circles without a gap in the center.
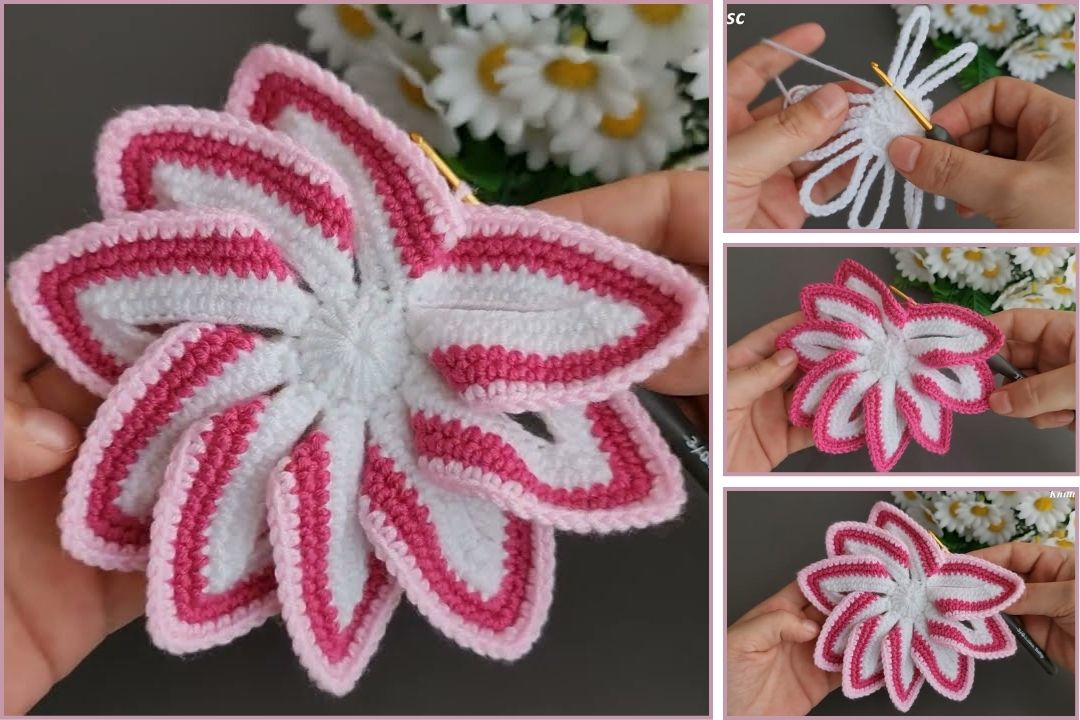
The Beautiful 3D Flower Motif Coaster Pattern
We’ll build this flower from the center outwards, creating layers of petals that naturally give it a 3D effect.
Abbreviations (US Crochet Terms):
- ch: chain
- sl st: slip stitch
- sc: single crochet
- hdc: half double crochet
- dc: double crochet
- tr: triple crochet (or treble crochet)
- MR: magic ring
- st(s): stitch(es)
Start (Flower Center – Use Center Color, or Main Flower Color):
- Create a Magic Ring (MR).
- Rnd 1: Ch 1 (does NOT count as a stitch). Work 10 sc into the Magic Ring. Pull the ring tight. Join with a sl st to the top of the first sc. (10 sc)
- This forms the small, tight center of your flower.

First Layer of Petals (Smaller, Inner Petals – Use Main Flower Color):
- Rnd 2: Ch 1 (does NOT count as a stitch).
- *In the same stitch where you just joined, work (1 sc, 1 hdc, 1 sc).
- Sl st into the next stitch.*
- Repeat from * to * 4 more times around. (You will have created 5 petals).
- Join with a sl st to the very first sc of the round.
- These are your first set of small, delicate petals.
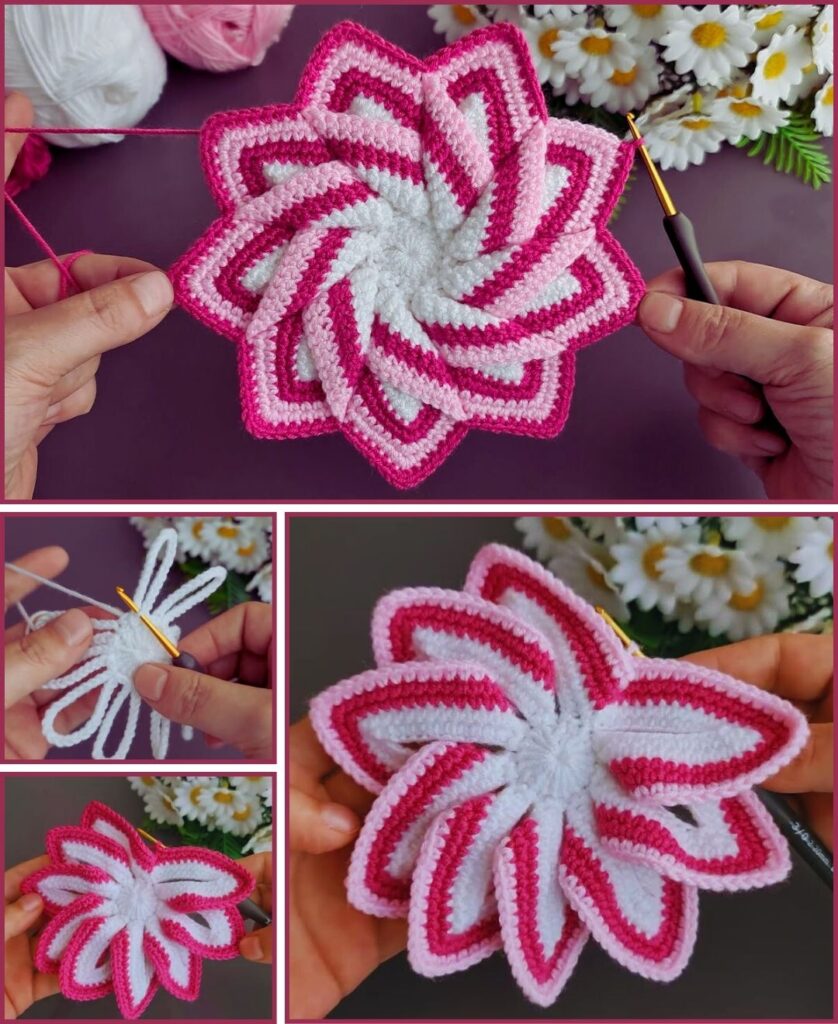
Second Layer of Petals (Larger, Underlying Petals – Use Main Flower Color):
This layer will emerge from behind the first layer of petals, giving the flower its initial 3D lift. You’ll work into the slip stitches or spaces from Rnd 1.
- Rnd 3: Ch 2 (does NOT count as a stitch).
- *Work (1 dc, 1 tr, 1 dc) into the next slip stitch or space between the petal bases from Rnd 1 (these are the slip stitches you made in Rnd 2, connecting to Rnd 1).
- Sl st into the next available sc from Rnd 1’s stitches.*
- Repeat from * to * 4 more times around. (You will have created 5 larger petals, each appearing to pop up from behind the first layer).
- Join with a sl st to the base of your starting Ch 2.
- This is where the flower starts to become truly dimensional.

Third Layer of Petals (Fullest Outer Petals – Use Main Flower Color or Accent Color):
This final layer of petals will create the fullest, most open appearance of your flower.
- Rnd 4: Ch 1 (does NOT count as a stitch).
- *Work 1 sc in the next dc (the middle stitch of one of the petals from Rnd 3).
- Ch 3.
- Work (1 dc, 1 tr, 1 tr, 1 dc) into the next tr (the tallest stitch of the petal from Rnd 3).
- Ch 3.
- Work 1 sc in the next dc (the last stitch of the same petal from Rnd 3).*
- Repeat from * to * 4 more times around. (You will have created 5 large, full petals).
- Join with a sl st to the very first sc of the round.
- Final Coaster Round (Optional – for a larger, flatter coaster edge):
- Rnd 5: Ch 1 (does not count as st).
- Work 1 sc in each sc around.
- When you reach a Ch-3 space, work 3 sc into the Ch-3 space.
- When you reach a petal (the (dc, tr, tr, dc) cluster), work 1 sc into each dc and tr stitch.
- Continue this pattern around the entire motif. This will create a more defined, sturdy edge for your coaster. Adjust stitch count to keep it flat.
- Join with a sl st to the first sc. (You should have a total of 50 sc if all stitches are placed correctly – 5 petals * (3 sc + 4 sc + 3 sc) = 5 * 10 = 50 sc).

Finishing Your Beautiful Motif Coaster
- Fasten Off: Cut your yarn, leaving a tail of about 6-8 inches (15-20 cm). Yarn over your hook, pull the tail completely through the loop, and pull tight to secure.
- Weave in All Ends: This is crucial for a professional-looking and durable coaster. Use your yarn needle to carefully weave in every single yarn tail. Go back and forth through stitches on the back of the motif, making sure they are well hidden and secure.
- Blocking (Highly Recommended):
- Gently wet your entire flower coaster.
- Carefully squeeze out excess water (do not wring!).
- Lay it flat on a clean towel or a foam blocking mat. Gently shape the petals, fanning them out and arranging them nicely. Pin them down if necessary to ensure the coaster lays perfectly flat and the petals are well-defined.
- Allow it to air dry completely. Blocking makes a huge difference in the final appearance, making your coaster lay flat and showcasing its beautiful 3D details.
Tips for Making a Beautiful Motif Coaster
- Tension: Consistent tension is key to beautiful, even stitches and a flower that sits nicely.
- Read Carefully: Especially for the petal placement (working into specific stitches or spaces from previous rounds), read each step slowly.
- Stitch Markers: If you’re unsure about where a round starts or ends, use a stitch marker.
- Yarn Colors: Experiment with colors! A bright center with lighter petals, or a solid color throughout, can all create different stunning effects.
- Practice: If the first one isn’t perfect, don’t worry! Crochet takes practice, and each rose will look better than the last.
You’ve now created a truly beautiful and decorative crochet coaster with a stunning 3D flower motif. Enjoy showcasing your lovely handmade creation!