 by
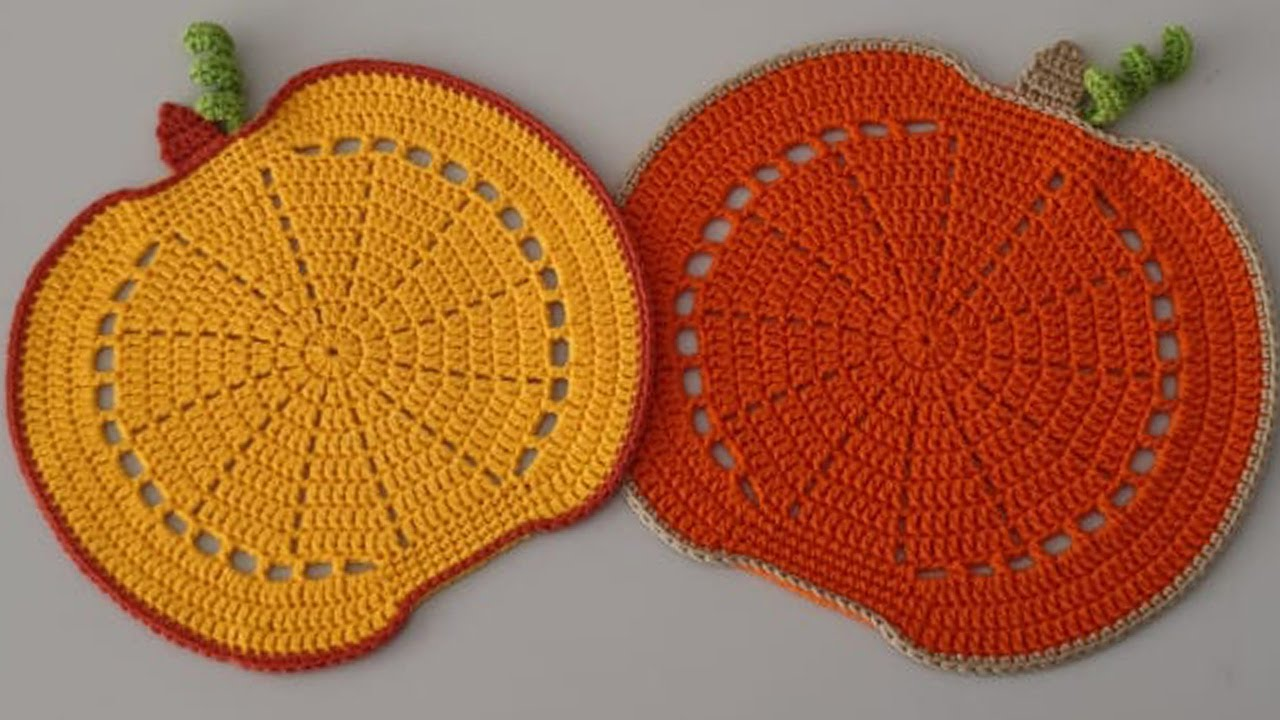
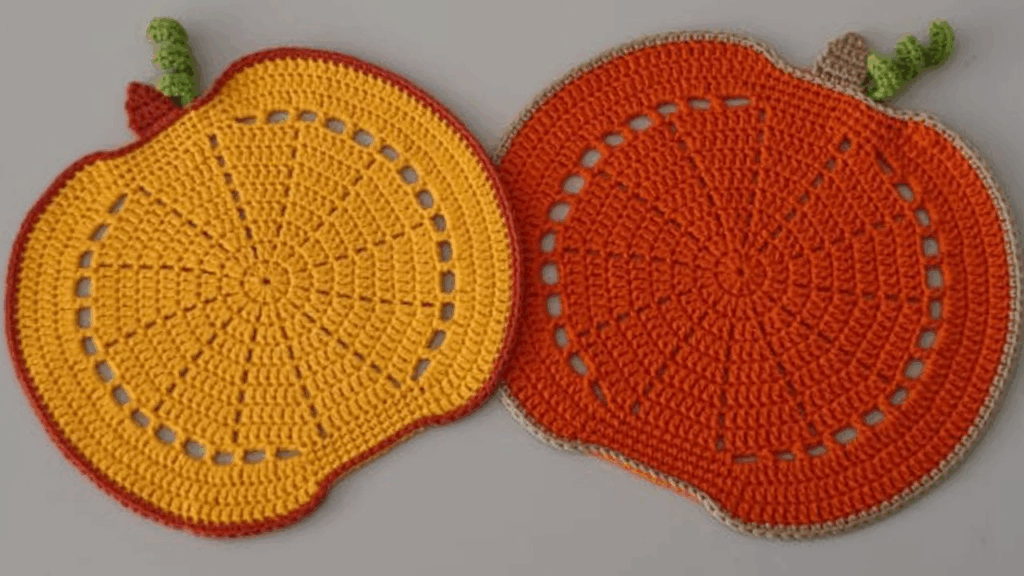
by That’s a fantastic idea! A crochet pumpkin placemat is a charming and festive way to decorate for autumn, Halloween, or Thanksgiving, or simply to add a touch of fall coziness to your dining table. It’s a fun project that allows you to combine shaping techniques with textural details to bring a beloved seasonal motif to life.
Given that it’s warm in Phnom Penh, choosing the right yarn is still important for placemats. 100% cotton yarn is highly recommended. Cotton is durable, absorbent (great for any condensation or spills), easy to wash (essential for placemats!), and holds its shape well. It also provides excellent stitch definition, which is perfect for creating the distinct ridges of a pumpkin.
How to Crochet a Pumpkin Placemat: A Detailed Guide
This tutorial will guide you through creating a pumpkin-shaped placemat. We’ll achieve the pumpkin’s iconic roundness and ridges by working in the round and using specific stitch placements.
1. Essential Materials You’ll Need
- Yarn:
- Main Color (MC – Orange): Worsted Weight (Aran / Medium / Category 4) 100% Cotton Yarn. You’ll need approximately 200-300 grams (about 350-500 yards) for one placemat.
- Accent Color 1 (AC1 – Green/Brown for Stem): Small amount of Worsted Weight Cotton Yarn.
- Accent Color 2 (AC2 – Green for Vine/Leaf, Optional): Small amount of Worsted Weight Cotton Yarn.
- Crochet Hook:
- A 4.5mm (US 7) or 5.0mm (US H/8) hook. The goal is to create a dense, firm fabric for your placemat so it lies flat and offers good protection. If your stitches are naturally loose, go down a hook size.
- Scissors: For cutting yarn.
- Yarn Needle (Tapestry Needle): Essential for weaving in ends and attaching the stem/leaf.
- Stitch Marker (Optional but helpful): To mark the beginning of rounds when working in a continuous spiral, or for specific stitches.
2. Basic Crochet Stitches You’ll Use
This project utilizes fundamental crochet stitches and working in the round:
- Magic Ring (MR) / Adjustable Ring: (Highly Recommended!) Creates a tight, hole-free center. Alternatively, you can
ch 4andsl stto the first chain to form a ring. - Chain (ch): For starting, turning, and creating spaces.
- Slip Stitch (sl st): For joining rounds.
- Single Crochet (sc): A dense, short stitch.
- Half Double Crochet (hdc): A versatile, medium-height stitch.
- Double Crochet (dc): A taller stitch, used for shaping.
- Back Loop Only (BLO): Working only into the back loop of the stitch, which helps create a ribbed effect for pumpkin ridges.
- Front Loop Only (FLO): Working only into the front loop.
- Increase (inc): Work 2 stitches into the same stitch.
- Fasten Off: To securely end your work.
- Weaving in Ends: Hiding yarn tails for a neat and professional finish.
Crochet Pumpkin Placemat Pattern (Approx. 12-14 inches diameter)
This pattern creates a circular pumpkin shape with visible ridges. You’ll mostly work in a continuous spiral for the main pumpkin body, so a stitch marker is recommended.
Abbreviations (US Crochet Terms):
- MC: Main Color (Orange)
- AC1: Accent Color 1 (Stem)
- AC2: Accent Color 2 (Vine/Leaf)
- MR: Magic Ring
- ch: chain
- sl st: slip stitch
- sc: single crochet
- hdc: half double crochet
- dc: double crochet
- BLO: Back Loop Only
- inc: increase (work 2 stitches into the same stitch)
- st(s): stitch(es)
- FO: Fasten off
Part 1: Pumpkin Body (Main Color – MC)
We’ll work in continuous rounds for the pumpkin body to avoid a visible seam. Place a stitch marker in the first stitch of each round and move it up as you go.
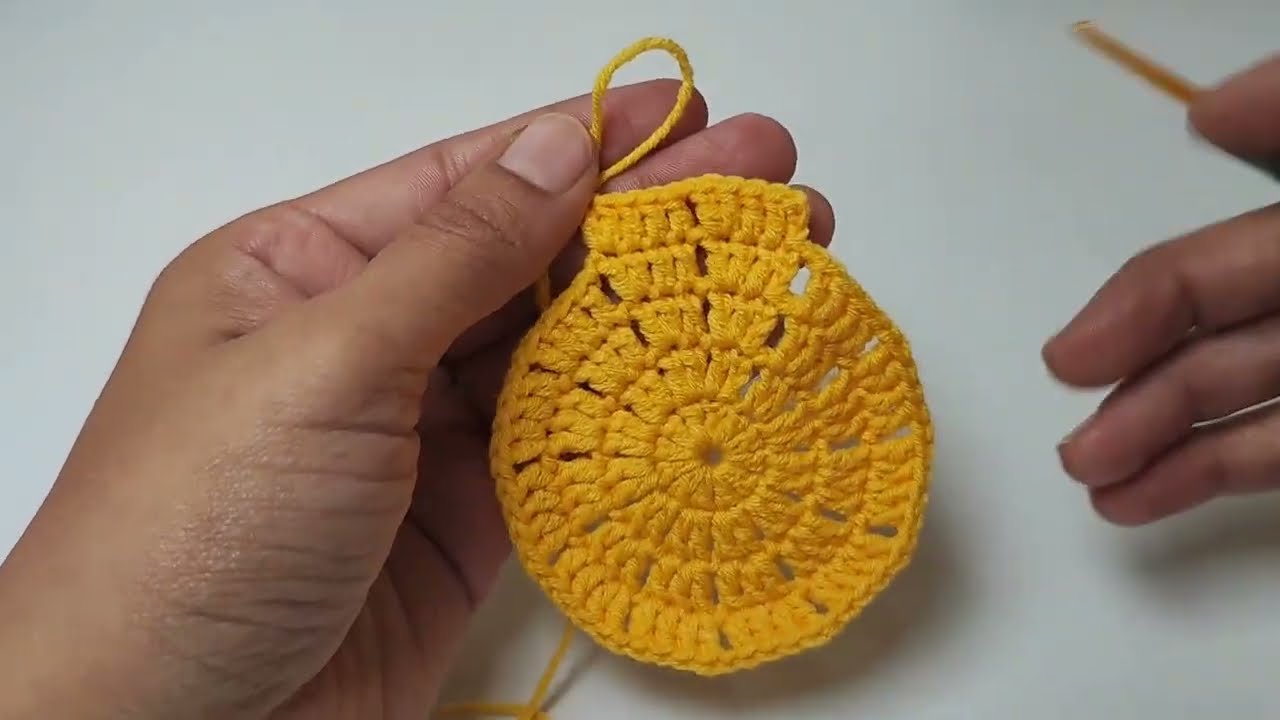
- Round 1: With MC, create a MR. Ch 2 (does not count as a stitch). Work 10 hdc into the MR. (10 hdc)
- Pull the MR tail to close the center hole tightly. Weave in this starting tail now.
- Round 2: Inc hdc in each st around. (20 hdc)
- Round 3:
*Hdc in the next st, inc hdc in the next st.*Repeat 10 times around. (30 hdc) - Round 4:
*Hdc in the next 2 sts, inc hdc in the next st.*Repeat 10 times around. (40 hdc) - Round 5:
*Hdc in the next 3 sts, inc hdc in the next st.*Repeat 10 times around. (50 hdc) - Round 6:
*Hdc in the next 4 sts, inc hdc in the next st.*Repeat 10 times around. (60 hdc) - Round 7:
*Hdc in the next 5 sts, inc hdc in the next st.*Repeat 10 times around. (70 hdc) - Round 8:
*Hdc in the next 6 sts, inc hdc in the next st.*Repeat 10 times around. (80 hdc) - Round 9:
*Hdc in the next 7 sts, inc hdc in the next st.*Repeat 10 times around. (90 hdc) - Round 10:
*Hdc in the next 8 sts, inc hdc in the next st.*Repeat 10 times around. (100 hdc) - Round 11:
*Hdc in the next 9 sts, inc hdc in the next st.*Repeat 10 times around. (110 hdc) - Round 12:
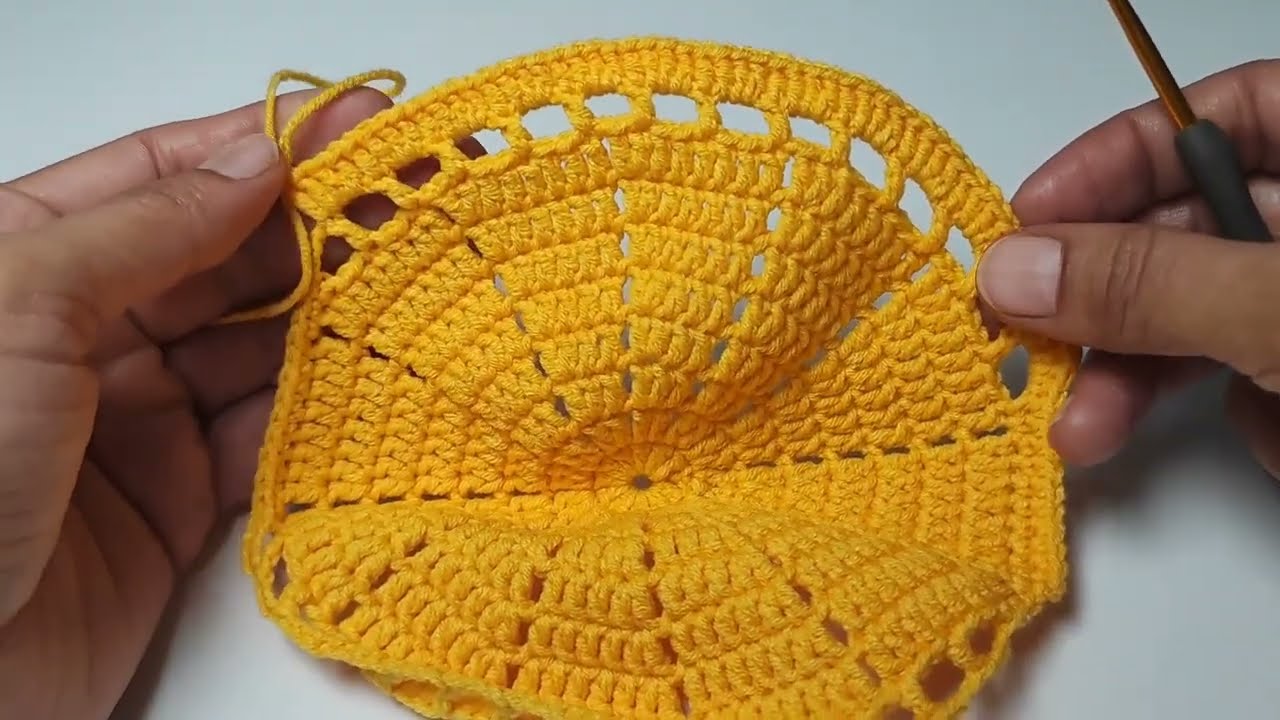
*Hdc in the next 10 sts, inc hdc in the next st.*Repeat 10 times around. (120 hdc) - Round 13 (Ridges): Sc in BLO of each st around. (120 sc)
- Round 14:
*Hdc in the next 11 sts, inc hdc in the next st.*Repeat 10 times around. (130 hdc) - Round 15 (Ridges): Sc in BLO of each st around. (130 sc)
- Round 16:
*Hdc in the next 12 sts, inc hdc in the next st.*Repeat 10 times around. (140 hdc) - Round 17 (Ridges):Sc in BLO of each st around. (140 sc)
- At this point, your pumpkin should be about 12-14 inches in diameter. If you want it larger, continue adding more rounds, alternating between hdc increase rounds and BLO sc rounds, following the same increase pattern (e.g., Round 18:
*Hdc in next 13 sts, inc hdc*, etc. followed by another BLO sc round).
- At this point, your pumpkin should be about 12-14 inches in diameter. If you want it larger, continue adding more rounds, alternating between hdc increase rounds and BLO sc rounds, following the same increase pattern (e.g., Round 18:
- Sl st into the next st to finish the round cleanly. FO MC, leaving a tail for weaving in. Weave in this tail.

Part 2: Pumpkin Stem (Accent Color 1 – AC1)
The stem is crocheted in a small tube.
- With AC1, ch 8.
- Round 1: Sc in the 2nd ch from hook, and in each ch across. (7 sc). Do not turn.
- Round 2: Join the ends of your row to form a tube: sl st into the first sc to create a circle. Ch 1. Sc in each sc around. (7 sc)
- Rounds 3-6: Sc in each st around (working in a continuous spiral). (7 sc per round)
- Stuff the stem lightly with fiberfill as you go, or it will be too narrow to stuff later.
- Round 7 (Optional decrease for taper): Sc2tog, sc in next 5 sts. (6 sc)
- FO AC1, leaving a long tail (at least 10-12 inches / 25-30 cm) for sewing onto the pumpkin.
Part 3: Pumpkin Vine (Accent Color 2 – AC2 – Optional)
A curly vine adds a nice touch!
- With AC2, ch 20.
- Work 3 hdc into the 2nd ch from hook, and into each ch across. This will make the chain curl.
- FO AC2, leaving a tail for sewing.
Part 4: Pumpkin Leaf (Accent Color 2 – AC2 – Optional)
A simple leaf adds to the autumnal theme.
- With AC2, ch 5.
- Sl st in 2nd ch from hook. Sc in next ch. Hdc in next ch. Dc in last ch.
- Ch 2. Turn work. Sl st into the side of the last dc to form the leaf point.
- Working down the other side of the starting chain: Dc in the side of the dc. Hdc in the side of the hdc. Sc in the side of the sc. Sl st in the last sl st.
- FO AC2, leaving a tail for sewing.
Part 5: Assembly & Finishing
- Weave in ALL Remaining Ends: This is paramount for a professional and durable finish. Take your time to hide every single yarn tail (especially from the fastens off and color changes) securely on the backside of your pumpkin placemat and its accessories.
- Attach Stem:
- Position the stem at the top center of your pumpkin placemat.
- Use the long tail from the stem and your yarn needle to securely sew the base of the stem to the center of the pumpkin. Stitch around the entire base several times to ensure it’s firmly attached.
- Attach Vine & Leaf (Optional):
- Position the vine(s) and leaf (if made) around the base of the stem in a pleasing arrangement.
- Use your yarn needle to stitch them securely in place. For the vine, a few stitches at the base and perhaps one or two along the curl to hold its shape are usually sufficient.
- Blocking (Highly Recommended!): Blocking makes a significant difference for flat crochet pieces like placemats. It helps to:
- Even out your stitches and tension.
- Ensure the placemat lays perfectly flat and maintains its round (or slightly oval, like a pumpkin) shape.
- Sharpen and define the ridges.
- Method:
- Gently wet your finished pumpkin placemat. You can submerge it in cool water with a tiny bit of mild soap, then gently squeeze out excess water (without twisting), or simply mist it thoroughly with a spray bottle until damp.
- Lay it flat on a blocking mat, a clean towel, or any flat, even surface where it can dry undisturbed.
- Gently stretch and shape the pumpkin into a smooth circle or desired pumpkin-like oval. You can use rust-proof pins to hold the edges in place and even to define the ridges if you wish.
- Allow it to air dry completely. This might take several hours or even overnight. Do not use heat (like a hairdryer) as it can distort cotton yarn and ruin your work.

Tips for a Beautiful Pumpkin Placemat
- Consistent Tension: This is the most important aspect for a flat, even placemat that doesn’t buckle or wave.
- Counting Stitches: In increase rounds, always count your stitches at the end of each round to ensure your pumpkin grows evenly and remains flat.
- Defining Ridges: The
sc in BLOrounds create the subtle ridges. You can emphasize them further by lightly pressing along them during blocking. - Yarn Quality: Cotton yarn is best for its practicality and stitch definition.
- Size Adjustment: To make a smaller or larger pumpkin, adjust the number of increase rounds. Keep the increase pattern consistent (e.g., increasing by 10 stitches per hdc round).
- Personalize It: Experiment with different shades of orange, or even a cream/white pumpkin! Add embroidered facial features for a Halloween placemat.
- Gift Idea: A set of these pumpkin placemats makes a wonderful hostess gift for fall gatherings!
You’re now ready to crochet a beautiful and festive pumpkin placemat! Enjoy bringing this cozy autumn touch to your dining area.