 by
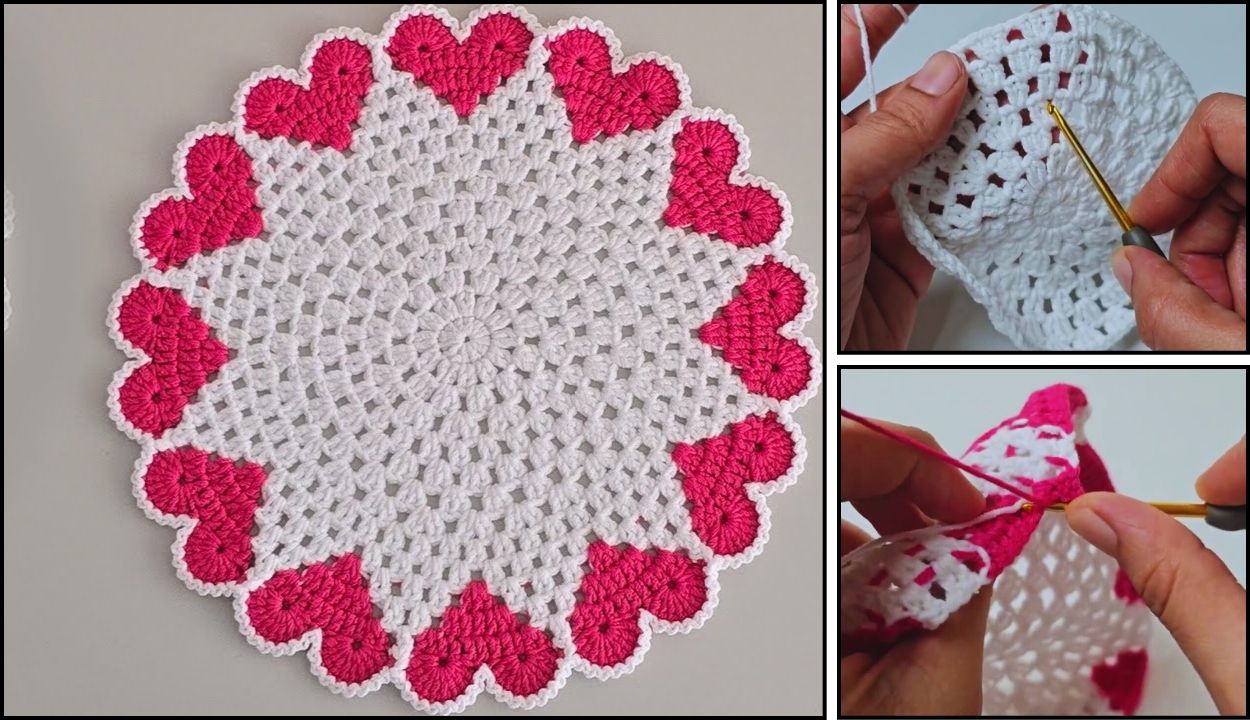
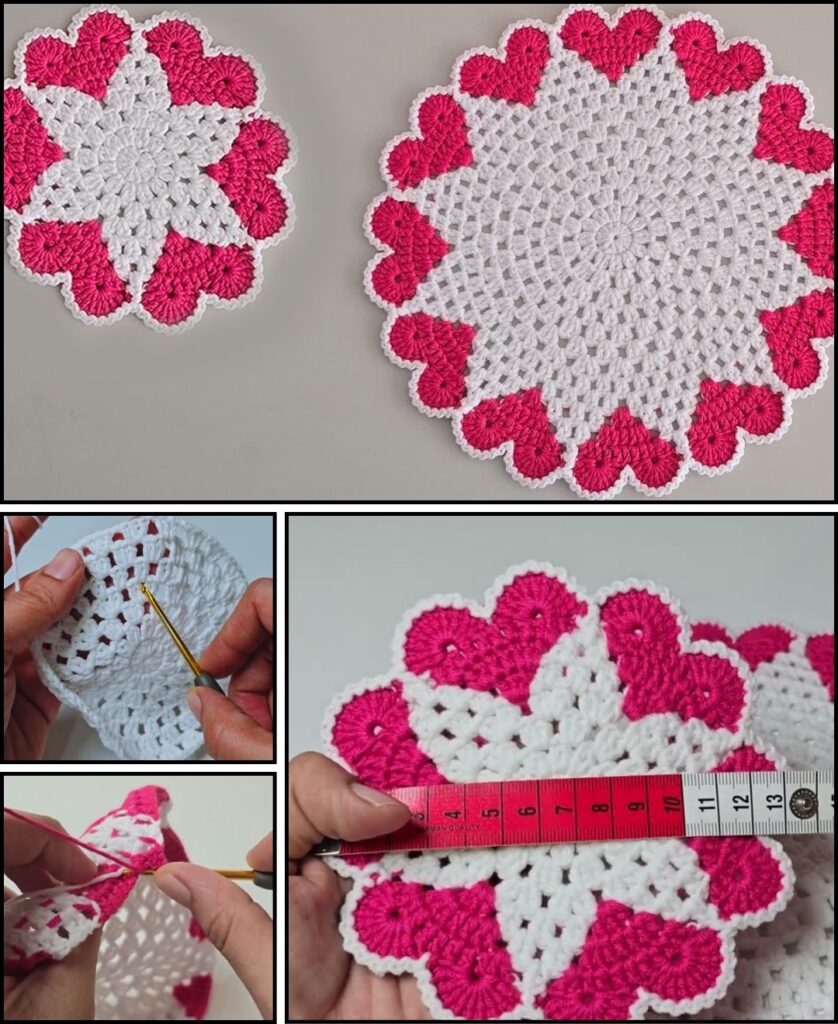
by Creating a crochet heart placemat and coaster set is a wonderfully charming project that brings a touch of handmade warmth and affection to any dining table! This set is perfect for special occasions like Valentine’s Day, anniversaries, or simply to brighten your everyday meals. It’s also a thoughtful gift idea. While it involves making two different sizes of the same basic shape, the techniques are quite beginner-friendly for anyone comfortable with working in the round and mastering a few basic stitches.
Given that it’s currently warm in Phnom Penh, 100% cotton yarn is an excellent choice for these items. Cotton is highly durable, wonderfully absorbent (essential for coasters to soak up condensation), easy to wash (a must for table linens that might encounter spills), and holds its shape well, even when damp. It also provides fantastic stitch definition, which will make your heart shapes look crisp and beautiful.

How to Crochet a Heart Placemat & Coaster Set
This tutorial will guide you through creating a heart motif that can be scaled up or down to make both a coaster and a placemat. The core of this project lies in crocheting two separate “bumps” (the rounded top parts of the heart) and then seamlessly joining them to form the full heart shape.
1. Essential Materials You’ll Need
- Yarn:
- Main Color: Choose a color you love for your hearts – traditional red, pink, or white, or perhaps a modern grey, blue, or green. Worsted Weight (Aran / Medium / Category 4) 100% Cotton Yarn is highly recommended.
- For one placemat and one coaster, you’ll likely need about 200-300 grams (approximately 350-500 yards) of worsted weight cotton yarn, depending on your individual tension and the exact finished size you desire for your pieces.
- Crochet Hook:
- A 4.0mm (US G/6) or 4.5mm (US 7) hook. The key is to select a hook size that creates a dense, firm fabric. This is crucial for both the placemat and coaster to lay flat, maintain their shape, and offer good protection for your surfaces. If you naturally crochet loosely, consider going down a hook size.
- Scissors: For cleanly cutting your yarn.
- Yarn Needle (Tapestry Needle): Absolutely essential for neatly weaving in all your yarn ends, which contributes significantly to a polished, professional finish.
- Stitch Markers (at least 2, optional but helpful): These can be very useful for marking specific stitches, especially the beginning of a round or critical turning points, which can help beginners keep track.
2. Basic Crochet Stitches You’ll Use
This project primarily utilizes fundamental crochet stitches that are commonly learned early on:
- Magic Ring (MR) / Adjustable Ring: (Highly Recommended!) This technique creates a super tight, hole-free center for your initial “bumps,” which is ideal for a clean start. As an alternative, if the Magic Ring is challenging, you can
ch 4and thensl stinto the first chain to form a ring, and work your first round of stitches into this chain ring. - Chain (ch): Used for creating your initial foundation, for turning, and for forming small connecting spaces.
- Slip Stitch (sl st): Used for joining rounds seamlessly and for moving your hook neatly across stitches without adding height.
- Single Crochet (sc): A very dense, short stitch, which is great for creating firm edges or for adding a neat border.
- Half Double Crochet (hdc): A versatile, medium-height stitch that builds fabric quickly and provides good density. It’s often used for the main body of this pattern.
- Double Crochet (dc): A taller stitch that expands fabric more rapidly, used for larger pieces like the placemat.
- Treble Crochet (tr) / Triple Crochet: An even taller stitch (sometimes used in larger patterns for quicker expansion, though not explicitly in this core pattern, it’s good to be aware of).
- Increase (inc): This refers to working 2 stitches into the same stitch, which is how you expand your crochet fabric in the round to keep it flat and prevent curling.
- Fasten Off: The method used to securely end your piece of crochet, creating a neat knot.
- Weaving in Ends: The process of using a yarn needle to hide any remaining yarn tails within your finished work, making it look professional and preventing unraveling.
Crochet Heart Pattern (for both Coaster & Placemat)
The core pattern for each heart is identical in its initial shaping; you’ll simply continue for more rounds (and potentially use taller stitches) to make a placemat, or stop earlier for a coaster.
Abbreviations (US Crochet Terms):
- MR: Magic Ring
- ch: chain
- sl st: slip stitch
- sc: single crochet
- hdc: half double crochet
- dc: double crochet
- st(s): stitch(es)
(...): work stitches into the same stitch or space[...]: repeat instructions in brackets- FO: Fasten off
Part 1: First “Bump” of the Heart (Make 1)
This section forms one of the two rounded top parts of your heart.
- Start with your chosen yarn color.
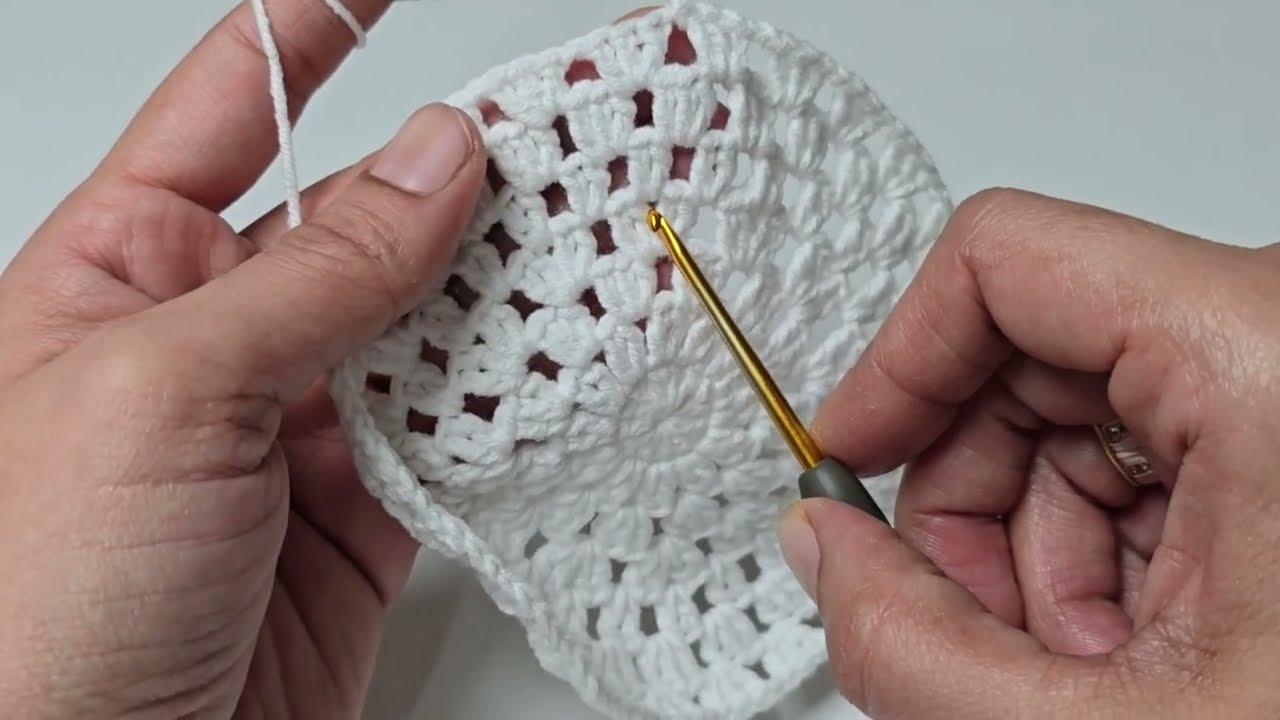
- Round 1: Create a MR. Ch 2 (this chain does not count as a stitch). Work 9 dc into the Magic Ring. Join with a sl st to the top of the very first dc you made (not the ch-2). (You should have 9 dc stitches in this round).
- Gently pull the tail of the Magic Ring to close the center hole tightly. For neatness and security, it’s a good idea to weave in this short starting tail now.
- Fasten Off, leaving a tail about 4-6 inches (10-15 cm) long.
Part 2: Second “Bump” of the Heart (Make 1)
This section forms the second rounded top part of your heart.
- Repeat all steps for Part 1 exactly.
- Crucially, DO NOT Fasten Off this second bump. Keep the yarn attached to your hook, as you will use it immediately to join the two bumps together.
Part 3: Joining the Bumps & Shaping the Heart
Now, with the yarn still attached to your second bump, we’ll connect them and begin to form the distinct heart shape.
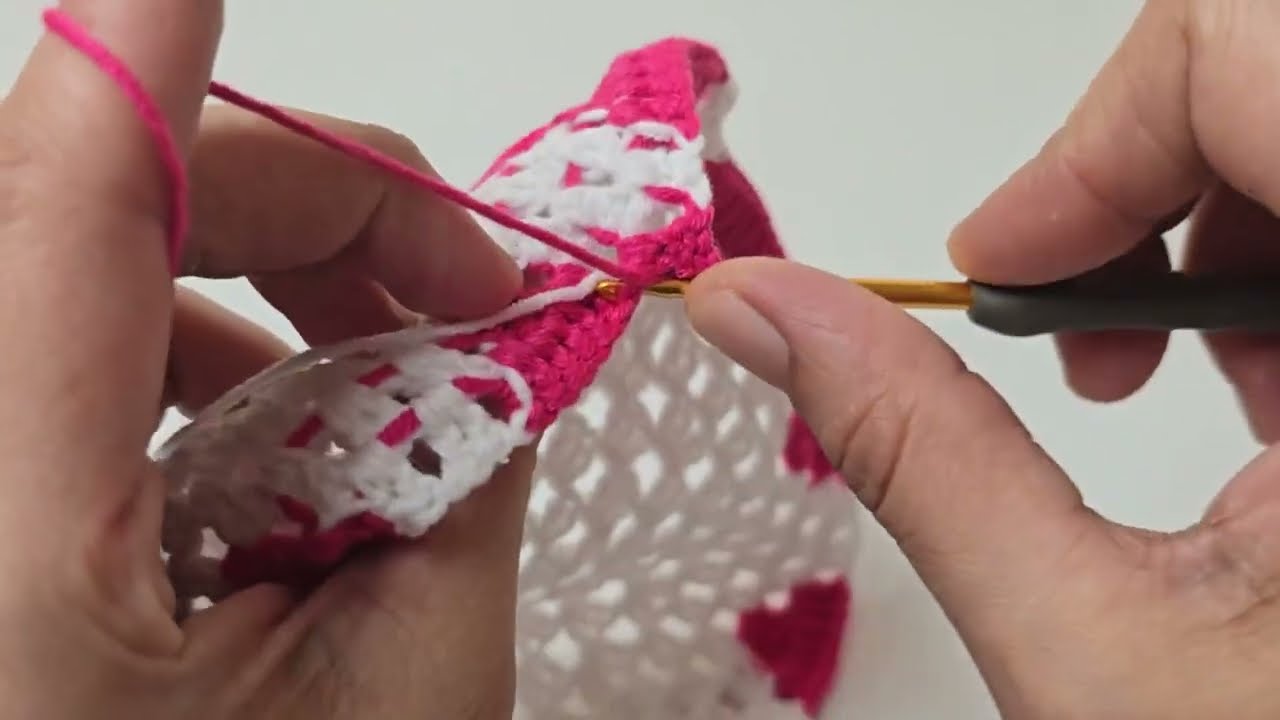
- With the second bump still on your hook (do not chain or turn), insert your hook into the last dc of the first bump (the one you fastened off earlier).
- Make a sl st into that stitch to join the two bumps together. This creates the neat, central dip at the top of the heart.
- Ch 2 (this counts as your first hdc for this round).
- Work 8 hdc into the remaining 8 dc stitches of the first bump. (At this point, you’ve worked into 9 stitches of the first bump, including the sl st join and the new ch-2).
- Now, work 9 hdc into the 9 dc stitches of the second bump.
- You should now be back at the point where the two bumps were originally joined by that slip stitch in Step 2. Work 2 hdc into that specific joining sl st from Step 2. (This increase helps to create the sharp bottom point of the heart).
- Now, work back along the underside of the first bump: Work 9 hdc into the 9 dc stitches of the first bump (the ones on the “other side” you haven’t worked into yet).
- Finally, work 9 hdc into the 9 dc stitches of the second bump (the ones on the “other side” you haven’t worked into yet).
- Join with a sl st to the top of the beginning ch 2 from Step 3. (You should now have a total of 40 hdc stitches in this combined round).
Part 4: Expanding for Coaster or Placemat
This is the point where you decide the size of your heart. You’ll add more rounds, increasing stitches evenly to ensure the heart lays flat and doesn’t curl.
For the Coaster (Continue from Part 3):
- Round 4: Ch 2 (counts as 1st hdc). Hdc in the same stitch.
*Hdc in the next 3 stitches, then inc hdc (work 2 hdc into the next stitch).*Repeat from*to*9 times around the entire heart.- Join with a sl st to the top of the beginning ch 2. (You should have 50 hdc stitches in this round).
- Round 5 (Optional Border): Ch 1 (does not count as a stitch). Sc in each stitch around. Join with a sl st to the first sc. (You should still have 50 sc stitches).
- Fasten Off, leaving a tail for weaving in. Weave in all remaining yarn ends neatly.
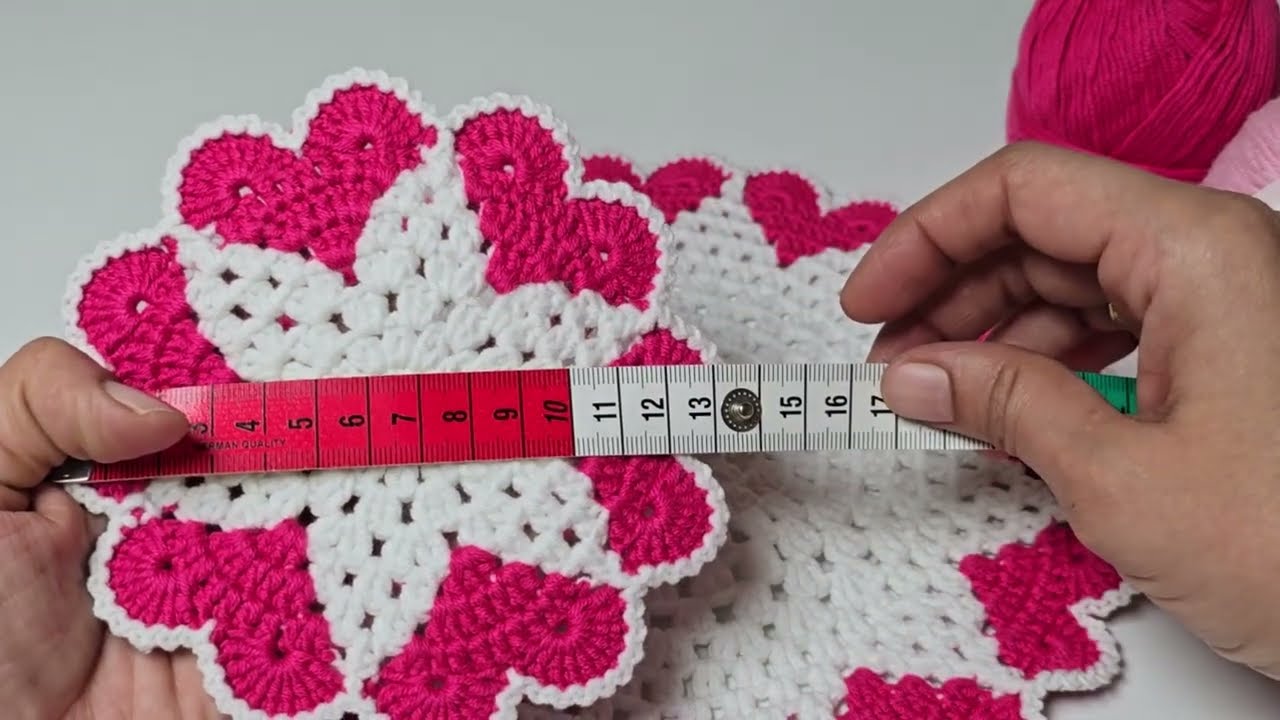
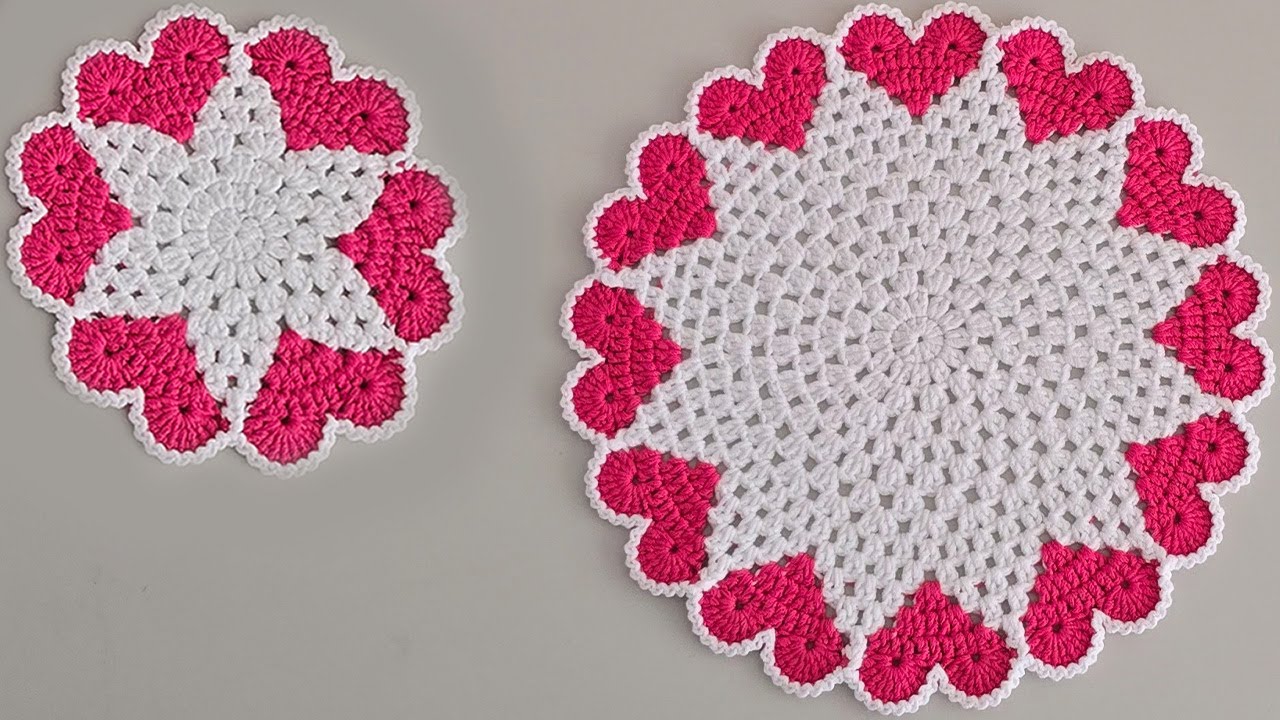
- Your finished coaster should be approximately 4-5 inches (10-12.5 cm) wide.
For the Placemat (Continue from Part 3):
You will work more increase rounds, and potentially switch to taller stitches (dc, tr) in later rounds to make the placemat expand more quickly.
- Round 4: Ch 2 (counts as 1st hdc). Hdc in the same stitch.
*Hdc in the next 3 stitches, then inc hdc in the next stitch.*Repeat from*to*9 times around.- Join with a sl st to the top of the beginning ch 2. (50 hdc)
- Round 5: Ch 2 (counts as 1st hdc). Hdc in the same stitch.
*Hdc in the next 4 stitches, then inc hdc in the next stitch.*Repeat from*to*9 times around.- Join with a sl st to the top of the beginning ch 2. (60 hdc)
- Round 6: Ch 3 (counts as 1st dc). Dc in the same stitch.
*Dc in the next 4 stitches, then inc dc in the next stitch.*Repeat from*to*11 times around.- Join with a sl st to the top of the beginning ch 3. (72 dc)
- Round 7: Ch 3 (counts as 1st dc). Dc in the same stitch.
*Dc in the next 5 stitches, then inc dc in the next stitch.*Repeat from*to*11 times around.- Join with a sl st to the top of the beginning ch 3. (84 dc)
- Round 8: Ch 3 (counts as 1st dc). Dc in the same stitch.
*Dc in the next 6 stitches, then inc dc in the next stitch.*Repeat from*to*11 times around.- Join with a sl st to the top of the beginning ch 3. (96 dc)
- Round 9 (Optional Border): Ch 1 (does not count as a stitch). Sc in each stitch around. Join with a sl st to the first sc. (96 sc)
- Fasten Off, leaving a tail for weaving in. Weave in all remaining yarn ends neatly.
- Your finished placemat should be approximately 10-12 inches (25-30 cm) wide. For an even larger placemat, you can continue adding more increase rounds, always increasing a consistent number of stitches to maintain the flat shape (e.g., Round 10 would be
*Dc in next 7 sts, inc dc*, etc.).
5. General Finishing & Blocking
- Weave in ALL Ends Thoroughly: This is paramount for a professional and durable finish. Take your time to hide every single yarn tail (especially from the fastens off) securely on the backside of your pieces. Use your yarn needle to weave the tail back and forth through several stitches (about 1-2 inches) to ensure they are completely hidden and won’t unravel with use or washing.
- Blocking (Highly Recommended!): Blocking makes a significant difference for flat crochet pieces like placemats and coasters. It helps to:
- Even out your stitches and improve overall tension.
- Ensure the pieces lay perfectly flat on your table, preventing any curling or buckling.
- Sharpen and define the edges and the overall heart shape.
- Method:
- Gently wet your finished heart pieces. You can either submerge them in cool water with a tiny bit of mild soap, then gently squeeze out excess water (without twisting), or simply mist them thoroughly with a spray bottle until damp.
- Lay them flat on a blocking mat, a clean towel, or any flat, even surface where they can dry undisturbed.
- Gently stretch and shape each heart into its perfect form, ensuring the curves are smooth and the point is sharp. If you have rust-proof pins, you can use them to hold the edges in place.
- Allow the pieces to air dry completely. This might take several hours or even overnight, depending on humidity. Crucially, do not use heat (like a hairdryer or direct sun for too long) as it can distort cotton yarn and ruin your work.
Tips for a Beautiful Heart Set
- Consistent Tension: This is the most important factor for achieving flat, even hearts that don’t curl or have wavy edges. Consistent tension ensures uniform stitch size throughout.
- Yarn Choice: As mentioned, cotton is ideal for its practical qualities for table linens. Its excellent stitch definition also helps the heart shape stand out.
- Stitch Count: Always count your stitches at the end of each round. Missing or adding even one stitch can cause your heart to warp or become uneven.
- Learning Curve: The shaping of the heart, particularly the initial joining of the two bumps, can be a little tricky the very first time. Don’t be discouraged if it takes a couple of attempts to get the hang of it; crochet is very forgiving, and you can always “frog” (unravel) back to fix mistakes.
- Gift Idea: A handmade set of these heart placemats and coasters makes a truly unique, thoughtful, and personalized gift for housewarmings, weddings, or just to show someone you care!
You’ve now got the detailed instructions to crochet a beautiful and functional heart placemat and coaster set. Enjoy adding this warm, handmade touch to your home!