 by
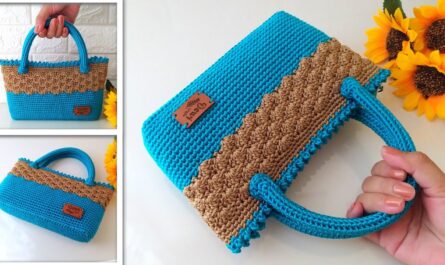
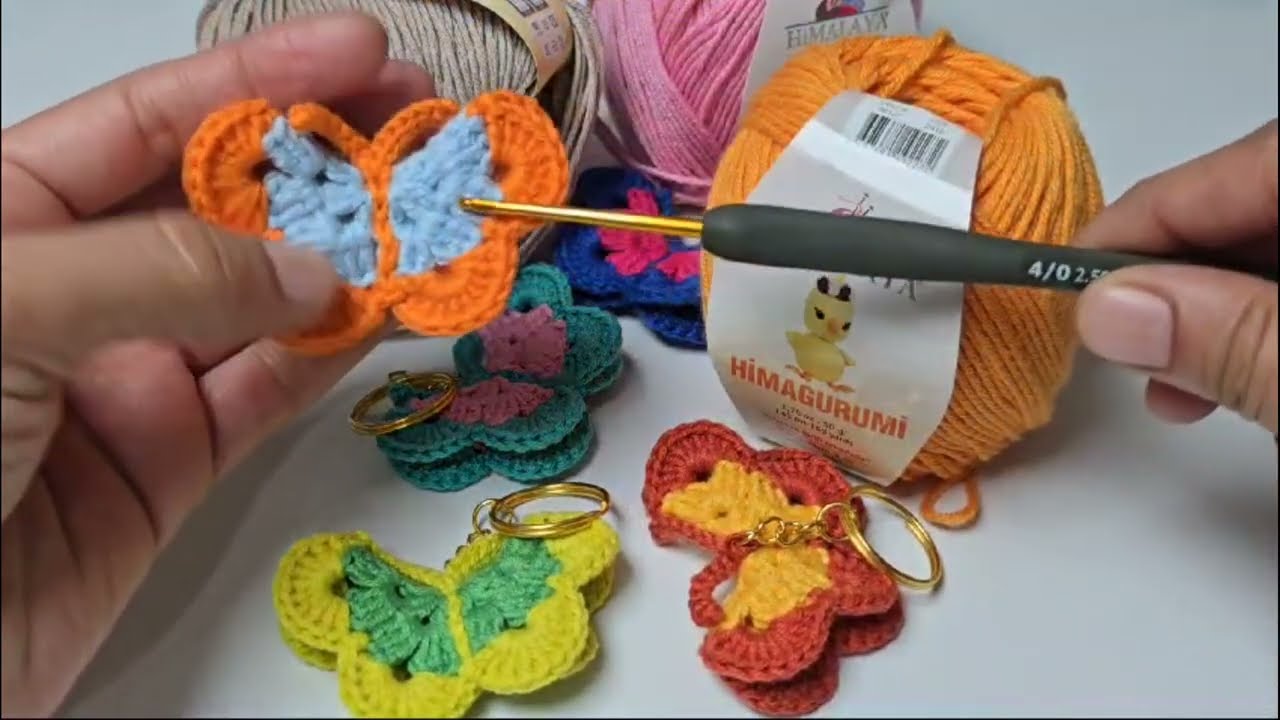
by A crochet butterfly keychain is an absolutely delightful and quick project, perfect for adding a touch of charm to your keys or bag! It’s also a fantastic way for beginners to practice basic stitches and learn how to assemble small crocheted pieces.
Given that it’s warm in Phnom Penh, choosing the right yarn for your keychain is simple. 100% cotton yarn or a smooth acrylic yarn would be ideal. Cotton offers great stitch definition and a crisp finish, while acrylic comes in a vast array of colors and is very easy to work with. Both are durable enough for a keychain that will see some wear and tear.

How to Crochet a Beautiful Butterfly Keychain: A Beginner Tutorial
This pattern will guide you through creating a charming butterfly with two upper wings, two lower wings, and a small body, which are then assembled.
1. Essential Materials You’ll Need
- Yarn:
- Main Color (for wings): Choose a vibrant color for your butterfly’s wings. Worsted Weight (Aran / Medium / Category 4).
- Accent Color (for wing trim/body): A contrasting or complementary color. Worsted Weight.
- Small amounts of each color are more than enough – perfect for using up scraps!
- Crochet Hook:
- A 3.0mm (US C/2) or 3.5mm (US E/4) hook. A slightly smaller hook helps create a denser fabric, which is good for small projects like keychains as it helps them hold their shape.
- Scissors: For cutting yarn.
- Yarn Needle (Tapestry Needle): Essential for weaving in ends and assembling the butterfly.
- Keychain Ring/Split Ring: The hardware to make it a keychain!
- Optional: Small beads or embroidery floss for antennae or decorative details.
2. Basic Crochet Stitches You’ll Use
This project utilizes fundamental crochet stitches:
- Chain (ch): For foundation, turning, and forming spaces.
- Slip Stitch (sl st): For joining and neatening.
- Single Crochet (sc): A dense, short stitch.
- Half Double Crochet (hdc): A medium-height stitch.
- Double Crochet (dc): A taller stitch, used for wing shaping.
- Treble Crochet (tr) / Triple Crochet: An even taller stitch (optional for larger wings).
- Working in Rows: You’ll create flat pieces that are then assembled.
- Fasten Off: To securely end your work.
- Weaving in Ends: Hiding yarn tails for a neat finish.

Crochet Butterfly Keychain Pattern
This pattern creates a butterfly that’s roughly 2-3 inches (5-7.5 cm) wide, depending on your yarn and tension.
Abbreviations (US Crochet Terms):
- MC: Main Color (for wings)
- AC: Accent Color (for trim/body)
- ch: chain
- sl st: slip stitch
- sc: single crochet
- hdc: half double crochet
- dc: double crochet
- tr: treble crochet
- st(s): stitch(es)
(...): work stitches into the same stitch or space[...]: repeat instructions in brackets- FO: Fasten off
Part 1: Upper Wings (Make 2)
Use your Main Color (MC).
- Ch 5.
- Row 1: (Work into the back bump of the chain for a neater edge, or just into the top loop).
- Sc in the 2nd ch from hook.
- Hdc in the next ch.
- Dc in the next ch.
- 5 dc in the last ch. (This creates the curved tip of the wing).
- Now, working down the other side of the starting chain:
- Dc in the same ch where you worked the last dc. (Total 6 dc in last ch).
- Hdc in the next ch.
- Sc in the next ch.
- Sl st into the very first sc you made.
- FO MC, leaving a tail for weaving in.
- You should have a small, almost heart-shaped wing.

Part 2: Lower Wings (Make 2)
Use your Main Color (MC).
- Ch 4.
- Row 1: (Work into the back bump of the chain for a neater edge, or just into the top loop).
- Sc in the 2nd ch from hook.
- Hdc in the next ch.
- 4 dc in the last ch. (This creates the curved tip of the wing).
- Now, working down the other side of the starting chain:
- Hdc in the same ch where you worked the last hdc. (Total 5 dc in last ch).
- Sc in the next ch.
- Sl st into the very first sc you made.
- FO MC, leaving a tail for weaving in.
- You should have a slightly smaller, almost tear-drop shaped wing.
Part 3: Wing Edging (Optional, but Recommended for Polish)
This adds definition and tidies up the edges. Use your Accent Color (AC).
- Upper Wings:
- Rejoin AC with a sl st into any stitch along the straight/bottom edge of an upper wing.
- Ch 1, then sc evenly around the entire outer edge of the wing. Work 1 sc into each stitch and try to keep your stitches consistent around the curved part.
- When you reach the starting point, sl st to join.
- FO AC, weave in ends.
- Repeat for the second upper wing.
- Lower Wings:
- Repeat the edging process from the Upper Wings for both lower wings.
- FO AC, weave in ends.
Part 4: Butterfly Body
Use your Accent Color (AC).
- Ch 7.
- Row 1:Sl st in the 2nd ch from hook. Sc in the next ch. Hdc in the next ch. Dc in the next ch. Hdc in the next ch. Sc in the last ch. (6 stitches total).
- FO AC, leaving a long tail (about 10-12 inches / 25-30 cm) for sewing.
- This creates a slightly tapered body. Weave in the starting tail.
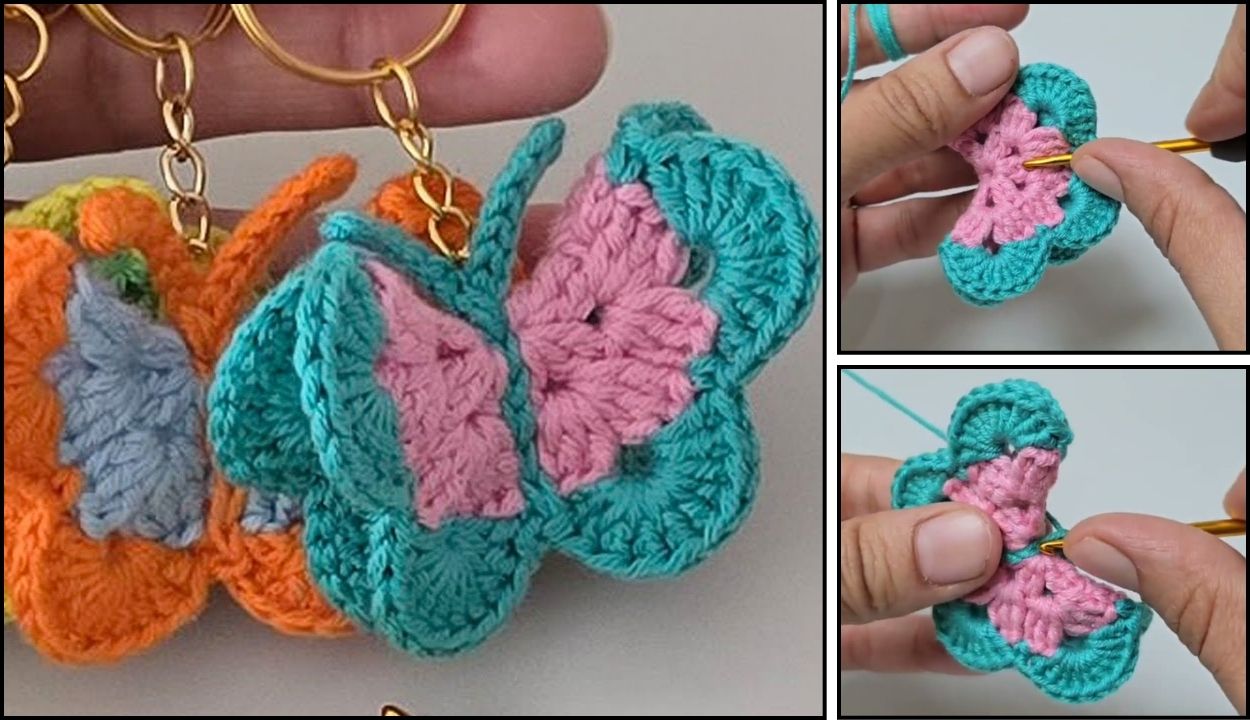
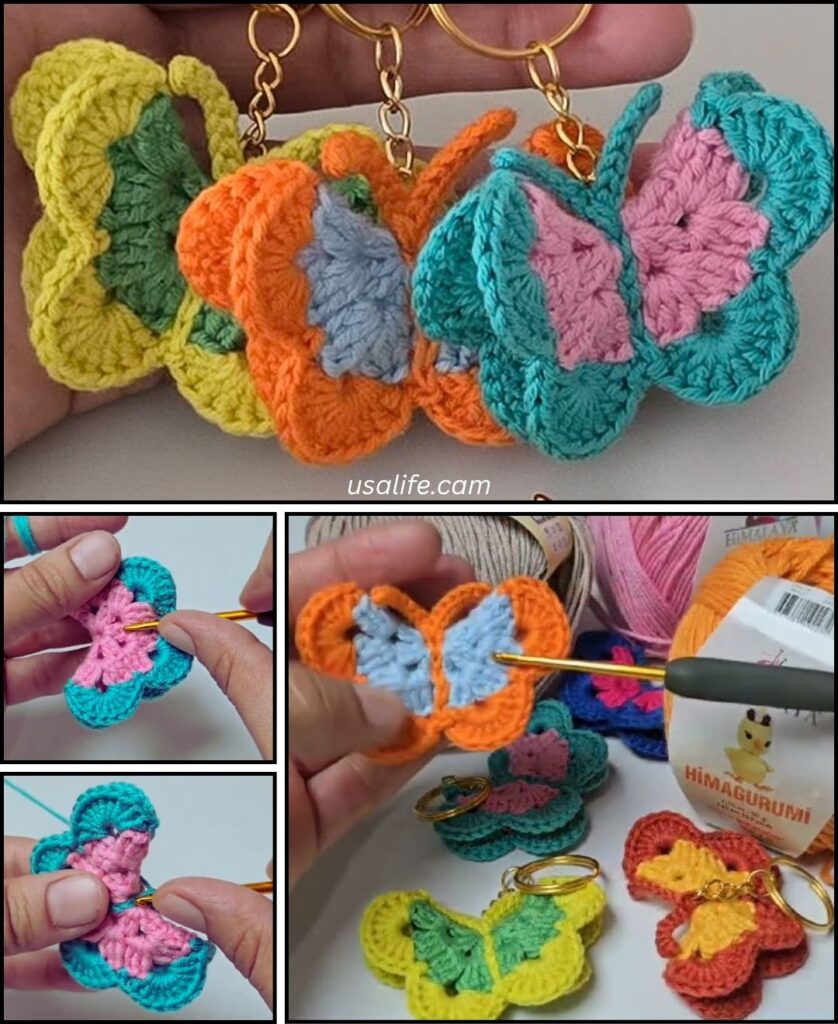
Part 5: Assembly
This is where your butterfly comes to life!
- Stack the Wings: Lay out your wings. Place one upper wing slightly overlapping one lower wing. Do the same for the other set.
- Attach to Body:
- Lay the crocheted body piece centrally over the stacked wings. The wider end of the body should be near the top (where you’ll attach the keychain ring).
- Using your yarn needle and the long tail from the body, carefully sew the wings to the body. Go through all layers (body + both wings) with a few secure stitches.
- Ensure the wings are symmetrical and firmly attached.
- Securely knot your yarn and weave any remaining tail into the body.
- Optional: Add Antennae (Embroidered or Beaded):
- Embroidered: With black embroidery floss or a thin strand of yarn, make two small stitches from the top of the head, then tie a small knot at the end of each stitch.
- Beaded: Thread a small bead onto a thin wire or a strong thread, then attach to the head.
- Attach the Keychain Ring:
- Thread a small piece of AC yarn (about 6 inches / 15 cm) onto your yarn needle.
- Pass the needle through a sturdy stitch at the very top center of the butterfly’s body (where you want the keychain to hang).
- Thread both ends of this yarn piece through your keychain ring.
- Tie the yarn ends securely in a double knot, ensuring the keychain ring is firmly attached. Trim any excess yarn.
6. Finishing Touches and Tips
- Weave in All Ends: Take your time to carefully weave in every single yarn tail. For a keychain that will be handled frequently, secure ends are critical to prevent unraveling.
- Blocking (Optional): For a crisper, flatter butterfly, you can lightly mist it with water and lay it flat to dry, gently shaping the wings.
- Symmetry: Pay attention to how you lay out your wings before sewing to ensure a symmetrical butterfly.
- Experiment with Color: Try different color combinations! Ombre wings (using shades of the same color) or rainbow wings can be beautiful.
- Alternative Assembly: Instead of sewing the wings and body, you could use a small amount of fabric glue on the backside to hold the layers together before doing a final border of single crochet around the entire butterfly (going through all layers) for a super secure finish.
You’ve now created a beautiful, handmade crochet butterfly keychain! It’s a lovely accessory for yourself or a thoughtful gift for a friend.