 by
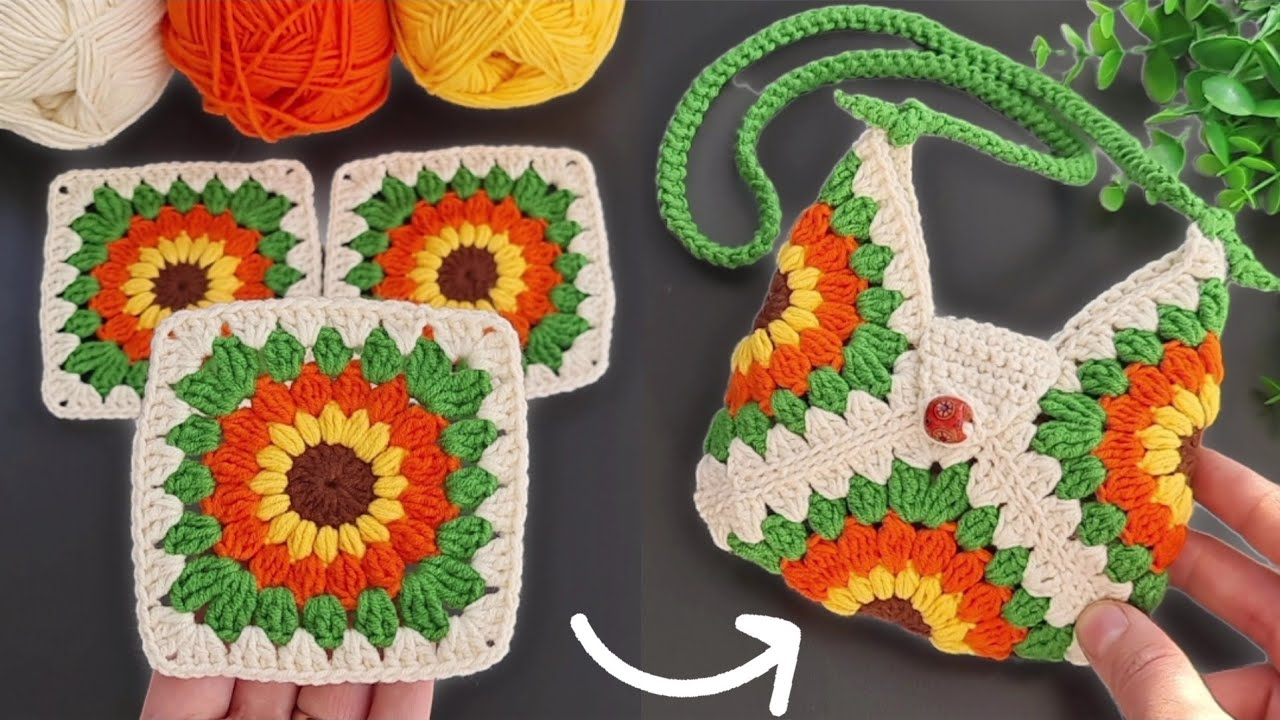
by Crafting a mini bag purse keychain is an incredibly charming and useful project! It’s perfect for holding a tiny coin, a folded bill, a small earbud case, or just for adding an adorable decorative touch to your keys or bag. These little purses are quick to make and allow for lots of creative color combinations.
For a durable and well-structured keychain that will stand up to daily use, especially in a warm climate like Phnom Penh, 100% cotton yarn or a cotton blend is an excellent choice. Cotton holds its shape beautifully and is easy to clean.
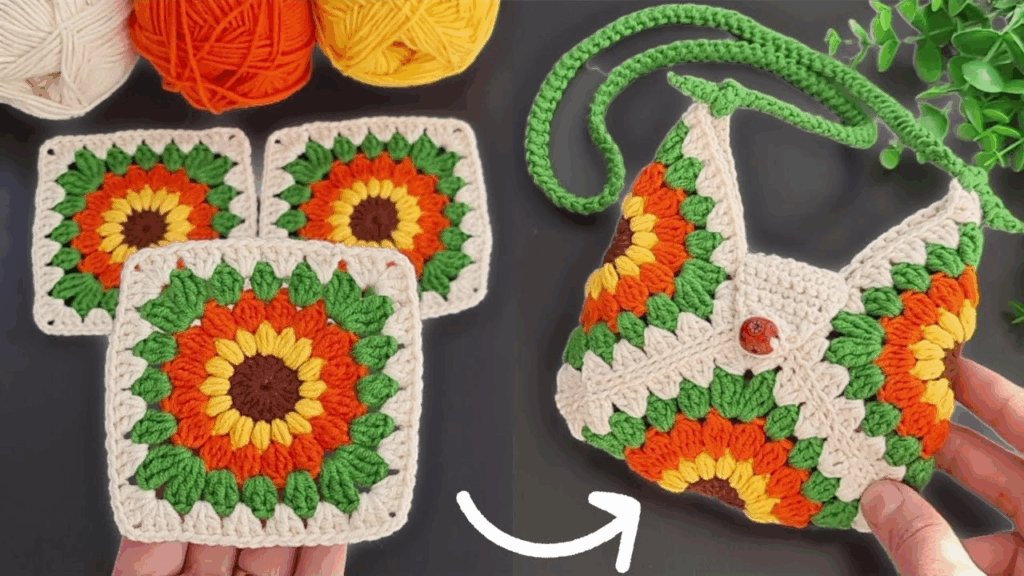
How to Crochet a Mini Bag Purse Keychain
This tutorial will guide you through crocheting a tiny, functional purse with a flap and a handle, perfect for a keychain.
1. Essential Materials You’ll Need
- Yarn:
- Main Bag Color: Small amount (approx. 10-15 yards / 9-14 meters) of 100% Worsted Weight Cotton Yarn.
- Accent Color (Optional): Very small amount for stripes or a contrasting flap/handle.
- Crochet Hook: A 3.0mm (US C/2) or 3.5mm (US E/4) hook. A slightly smaller hook will create a denser fabric, which is ideal for a sturdy mini purse that won’t stretch out of shape.
- Scissors: For cutting yarn.
- Yarn Needle (Tapestry Needle): Essential for weaving in ends and seaming.
- Small Button or Snap (Optional): For the bag closure. A small, flat button (6-8mm) or a tiny magnetic snap works best.
- Keychain Hardware: A split ring or a lobster clasp. You can find these at craft stores or online.
- Optional: Stitch marker (helpful for marking the beginning of rows/rounds).
2. Basic Crochet Stitches You’ll Use
This project uses fundamental crochet stitches:
- Chain (ch): To begin your work and for spaces.
- Slip Stitch (sl st): For joining and neatening edges.
- Single Crochet (sc): The main stitch, creating a tight and sturdy fabric.
- Half Double Crochet (hdc): A medium-height stitch, good for stability.
- Double Crochet (dc): A taller stitch, sometimes used for shaping or decorative elements.
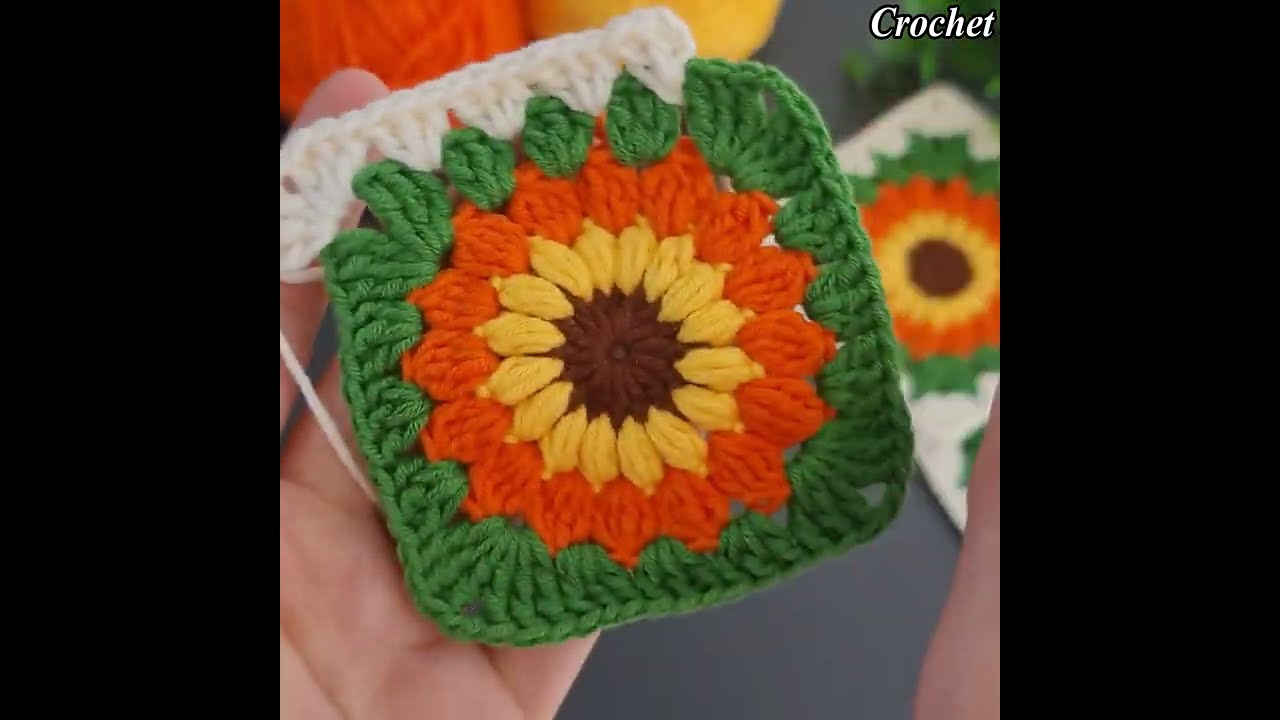
Part 1: Crocheting the Bag Body
We’ll start by making a flat rectangular piece that will be folded to form the purse.
Abbreviations (US Crochet Terms):
- ch: chain
- sc: single crochet
- hdc: half double crochet
- sl st: slip stitch
- st(s): stitch(es)
Instructions (Using your Main Bag Color):
- Foundation Chain: Ch 13. (This will be the width of your bag. For a wider or narrower bag, adjust this chain count.)
- Row 1: Work 1 sc in the 2nd chain from your hook. Work 1 sc in each remaining chain across the row. (12 sc)
- Row 2: Ch 1 (does NOT count as a stitch). Turn your work. Work 1 sc in each stitch across the row. (12 sc)
- Repeat Row 2: Continue repeating Row 2 for a total of 16 rows.
- This creates a long rectangle. When folded, it will form the back, bottom, and front of your mini bag. For a taller or shorter bag, adjust the number of rows.
- Fasten off, leaving a long tail (about 15-20 inches / 38-50 cm) for seaming the sides.
Part 2: Assembling the Bag Body
Now we’ll turn your rectangle into a purse shape.
- Fold the Rectangle: Lay your crocheted rectangle flat. Fold up one end to create the front flap of your purse (e.g., fold up about 4 rows). Then, fold the other end over the flap to form the main body of the purse (e.g., fold up about 8 rows, leaving 4 rows for the back that the flap will eventually attach to).
- Alternatively, fold up 8 rows from one end to make the main body, then the remaining 8 rows will form the back and flap. You’ll fold the top 4 rows down to make the flap.
- Let’s use a simpler fold for clarity: Fold the rectangle so that about 8 rows form the “front” of the bag, the next 4 rows form the “bottom,” and the remaining 4 rows form the “back.” The very first 4 rows you made will be the front flap that folds over.
---------------------- (Starting Chain edge - flap folds here) | Row 1 | FRONT | (e.g., 8 rows) | | | |---------|----------| | Row 9 | BOTTOM | (e.g., 4 rows) | | | |---------|----------| | Row 13 | BACK | (e.g., 4 rows) | | | ---------------------- (Last row worked) - So, you’ll fold up 8 rows, then fold the next 4 rows over the back. This creates a pouch.
- Seam the Sides: With your long tail and yarn needle, seam the side edges of the bag together using a whip stitch or mattress stitch. Stitch firmly from the bottom corner up to the top opening of the bag, on both sides. This creates the main pouch.
- Weave in any remaining initial yarn ends from the starting chain.

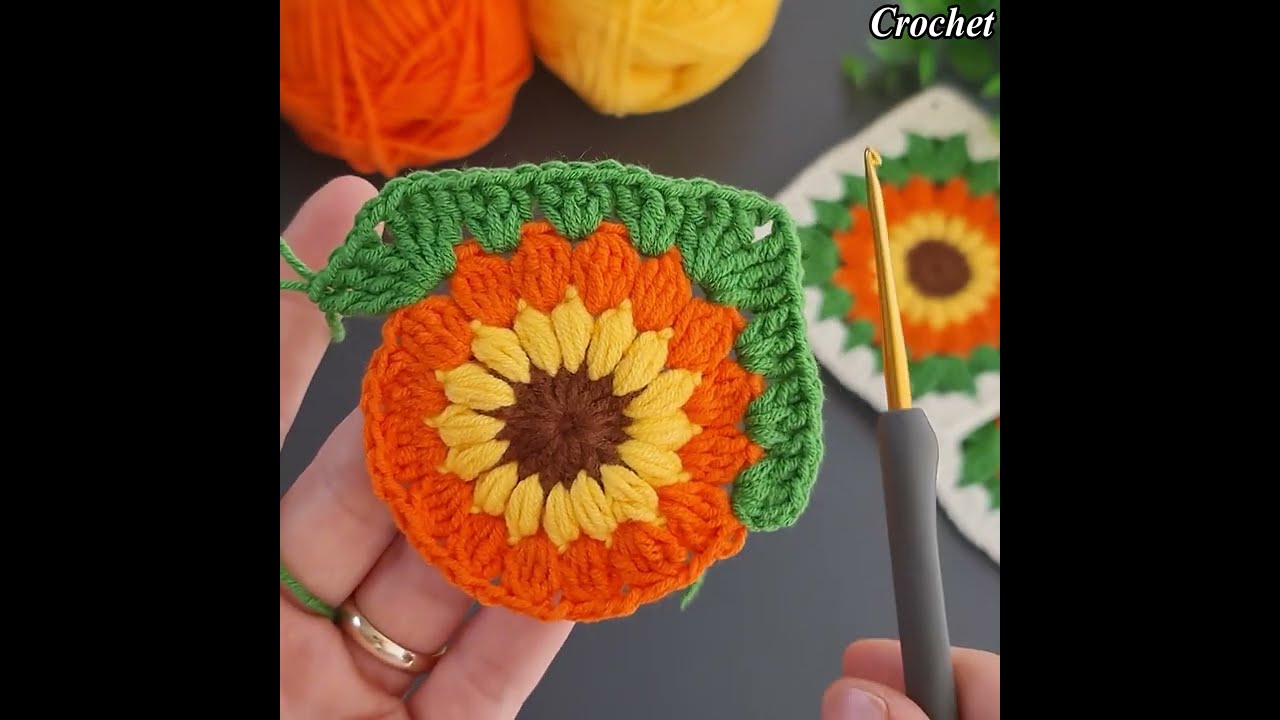
Part 3: Crocheting the Flap and Handle
Now for the signature parts of the mini purse!
- The Flap (already part of your rectangle): The top 4 rows of your original rectangle that are not part of the sewn pouch will form your flap.
- Optional: Edge the Flap (Main Bag Color or Accent Color):
- Join yarn with a sl st at one corner of the flap.
- Ch 1. Work sc stitches evenly around the outer edges of the flap (the two sides and the curved/straight top edge that will fold down). This creates a neat finish.
- Work (1 sc, ch 1, 1 sc) in each corner stitch to create crisp turns.
- Join with a sl st to the first sc. Fasten off.
- The Handle (Main Bag Color or Accent Color):
- Method A: Simple Chain Loop
- Join yarn with a sl st to the top center of the back of the bag (where the flap connects).
- Ch 15-20 (adjust chain length for your desired handle/keychain loop size).
- Sl st into the same stitch where you started the chain (or a secure stitch nearby).
- Fasten off, leaving a long tail for security. Use your yarn needle to weave this tail around the base of the chain loop and into the top of the bag multiple times for reinforcement.
- Method B: Crocheted Strap Handle (More durable, but slightly bulkier)
- Ch 6 (adjust for desired strap width).
- Work 1 sc in the 2nd ch from hook and in each remaining chain across. (5 sc)
- Ch 1, turn. Work 1 sc in each st across. Repeat for 2-3 rows.
- Fasten off, leaving long tails on both ends.
- Using your yarn needle, sew one end of the strap to the top center of the back of the bag. Sew the other end of the strap to the same area, forming a loop. Stitch securely multiple times.
- Method A: Simple Chain Loop

Part 4: Adding the Closure (Optional)
- For a Small Button:
- Button Loop: With your accent yarn or main bag yarn, attach to the underside center of your flap. Ch 5-7 (adjust chain length to fit your button). Sl st back into the same stitch to form a loop. Fasten off, weave in ends.
- Button Placement: Sew your small button securely onto the front of the bag, directly below the button loop on the flap, so the flap can close securely over it.
- For a Magnetic Snap:
- Sew one half of the magnetic snap to the underside center of your flap.
- Sew the other half of the magnetic snap to the front of the bag, ensuring they align perfectly when the flap is closed.
Part 5: Finishing & Attaching Keychain Hardware
- Weave in All Remaining Ends: This is critical for a neat and durable keychain. Take your time to weave in all yarn tails securely into the inside of your mini purse. Trim any excess very close to the fabric.
- Attach Keychain Hardware: Slide your chosen split ring or lobster clasp onto the crocheted handle/loop of your mini bag.

Tips for a Perfect Mini Bag Purse Keychain
- Tight Tension: For any small item like a keychain, maintaining a firm, tight tension is crucial. This helps the bag hold its shape, prevents sagging, and ensures durability.
- Secure Seams: Since this is a functional item, make sure your side seams are very secure and tight.
- Handle Reinforcement: If you use a chained loop for the handle, reinforce the base by stitching over it multiple times with your yarn needle. This is the main stress point.
- Customization:
- Stripes: Change colors every 2-4 rows when making the main body for striped bags.
- Shaping: You can make the flap pointed or rounded by adding decrease/increase stitches in the last few rows.
- Embellishments: Add a tiny crocheted flower, bead, or embroidery to the flap for extra cuteness!
You’ve now created an adorable, functional, and personalized mini bag purse keychain! It’s a perfect small accessory or a thoughtful handmade gift.