Learn making some adorable crochet baby sandals. Keep reading for the pattern and tutorial of this gorgeous project.
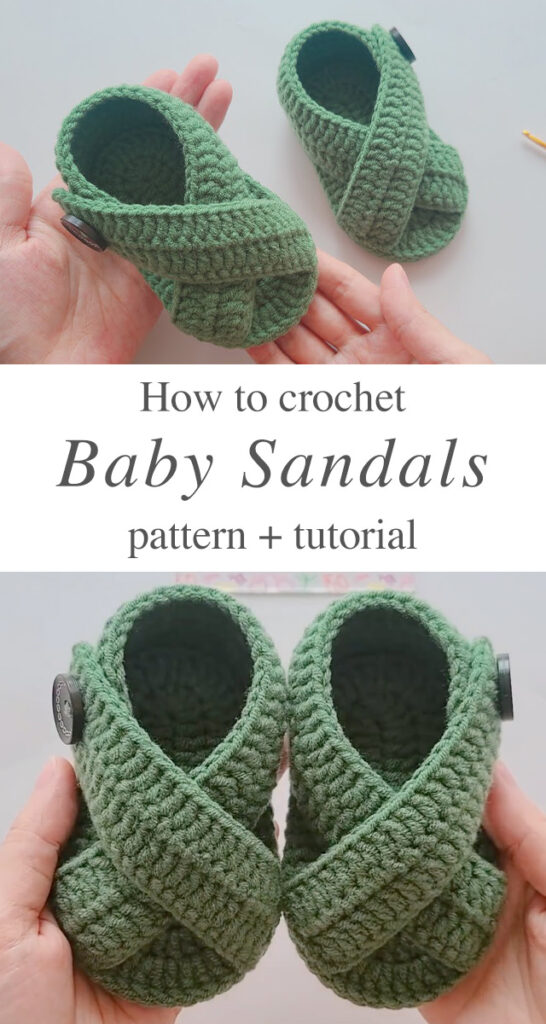
THE CROCHET BABY SANDALS
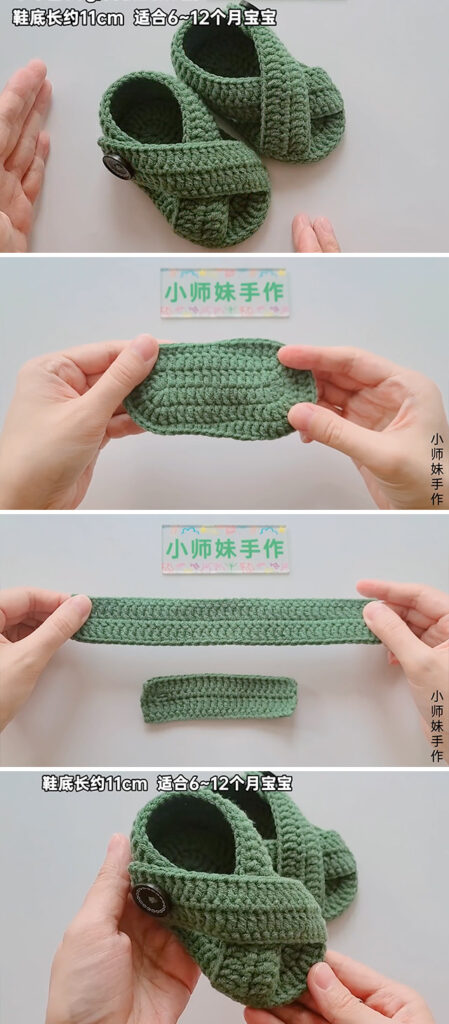
These baby sandals are made from 4 pieces with simple crochet stitches, and then sew them together to make these cute sandals. Lets follow this tutorial to know how to make them.
Materials
To create these crochet baby sandals, you will need a crochet hook of 3 mm, 2 buttons, and Dk weight yarn.
Pattern of Crochet Baby Sandals
– Slip knot, chain 15, 2dc in 3rd ch from hook, dc in the next 11ch, 6dc in last st, working on the opposite side of foundation ch, dc in the next 11st, 3dc in last st, sl st to 3rd ch of the beginning ch3 in the round. [34dc]
– Ch2, 2dc in the same st, 2dc in the next 2st, dc in the next 11st, 2dc in the next 6st, dc in the next 11st, 2dc in the last 3st, sl st to 1st dc in the round. [46dc]
– Ch1, sc in the same st, 2sc in the next st, sc in the next st, 2sc in the next st, sc in the next st, 2sc in the next st, sc in the next 5st, hdc in the next 3st, dc in the next 3st, *dc in the next st, 2dc in the next st*, repeat for the next 12st, dc in the next 3st, hdc in the next 3st, sc in the next 5st, 2sc in the next st, sc in the next st, 2sc in the next st, sc in the next st, 2sc in the next st, sc in the last st, sl st to the 1st sc in the round. [58st]
– Make 4 pieces using the previous steps, and then put every 2 pieces back to back and sl st around.
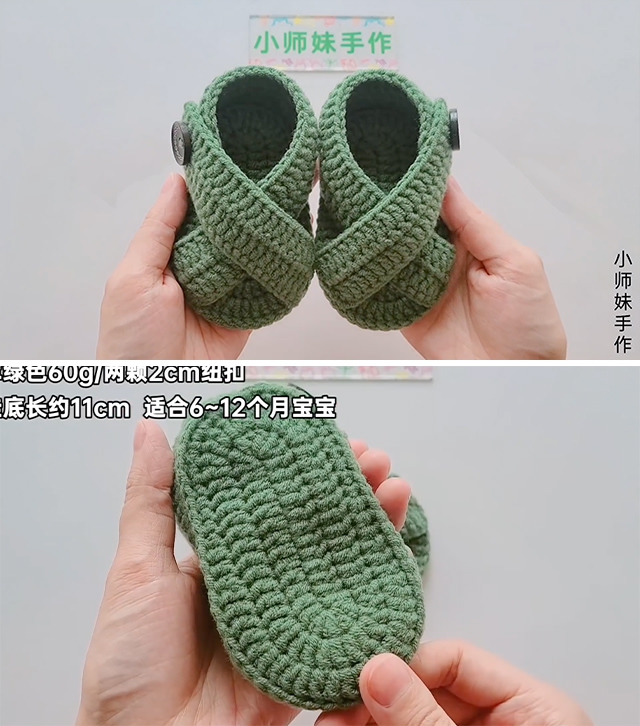
Upper long piece: (make 2)
– Ch40, sc in 2nd ch from hook, sc across the chains, ch2, turn.
– Dc in the same st, dc in the next st, dc across the row, ch1, turn.
– Sc in the same st, sc in the next st, sc across the row, ch2, turn.
– Dc in the same st, dc in the next st, dc across the row, fasten off.
Upper short piece: (make 2)
– Ch24, sc in 2nd ch from hook, sc across the chains, ch2, turn.
– Dc in the same st, dc in the next st, dc across the row, ch1, turn.
– Sc in the same st, sc in the next st, ch2, skip next 2st (button hole), sc in the next st, sc until the end, ch2, turn.
– Dc in the same st, dc in the next st, dc across the row, fasten off.
How to assemble the crochet baby sandals:
– Follow the below picture to understand clearly how to join parts.
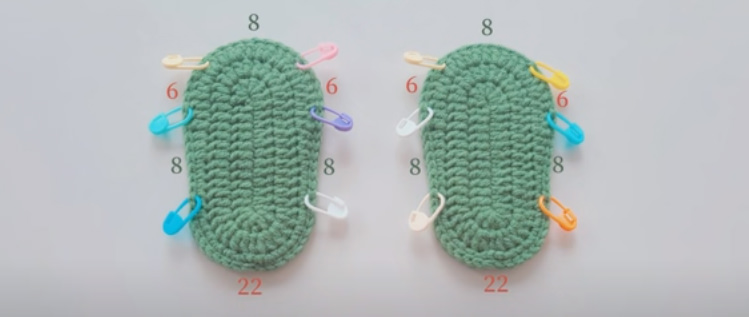
For the right sandal:
1. Start from the marker place in the right bottom of the sole with long strip, using tapestry needle, sew the strip with the sole until reach the next bottom marker place (22st), fasten off.
2. Sew the end of the strip between the 2 markers in the top right side of the sole (after skipping 22st).
3. Sew the short strip end between 2 markers in the top left side of the sole.
4. Sew the button on the long strip.
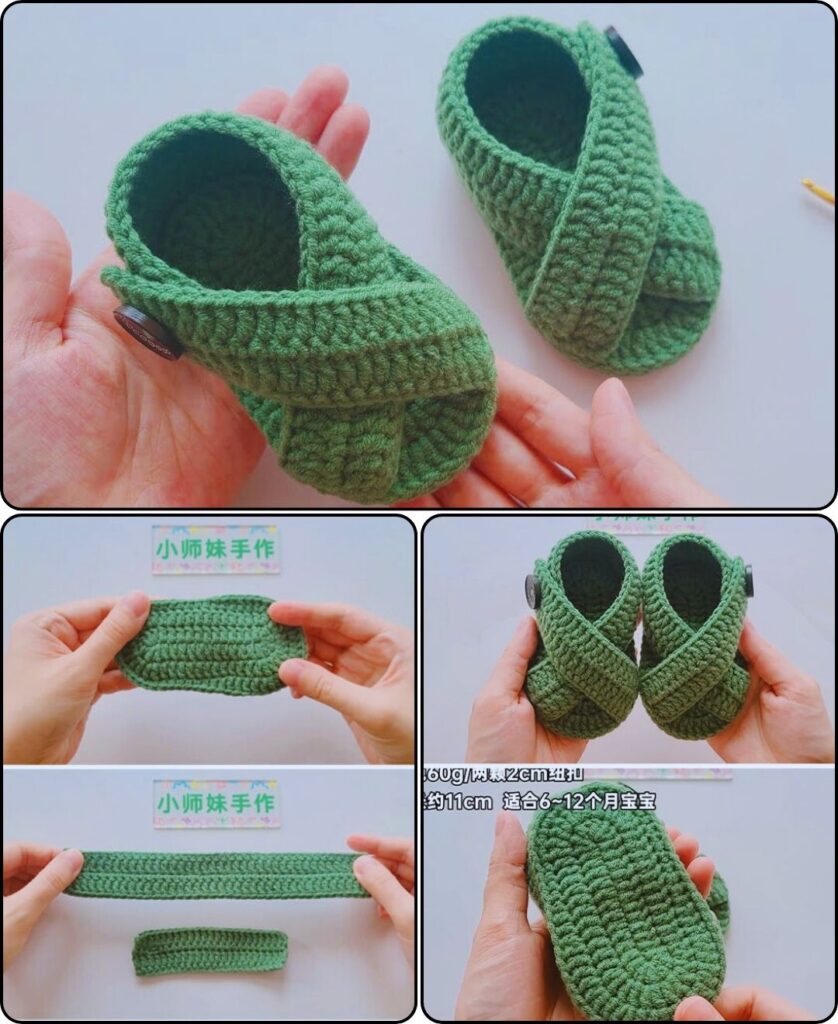
For the left sandal:
1. Start from the marker place in the left bottom of the sole with long strip, using tapestry needle, sew the strip with the sole until reach the next bottom marker place (22st), fasten off.
2. Sew the end of the strip between the 2 markers in the top left side of the sole (after skipping 22st).
3. Sew the short strip end between 2 markers in the top right side of the sole.
4. Sew the button on the long strip.
Fasten off, weave in all ends.
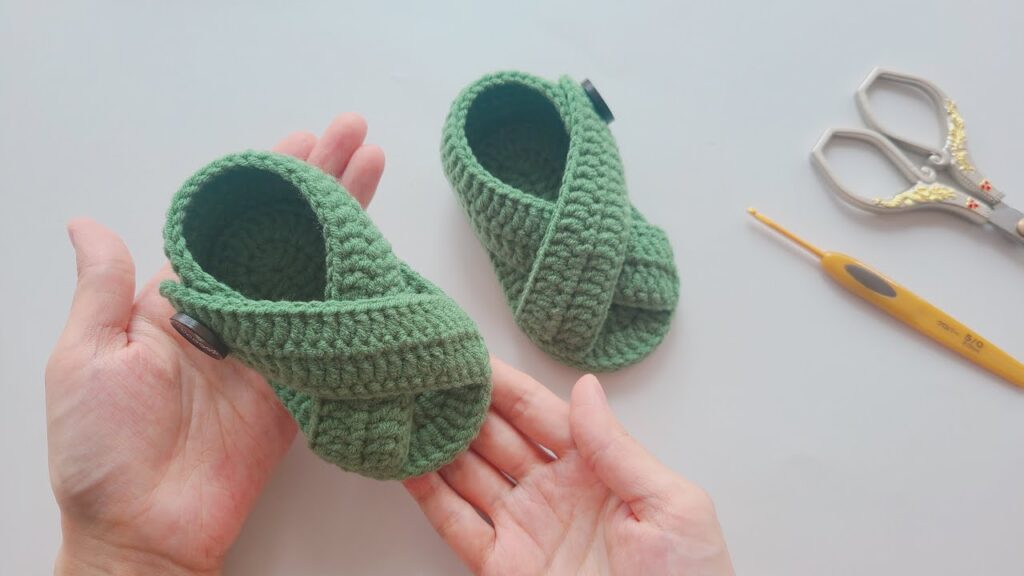
Tutorial and photos of these crochet baby sandals by: 小师妹手作.

