 by
by Make & Sell Gift Coasters, Accessories, and Decorations 🧶
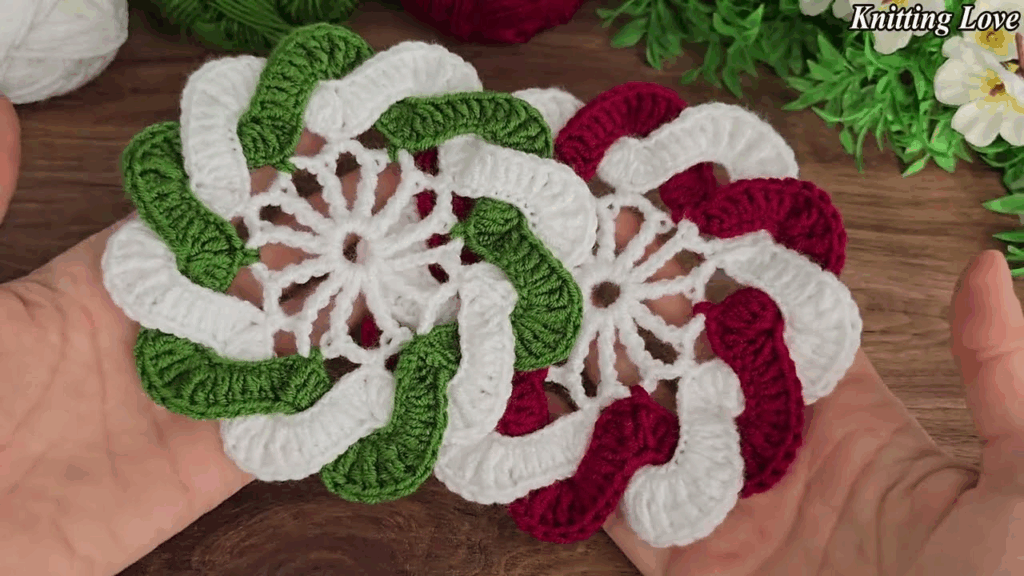
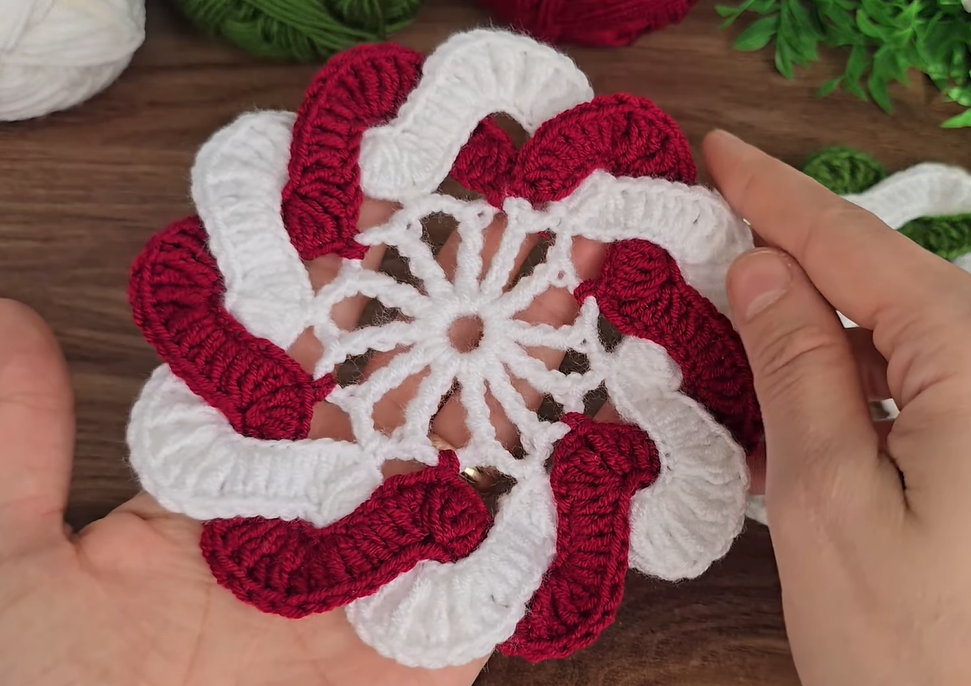
Crochet flowers are a timeless favorite in the handmade world—but 3D spiral crochet flowers stand out with their sculpted texture, multi-layered petals, and unique swirling shape. If you’ve been searching for a creative project that’s beautiful and easy enough for beginners to enjoy, this tutorial is for you.
These flowers can be used as:
- Gift coasters
- Mug rugs
- Keychains or bag charms
- Brooches and hair accessories
- Scrap-yarn stash busters
- Craft fair best-sellers
This guide walks you step-by-step through the process of creating your own 3D spiral crochet flower, with detailed instructions, tips, variations, and selling ideas to help you turn your hobby into profit.
🧶 Materials You Will Need
You can use almost any yarn, but the best results come from sturdy, smooth yarns that show stitch definition clearly.
Yarn Options
- Cotton yarn (recommended for coasters)
– Holds shape well
– Heat-resistant
– Durable - Acrylic yarn
– Produces fluffy, soft flowers
– Good for accessories and home décor - DK (3), Worsted (4), or Bulky (5) depending on the size you want
Hook Size
- Typically a 3.5 mm to 5 mm hook works well
- Use a hook slightly smaller than recommended for tighter petals
Other Tools
- Yarn needle
- Scissors
- Optional: stitch marker
🌼 Understanding the 3D Spiral Structure
Unlike flat crochet flowers, the 3D spiral flower is created by working multiple petal chains in a long strip, and then rolling it inward to form a layered spiral shape.
The magic comes from:
- Working rows with increasing pétale lengths
- Curling the finished strip tightly
- Sewing (or weaving) the base securely
This creates a sturdy, coaster-friendly structure with a full, blooming shape.
🌸 3D Spiral Crochet Flower Tutorial (Step-By-Step)
Below is a beginner-friendly pattern that you can modify easily.
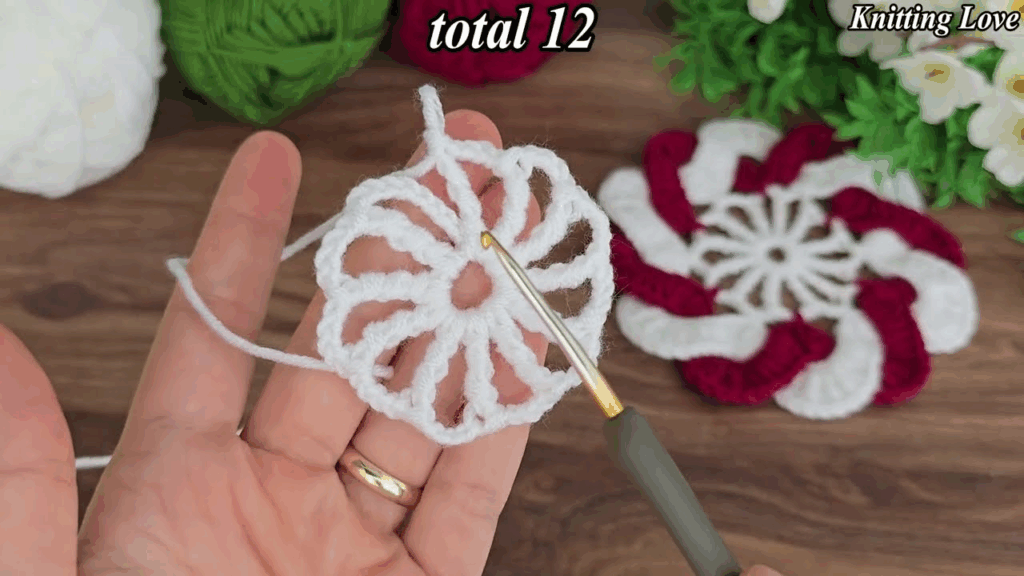
Step 1: Create the Base Chain
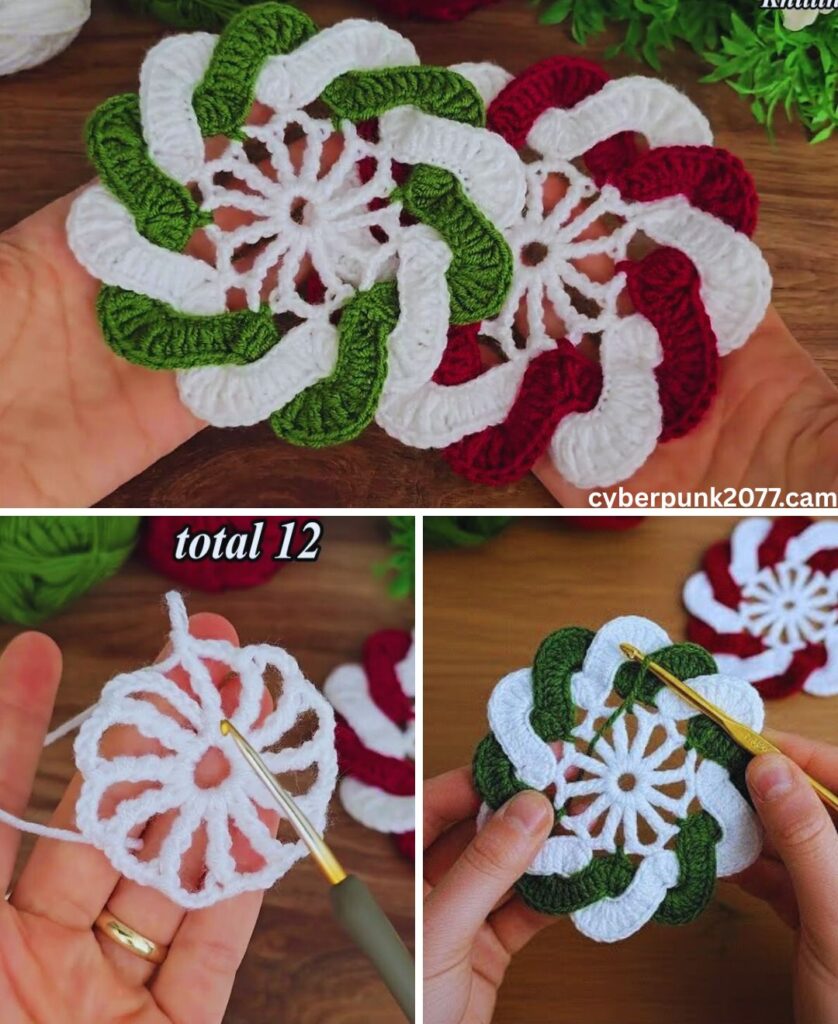
Chain 55 (or more for a fuller flower).
This foundation chain determines the flower’s radius.
Tip: For small flowers, chain 35. For large spirals, chain 70–90.
Step 2: Row 1 – Single Crochet Back Across the Chain
Starting in the second chain from your hook:
SC in each stitch across.
You should still have 54 stitches.
This row stabilizes your base so the flower doesn’t unravel.
Step 3: Row 2 – Begin Petals
Repeat the following pattern all the way across:
(Skip 1 stitch, in next stitch work: SC, HDC, DC, HDC, SC.)
Each of these clusters creates one rounded petal.
As you repeat this, the work begins to curl naturally—that’s good! It means the spiral will form beautifully later.
Step 4: Row 3 – Add Height to the Spiral (Optional)
To give the flower a more dramatic 3D effect, add a second row of taller petals.
In each skipped stitch from the previous row, work the following:
(Skip 1 stitch, in next stitch work: SC, DC, TR, DC, SC.)
This row creates the second “tier” of petals.
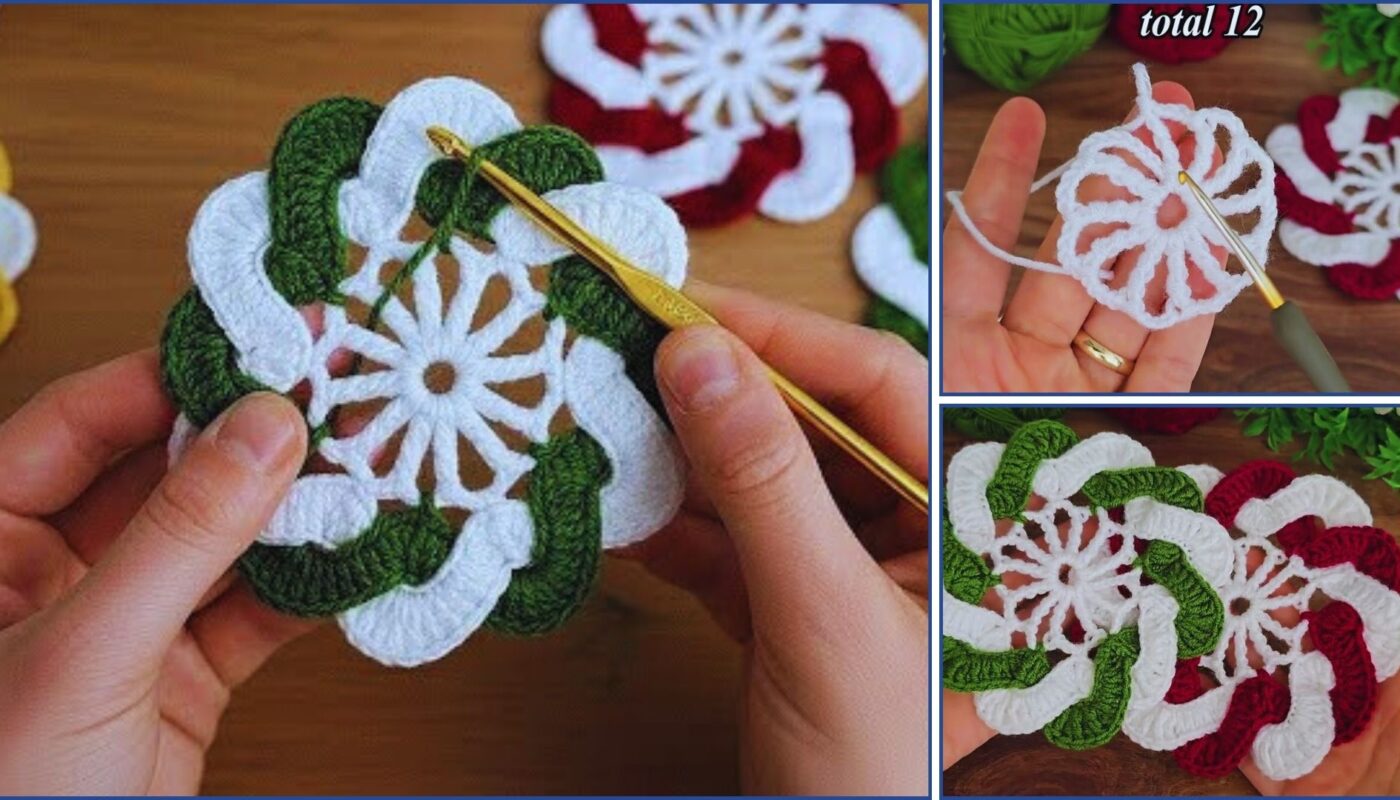
Step 5: Roll the Flower Into a Spiral
Starting at the short end of your strip:
- Roll it toward the center
- Hold tightly as the petals curl into layers
- Adjust as you go, making sure the petals are evenly staggered
Don’t sew yet—shape first.
Step 6: Secure the Flower
Using your yarn needle:
- Stitch across the underside
- Pass your needle through multiple layers to anchor the coil
- Knot securely
- Weave in ends
Make sure the base is flat if you’re using it as a coaster.
🌸 Optional: Turning Your Flower Into a Coaster
To make your 3D flower function as a usable mug coaster, you can:
Option 1: Flatten the Base
- Add a tightly crocheted circle underneath
- Sew it onto the back of the flower
This adds stability and prevents wobbling.
Option 2: Increase the Initial Chain
The larger the chain, the wider the spiral — meaning a flatter, coaster-friendly shape.
Option 3: Use Thick Cotton
Worsted cotton makes a dense, functional coaster that absorbs heat.
🌈 Customization Ideas
1. Dual-Color Spiral
Alternate colors every 10 stitches on the foundation chain for a variegated look.
2. Multilayer Bloom
Create two spirals:
- Small (inner layer)
- Large (outer layer)
Stitch them together for a full dahlia effect.
3. Add Leaves
Create simple leaf shapes and sew them under the flower for a natural touch.
4. Add a Button or Bead Center
Perfect for brooches and accessories.
💡 Selling Tips: Turn These Flowers Into Craft Income
3D crochet flowers perform extremely well at craft fairs and online marketplaces like Etsy, Shopify, and Facebook Marketplace.
Best-Selling Product Ideas
- Giftable coaster sets (2–4 pack)
- Refrigerator magnets
- Tea-time decorative set (flower coaster + mug cozy)
- Hair clips or brooch pins
- Keychain charms
- Boho bag accents
- Decorative bowl fillers
Pricing Guide
Depends on size and yarn quality:
- Small accessories: $4–$8
- Medium flowers/coasters: $8–$12
- Luxury cotton sets: $15–$25
Packaging Tips
- Tie two flowers together with twine
- Add kraft-paper tag with “Handmade with Love”
- Include care instructions (hand-wash, air-dry)
Presentation raises perceived value significantly.
🧶 Care Instructions
To keep the flowers looking bright:
- Hand-wash gently
- Squeeze water out carefully
- Reshape and air-dry
- Avoid heavy stretching
Cotton flowers will hold up even under daily use as coasters.
🌸 Final Thoughts
Creating a 3D Spiral Crochet Flower is a fun, creative, and rewarding project—perfect for beginners yet satisfying enough for experienced crocheters. Whether you’re decorating your home, making heartfelt gifts, or crafting products to sell, these flowers offer endless possibilities.
Once you master the basic spiral technique, you can invent entirely new versions—bigger blooms, layered petals, multi-color spirals, or even themed collections for holidays.
If you’d like:
✅ A printable PDF
✅ A diagram/chart version
✅ A video script
✅ A quick-pattern summary
…I’d be happy to create those for you!