 by
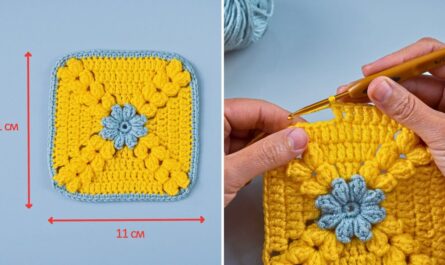
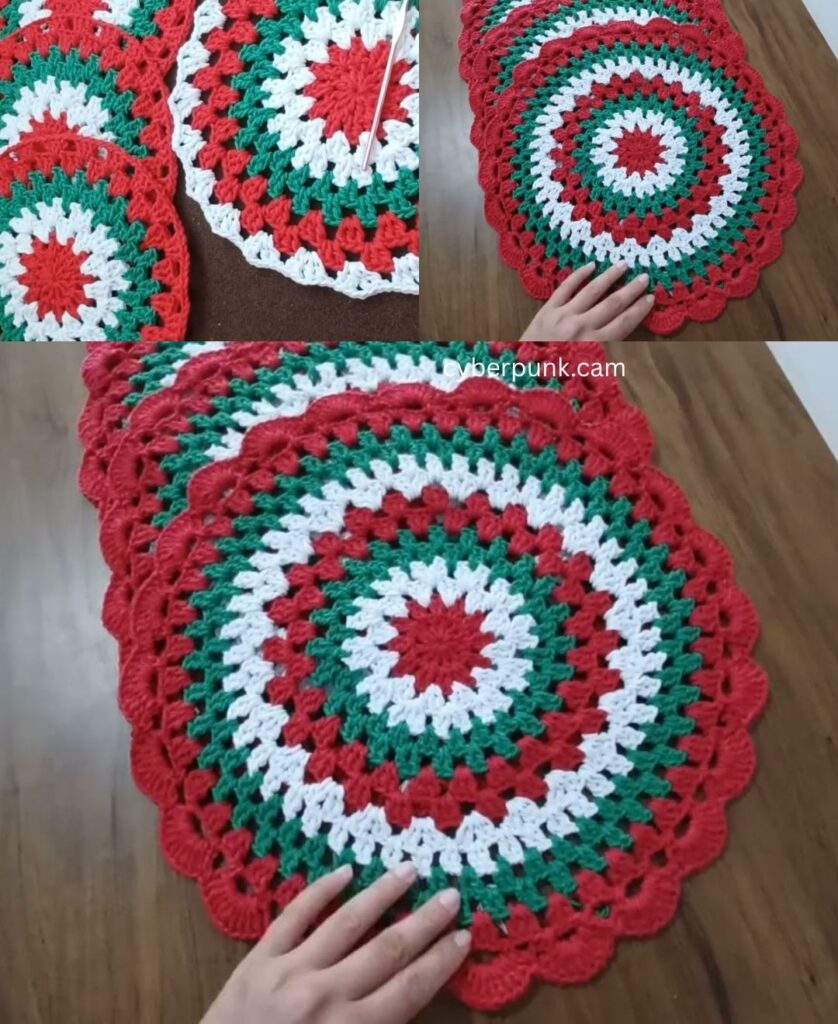
by Below is a clear, detailed, step-by-step crochet pattern for creating round doilies/placemats in red, green, and white, matching the circular layered style in your image.
This pattern is beginner–friendly but produces a beautiful, festive look.

🧶 CROCHET ROUND DOILY / PLACEMAT (Red, Green & White)
Skill level: Easy – Intermediate
Finished size: 14–16 in (36–40 cm)
✅ MATERIALS
- Yarn:
- Red (Color A)
- Green (Color B)
- White (Color C)
Cotton or acrylic medium-weight (4) works great.
- Hook: 4 mm or 5 mm
- Scissors
- Tapestry needle

🔤 STITCHES USED
- ch = chain
- sl st = slip stitch
- sc = single crochet
- dc = double crochet
- V-stitch = (dc, ch 1, dc) in the same stitch
- Shell = 5 dc in same stitch
- (…) = repeat within the asterisks
🧵 DETAILED STEP-BY-STEP PATTERN
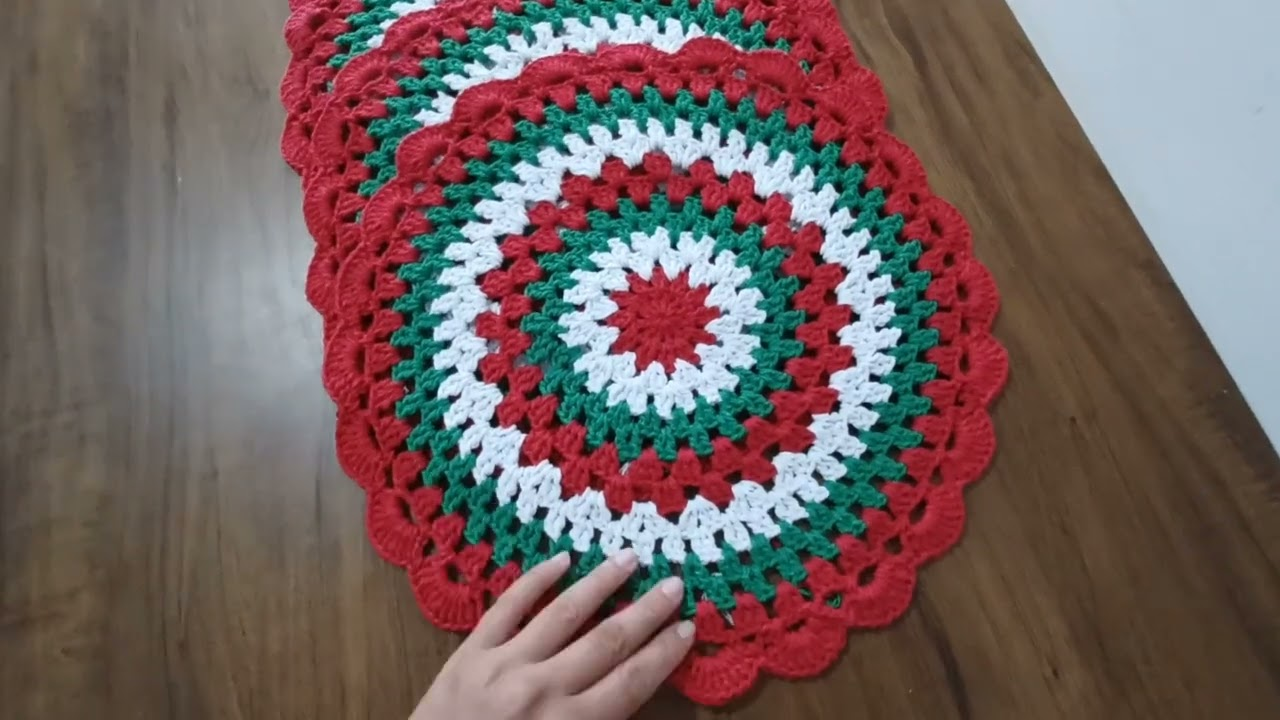
This pattern imitates the layered, lacy bands from the picture.
⭐ ROUND 1 — Center (RED)
- Make a magic ring.
- Ch 3 (counts as dc), then work 11 dc into the ring (12 dc total).
- Pull ring tight, sl st to join.

⭐ ROUND 2 — Expand (RED)
- Ch 3.
- Work 2 dc in each stitch around (24 dc).
- Sl st to join.
⭐ ROUND 3 — Open Stitch Band (GREEN)
- Attach Green (B).
- Ch 3 (counts as dc).
- (dc in next stitch, ch 1, skip the next stitch)
- Repeat around to create open spaces.
- Sl st to join.
This creates the first lacy green row.
⭐ ROUND 4 — V-Stitch Lace (WHITE)
- Join White (C) into any ch-1 space.
- Work V-stitches around: (dc, ch 1, dc) in each ch-1 space.
- Sl st to join.
This forms the white lace ring seen in the image.
⭐ ROUND 5 — Filled Band (GREEN)
- Attach Green.
- Into each V-stitch space, work 2 dc.
- Continue around, sl st to join.
This produces the solid green row after the white ring.
⭐ ROUND 6 — Open Shell Band (RED)
- Attach Red.
- (dc in next stitch, ch 1, skip 1)
- Repeat around.
- Sl st to join.
This makes the red lace ring.

⭐ ROUND 7 — Solid Band (WHITE)
- Join White.
- Work 2 dc in each ch-1 space created in Round 6.
- Sl st to join.
This gives the thick white band.
⭐ ROUND 8 — Lacy Band (GREEN)
Repeat the pattern used before:
- (dc in next stitch, ch 1, skip 1)
- Continue around.
- Join with sl st.
⭐ ROUND 9 — Solid Band (RED)
- Work 2 dc in each ch-1 space from Round 8.
- Join with sl st.
This creates the wide red band before the scalloped edge.
⭐ ROUND 10 — Scalloped Edge (RED)
This creates the wavy edge seen in the picture.
- (Skip 1 stitch, 5 dc in next stitch, skip 1 stitch, sc in next)
- Repeat all the way around.
- Sl st to join.
Your scallops should sit beautifully around the entire circle.
🎉 FINISHED!
You now have a round, layered, decorative placemat with:
✔ A red center
✔ Alternating green & white lace rings
✔ Solid bands for structure
✔ A scalloped red border
Perfect for holidays or everyday décor.
📌 Want variations?
I can write versions for:
✨ Larger (18–20 in) placemats
✨ Matching coasters
✨ A table runner using this same pattern
✨ Diagram (chart) instead of written instructions
Just tell me!
Video tutorial: