 by
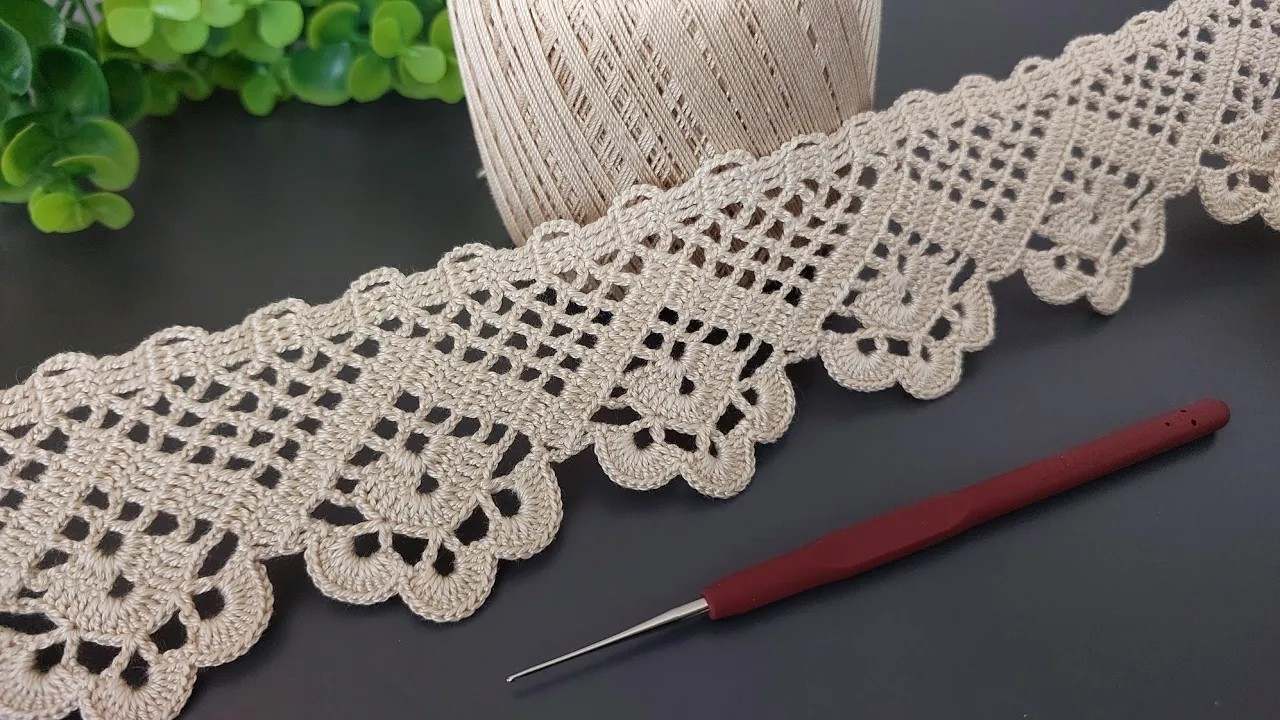
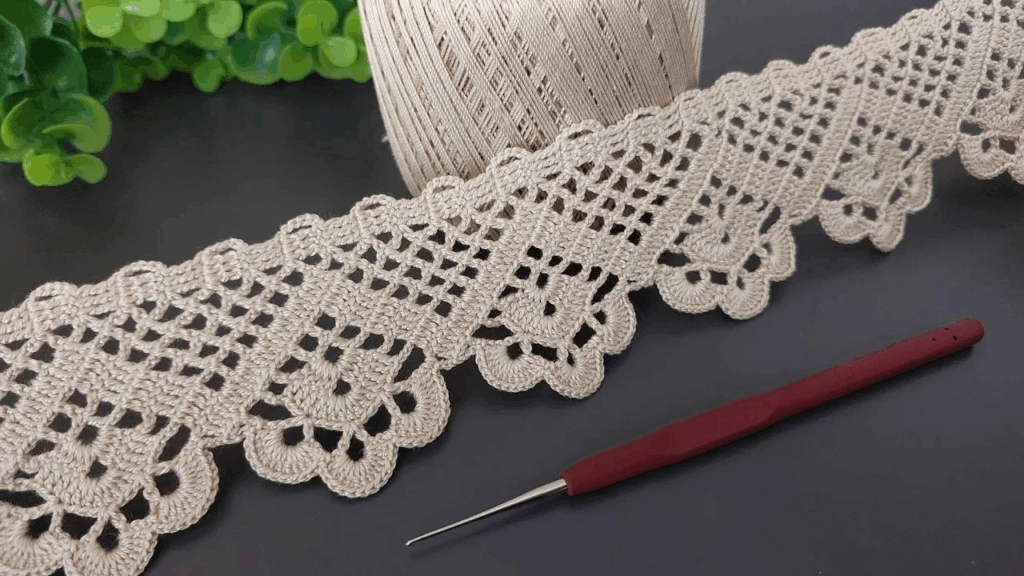
by Crocheting an elegant lace border is one of the easiest ways to transform a simple blanket, scarf, or cloth into a sophisticated piece. These borders typically rely on a rhythmic repetition of simple stitches and chain spaces to create an airy, delicate look.
This tutorial details a classic, beginner-friendly lace border design called the “Shell and Picot Edging.”
🐚 Elegant Shell and Picot Border Tutorial
This pattern combines the Shell stitch (a fan shape) with the Picot stitch (a small loop) for a timeless, decorative finish.
Materials You’ll Need
- Yarn: Use the same yarn as your main project, or a slightly finer yarn for a more delicate look. A contrasting color can also be very striking.
- Crochet Hook: The same size used for your main project.
- Scissors
- Tapestry Needle: For weaving in ends.
Key Crochet Terms
| Abbreviation | Stitch Name |
| ch | Chain |
| sl st | Slip Stitch |
| sc | Single Crochet |
| dc | Double Crochet |
| picot | Picot Stitch: Ch 3, then sl st back into the first ch. |
| st(s) | Stitch(es) |

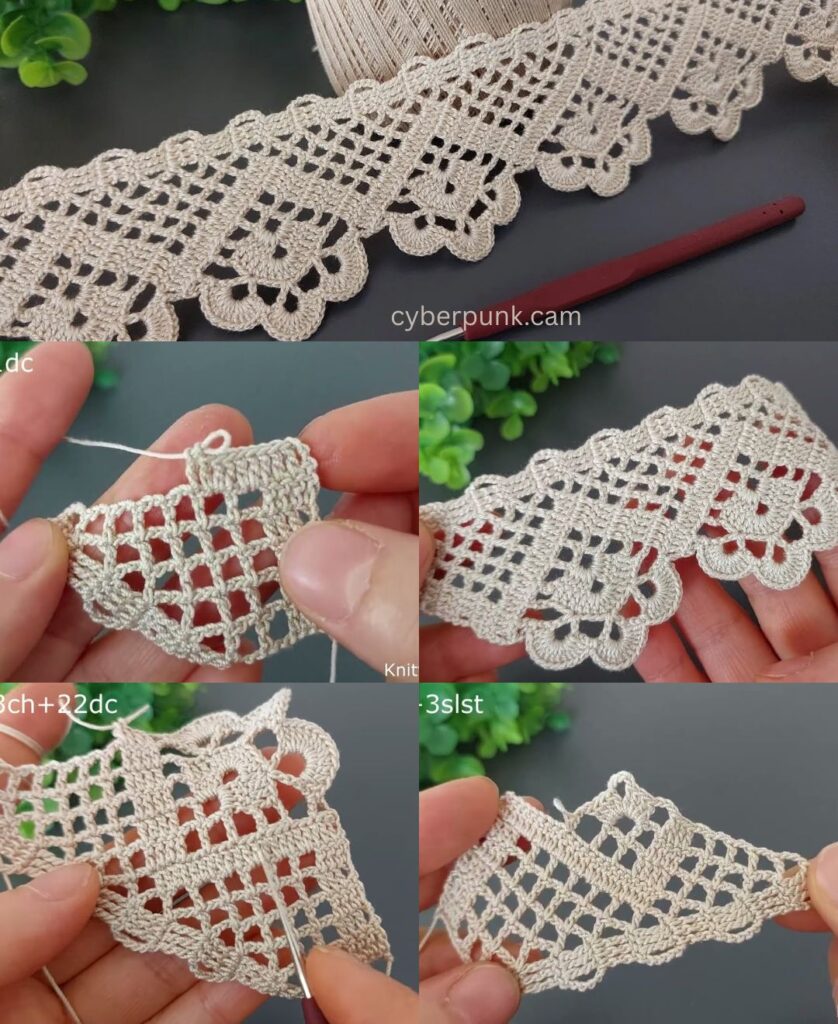
Step 1: Preparing the Edge (Base Round)
Before adding the decorative lace, you need a neat foundation of single crochet stitches to ensure your border lies flat.
- Join Yarn: Join your yarn (or border color) anywhere on the edge of your project with a sl st.
- Round of SC:ch 1 (does not count as st). Work sc evenly all the way around the entire edge of your project.
- Tip for Evenness: Aim to place 1 sc into each stitch and 2 sc for every 3 rows along the side edges.
- The Corner Rule: When you reach a corner, work [sc, ch 1, sc] into the corner stitch. This helps the corner turn sharply without pulling.
- Finish: Join with a sl st to the first sc.

Step 2: Creating the Lace Design (Shells)
This round introduces the fan-like shell stitch, which will form the main body of the lace.
- Start: ch 1 (does not count as st). sc into the same stitch.
- Skip: Skip the next 2 sts.
- First Shell: Work [5 dc] into the next stitch. (This creates the shell shape).
- Anchor: Skip the next 2 sts. Work sc into the next stitch.
- Repeat: Repeat the sequence [sk 2 sts, 5 dc into the next st (shell), sk 2 sts, sc into the next st] around the entire edge.
- Note on Corners: If your corner falls perfectly into the center of a shell (the 3rd dc), that’s fine. If a corner falls into an anchor (sc) stitch, ensure you work a simple sc into that corner stitch and then resume the pattern.
- Finish: Join with a sl st to the first sc. Fasten off this color (unless you want to use the same color for the final row).

Step 3: Adding the Scallop and Picot Edge (Optional Color Change)
This final round adds the small, pointed loops that give the border its elegant, scalloped look.
- Join Yarn: Join your yarn into the 3rd dc (the center stitch) of any 5-dc shell from the previous round with a sl st.
- Move Down the Shell: ch 1. Work sc into the same 3rd dc stitch. sc into the next dc stitch.
- First Picot Point: Work [sc, picot, sc] into the next sc anchor stitch between the shells.
- Move Up the Next Shell: sc into the next dc stitch.
- Center Picot: Work [sc, picot, sc] into the next 3rd dc (center) stitch of the shell.
- Repeat:[sc in the next dc, sc in the next dc, (sc, picot, sc) in the sc anchor st, sc in the next dc, (sc, picot, sc) in the 3rd dc of the shell] around.
- This sequence creates three picots over two shells, forming a continuous wave.
- Finish: Join with a sl st to the first sc. Fasten off and weave in all remaining ends.
This Shell and Picot border adds instant texture and elegance to any project!
Would you prefer a tutorial on a different style of lace border, like a Block Stitch Lace or a Granny Picot Edging?
Video tutorial: