 by
by Absolutely! Here’s a detailed and long step-by-step tutorial for making a crochet summer bucket hat – perfect for keeping cool and stylish in the warmer months. This pattern is easy to follow, beginner-friendly, and includes all the necessary instructions to make your own breathable, lightweight summer hat.
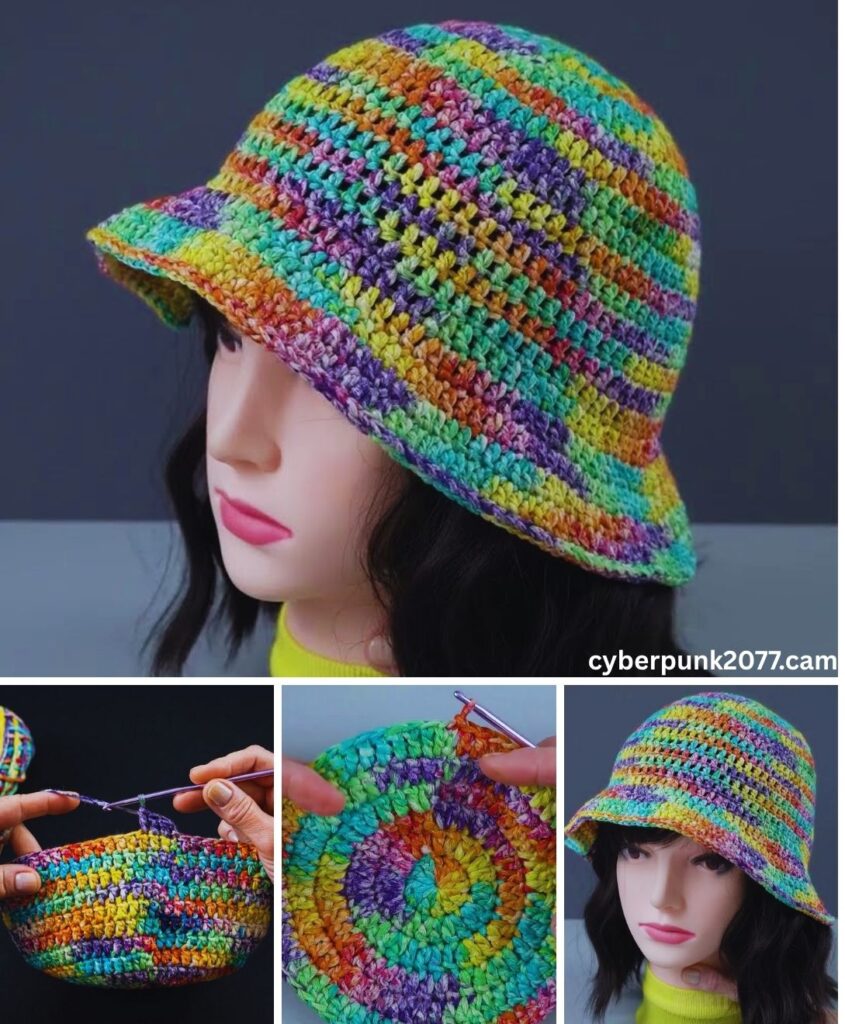
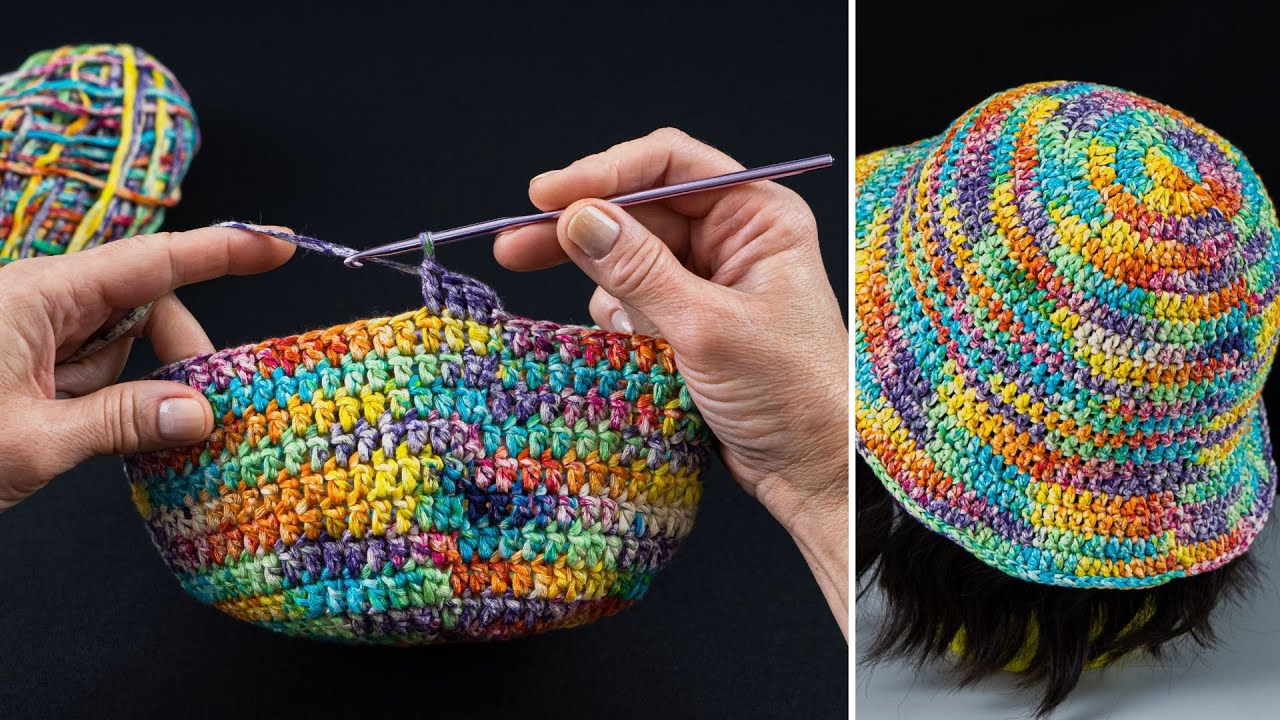
🧶 How to Crochet a Summer Bucket Hat – Step-by-Step Pattern & Tutorial
Summer is the perfect season for lightweight, breathable accessories, and nothing says style and function like a crocheted bucket hat. This versatile piece is perfect for beach days, picnics, or adding a touch of handmade charm to any outfit.
This tutorial will walk you through a simple and breezy bucket hat, ideal for hot weather. It features an airy, openwork stitch pattern and is made with cotton yarn to keep your head cool. Whether you’re a beginner or looking for a quick seasonal project, this hat is a must-make.
☀️ Why Crochet a Summer Bucket Hat?
- Lightweight and breathable for hot weather
- Stylish, trendy, and customizable
- A great stash-buster project
- Perfect for gifts or personal use
- Easy to make in a few hours
🧺 Materials You’ll Need
🧵 Yarn
- 100% Cotton Yarn (Lightweight DK or Worsted #3/4)
- Cotton is breathable, washable, and holds structure well.
- You’ll need about 100–150 grams (approx. 180–250 yards)
🪡 Tools
- Crochet Hook: 4.0 mm (G-6) or 4.5 mm (adjust to yarn weight and tension)
- Stitch Marker (optional but helpful)
- Yarn Needle (for weaving in ends)
- Scissors
- Measuring Tape (to check sizing)
📐 Sizing Info
This tutorial covers a standard adult size (head circumference: 21″–23″ / 53–58 cm). You can adjust the size by increasing or decreasing the number of rounds in the crown and body sections.
✨ Stitches & Abbreviations
| Abbreviation | Stitch |
|---|---|
| ch | Chain |
| sl st | Slip Stitch |
| sc | Single Crochet |
| dc | Double Crochet |
| inc | Increase (2 sc in one st) |
| st / sts | Stitch / Stitches |
| MR | Magic Ring |
Skill Level: Easy / Beginner
Pattern Style: Worked in the round, top-down construction.
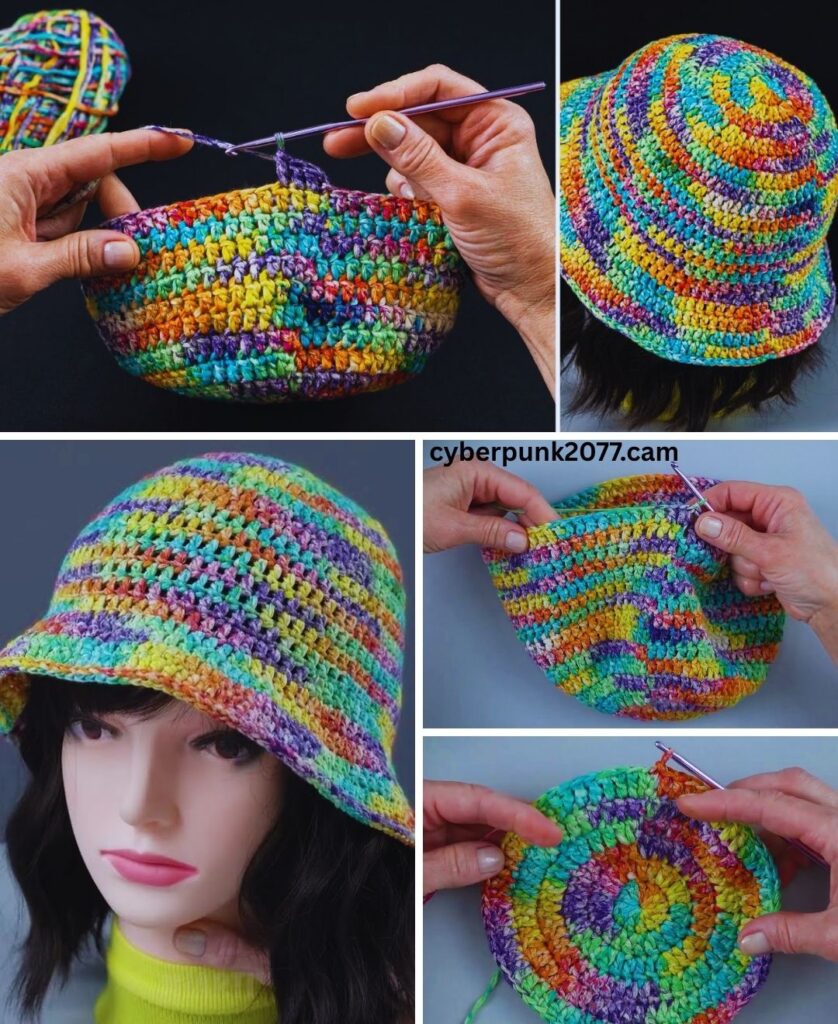
🧶 Overview of Hat Construction
The hat is made in three sections:
- Crown (top) – a flat circle that forms the top of the head
- Body (sides) – comes straight down from the crown
- Brim – flares outward for sun protection
🧵 Step-by-Step Crochet Pattern
🔘 Part 1: Crochet the Crown (Top Circle)
This part is worked in continuous rounds (do not join unless instructed). Use a stitch marker to keep track of your first stitch.
R1:
- Start with a magic ring (MR)
- Ch 2 (does not count as dc), work 12 dc into the ring
- Tighten and continue to next round
(12 sts)
R2:
- 2 dc in each st around
(24 sts)
R3:
- (1 dc, inc) repeat around
(36 sts)
R4:
- (2 dc, inc) repeat around
(48 sts)
R5:
- (3 dc, inc) repeat around
(60 sts)
R6:
- (4 dc, inc) repeat around
(72 sts)
👉 Stop increasing when the circle is about 6.5–7 inches (16.5–18 cm) in diameter for adult size. You may need to add one more round of increases depending on your yarn and gauge.

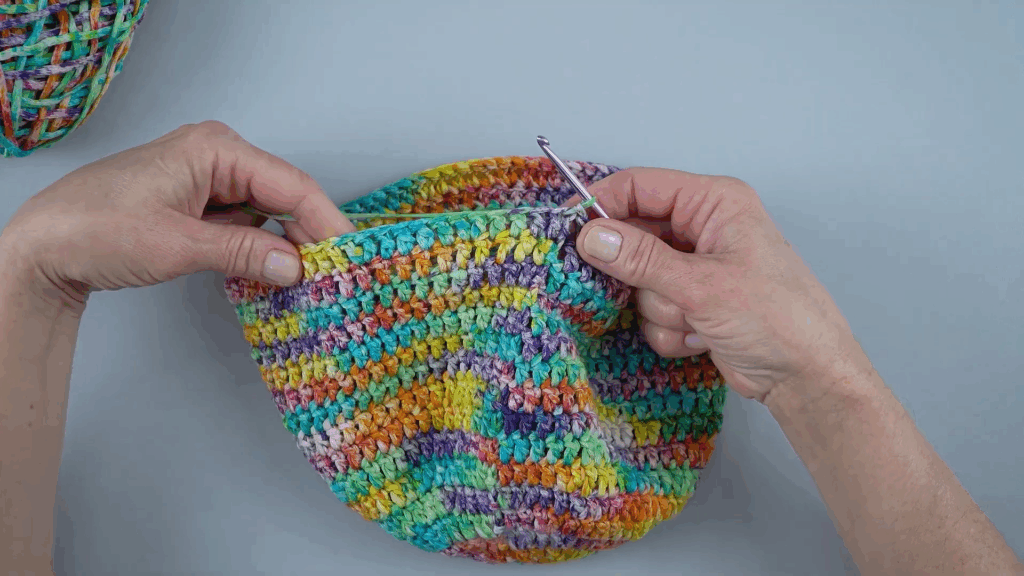
🧢 Part 2: Crochet the Body (Hat Sides)
Now that you’ve finished increasing, it’s time to build the sides of the hat.
R7–R15 (or until 4–5” in height):
- dc in each st around
- Optional: Use an openwork stitch like dc, ch 1, skip 1, repeat for a breezier texture.
You can alternate between solid and openwork rows to keep it stylish and breathable.
Example:
- R7: dc in each st around
- R8: (dc, ch 1, skip 1) repeat
- R9: dc in each ch-1 space and dc
Repeat these for a stylish lacy look.
👒 Part 3: Crochet the Brim
The brim gives your bucket hat its classic summer style and offers sun protection. You’ll start increasing again to flare it out.
R1:
- (6 dc, inc) repeat around
(Increase evenly)
R2:
- dc in each st around
R3:
- (7 dc, inc) repeat around
R4:
- dc in each st around
Repeat increasing every second round. You can stop when the brim measures about 2.5–3 inches (6–7.5 cm) or longer for a wider sun hat.
Optional Edging (For a Clean Finish)
- Work a round of sl st or reverse sc (crab stitch) around the edge of the brim for structure and polish.
🎨 Customization Ideas
- 🌸 Add a crocheted flower, bow, or ribbon
- 🧵 Change colors to make stripes or blocks
- 🪡 Embroider initials or designs
- 🧢 Use raffia or paper yarn for a straw-like texture
🧼 Washing & Care
- Hand wash in cold water or gentle machine cycle
- Lay flat to dry (reshape while wet)
- Avoid wringing or hanging when wet to prevent stretching
🕒 Estimated Time
- Beginner: 4–6 hours
- Intermediate: 2–3 hours
Perfect for a weekend or even an afternoon project!
📋 Quick Reference Summary
| Section | Approx. Rounds | Action |
|---|---|---|
| Crown | 6–7 rounds | Increase in double crochet |
| Body | 8–10 rounds | Straight stitches (dc or openwork) |
| Brim | 4–6 rounds | Evenly spaced increases |
🧵 Final Tips
- Always check your gauge if size matters.
- Use cotton yarn to avoid overheating in summer.
- Try your hat on as you go to adjust fit or flare.
- Block the final hat lightly to shape it.
❤️ Why You’ll Love This Hat
- It’s light, breathable, and perfect for summer.
- It’s beginner-friendly but looks professionally made.
- You can finish it in just a few hours.
- It makes a great gift or addition to your wardrobe.