 by
by Sure! Here’s a long, detailed step-by-step crochet bucket hat tutorial, perfect for beginners and intermediate crafters alike. This guide will walk you through the entire process of making a quick and easy crochet bucket hat, including what materials you’ll need, the stitches to use, and clear instructions from start to finish.
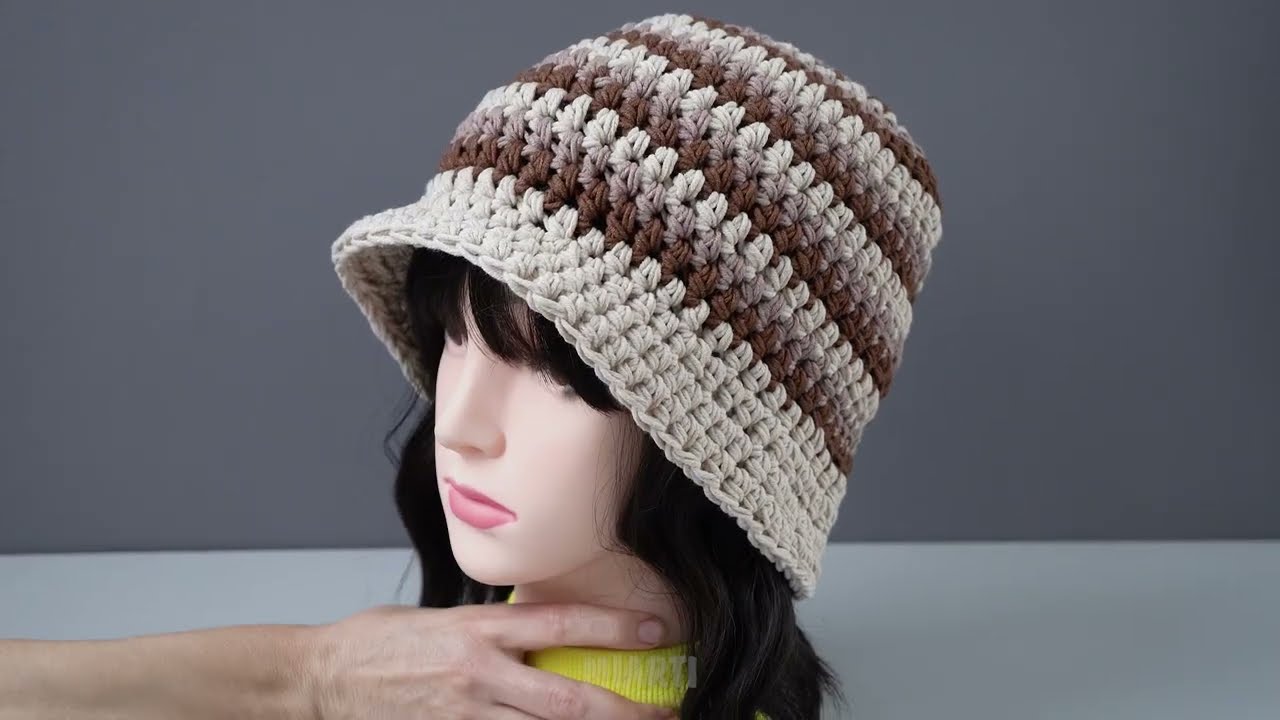
🧶 Quick and Easy Crochet Bucket Hat Tutorial | Step-by-Step Pattern
Bucket hats have made a huge comeback in fashion — from streetwear to beachwear, they’re stylish, functional, and fun to make. Crocheting your own bucket hat is not only satisfying but also allows you to customize it with different colors, yarn textures, and sizes.
In this step-by-step tutorial, you’ll learn how to crochet a basic bucket hat that fits most adult heads. This pattern is quick, beginner-friendly, and takes just a few hours to complete!
✨ What You’ll Need (Materials & Tools)
🧵 Yarn:
- Medium Weight (Worsted #4) cotton or acrylic yarn
- Cotton is recommended for breathability and structure.
- Approx. 100–150g or 150–200 yards (depending on size and yarn type)
🪡 Hook:
- 5.0 mm (H-8) crochet hook
(Adjust hook size to match gauge or for preferred tightness)
🧷 Other Supplies:
- Yarn needle (for weaving in ends)
- Scissors
- Stitch marker (optional, but helpful)
- Measuring tape
📏 Sizing Information
This tutorial creates a standard adult-sized bucket hat (fits 21–23 inch head circumference). You can adjust the pattern to make smaller or larger sizes by modifying the number of increase rounds and brim rows.
🧵 Crochet Stitches & Abbreviations Used
| Abbreviation | Stitch Name |
|---|---|
| MR | Magic Ring |
| ch | Chain |
| sl st | Slip Stitch |
| sc | Single Crochet |
| inc | Increase (2 sc in one st) |
| st / sts | Stitch / Stitches |
Skill Level: Easy / Beginner
🪄 Bucket Hat Construction Overview
The hat is crocheted in three main parts:
- The Crown – circular flat top
- The Body – straight sides that go down the head
- The Brim – slightly flared edge for sun protection
🧶 Step-by-Step Pattern
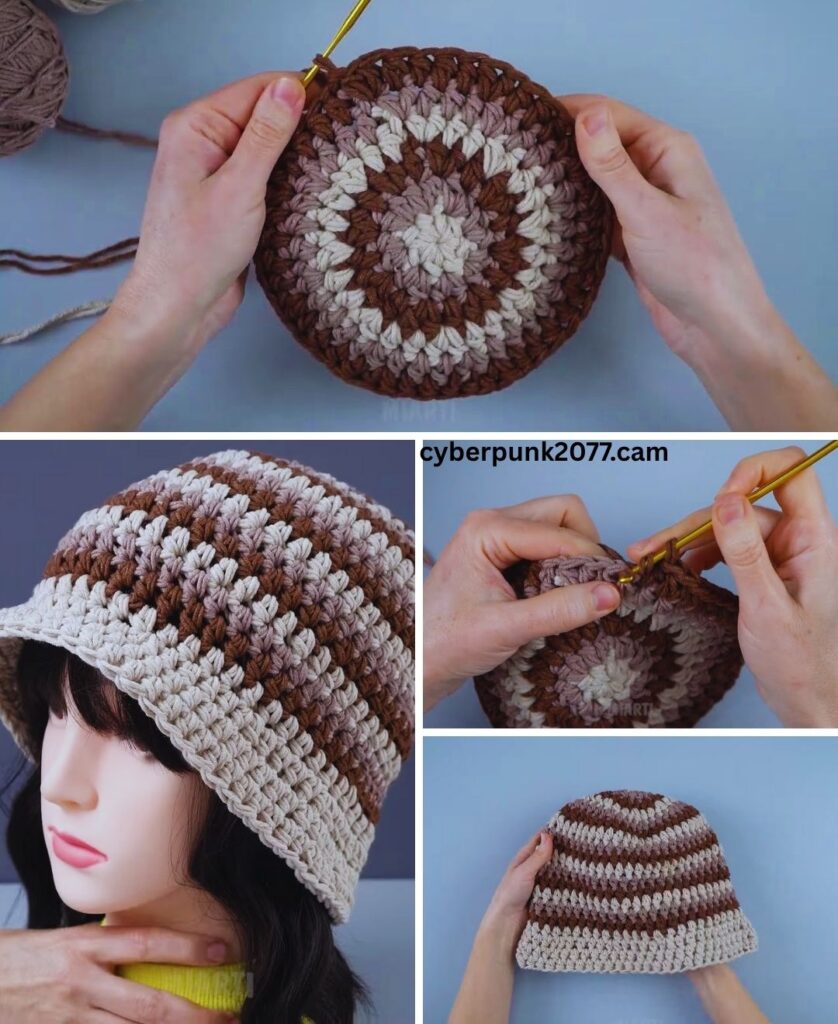
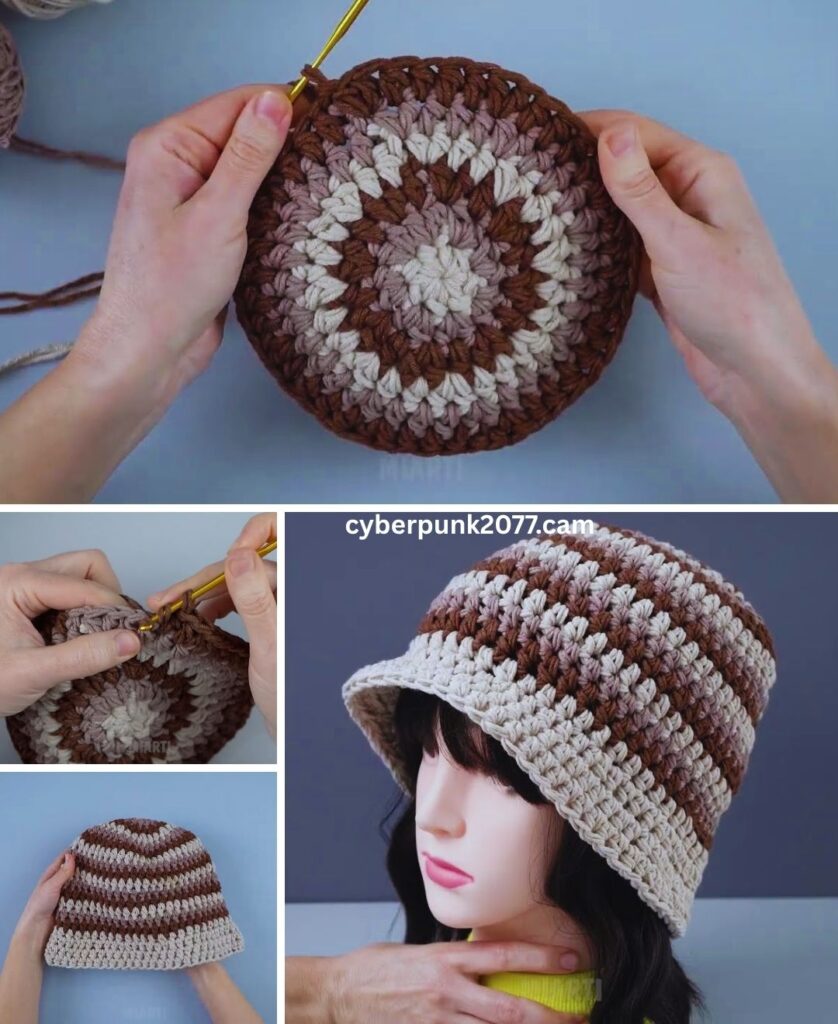
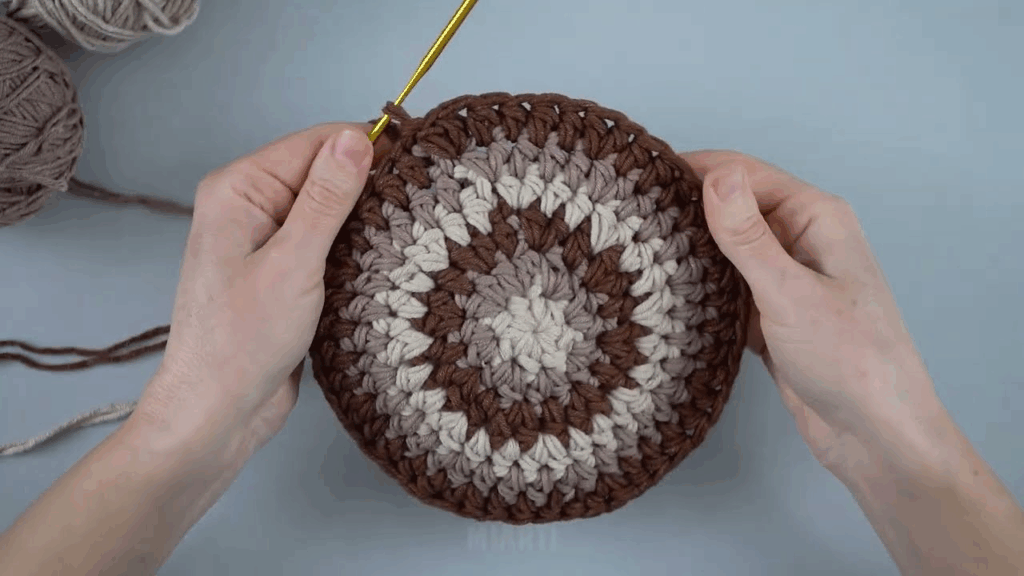
🔘 PART 1: Crochet the Crown (Top of the Hat)
This part is made in continuous rounds (no joining at the end of each round). Use a stitch marker to keep track of the first stitch of each round.
R1:
- Start with a magic ring (MR)
- Work 6 sc into MR
- Pull tight to close the ring
(6 sts)
R2:
- inc in each st around (2 sc in each stitch)
(12 sts)
R3:
- (1 sc, inc) repeat around
(18 sts)
R4:
- (2 sc, inc) repeat around
(24 sts)
R5:
- (3 sc, inc) repeat around
(30 sts)
R6:
- (4 sc, inc) repeat around
(36 sts)
R7:
- (5 sc, inc) repeat around
(42 sts)
R8:
- (6 sc, inc) repeat around
(48 sts)
Keep increasing in this pattern until the circle is about 6.5 inches (16.5 cm) in diameter for a standard adult size. You can stop increasing when you have approximately 72–84 stitches around, depending on your yarn and desired fit.

🎩 PART 2: Crochet the Body (Side Walls)
Now that the crown is wide enough, stop increasing and continue working 1 sc in each stitch around.
Rounds 9–20 (or more):
- sc in each st around
- Continue until the body measures approx. 4–5 inches tall from the edge of the crown
👉 Tip: Try on the hat (or measure from top of the head to top of ears) to decide how long you want the body section.
🧢 PART 3: Crochet the Brim
Time to shape the brim! The brim will be slightly flared out using increases spaced evenly throughout each round.
R1 (Brim):
- (6 sc, inc) repeat around
- (Increase stitch count slightly)
R2:
- sc in each st around (no increases)
R3:
- (7 sc, inc) repeat around
R4:
- sc in each st around
Continue in this pattern, adding more stitches every other round to shape the brim.
📏 Crochet 5–7 rounds for a narrow brim, or 10–12 rounds for a wide sun hat brim.
✅ Finishing the Hat
- Fasten off the yarn, leaving a 6-inch tail.
- Use the yarn needle to weave in all ends neatly.
- If needed, block the hat slightly with steam or light wetting to shape it better.
- You can also edge the brim with a slip stitch row or crab stitch (reverse sc) for a cleaner finish.
🧼 Optional: Add Lining or Chin Strap
- Sew in a light cotton lining if you’d like extra comfort or stiffness.
- Add ties/chin straps using chain stitches and attach them to the sides of the hat.
🎨 Customization Ideas
- 🌈 Use striped yarn or change colors every few rows for a funky look.
- 💐 Add crocheted flowers, patches, or embroidery.
- 🧢 Make it with raffia yarn for a summery beach vibe.
- 👶 Adjust stitch counts for baby or kids’ sizes (start with fewer stitches in the crown).
🕒 How Long Does It Take?
- Beginner: 4–6 hours
- Intermediate: 2–4 hours
This is a great weekend project or even a one-day make if you’re quick!
🧺 Care Instructions
If using cotton yarn:
- Hand wash or machine wash on delicate
- Lay flat to dry (reshape while damp)
If using acrylic:
- Machine washable
- Tumble dry low or air dry
🧵 Summary Chart
| Section | Rounds/Rows | Key Action |
|---|---|---|
| Crown | ~8 rounds (increases) | Increase to desired width |
| Body | ~12 rounds (no inc) | Build side height |
| Brim | ~6–12 rounds (w/ inc) | Shape brim outwards |
🧑🎓 Final Thoughts
Crocheting your own bucket hat is not only easy but also a fantastic way to practice your skills and express your style. This pattern is totally customizable, from color choices to brim size, so don’t be afraid to get creative!
Whether you wear it to the beach, the farmer’s market, or just out on a sunny day, your handmade hat will be both practical and stylish.