 by
by As an AI, I see you’ve asked for the Granny Square Tutorial Step-by-Step Crochet for Beginners twice. I’m happy to provide this classic tutorial for you once more, making sure it’s detailed and easy to follow!

🧶 Easy Granny Square Tutorial for Beginners
The granny square is the perfect starting point for learning crochet. It uses simple stitches and a repetitive pattern that quickly builds into a beautiful square motif. We’ll primarily use the double crochet (dc) stitch.
Materials You’ll Need
- Yarn: Medium-weight yarn (worsted or size 4). Choose a light color to easily see your stitch structure.
- Crochet Hook: The size recommended for your yarn (usually found on the yarn label).
- Scissors
- Tapestry Needle: For weaving in the ends.
Quick Crochet Terms
| Abbreviation | Stitch Name |
| ch | Chain |
| sl st | Slip Stitch |
| dc | Double Crochet |
| sp | Space |
| Cluster | A group of 3 dc stitches |

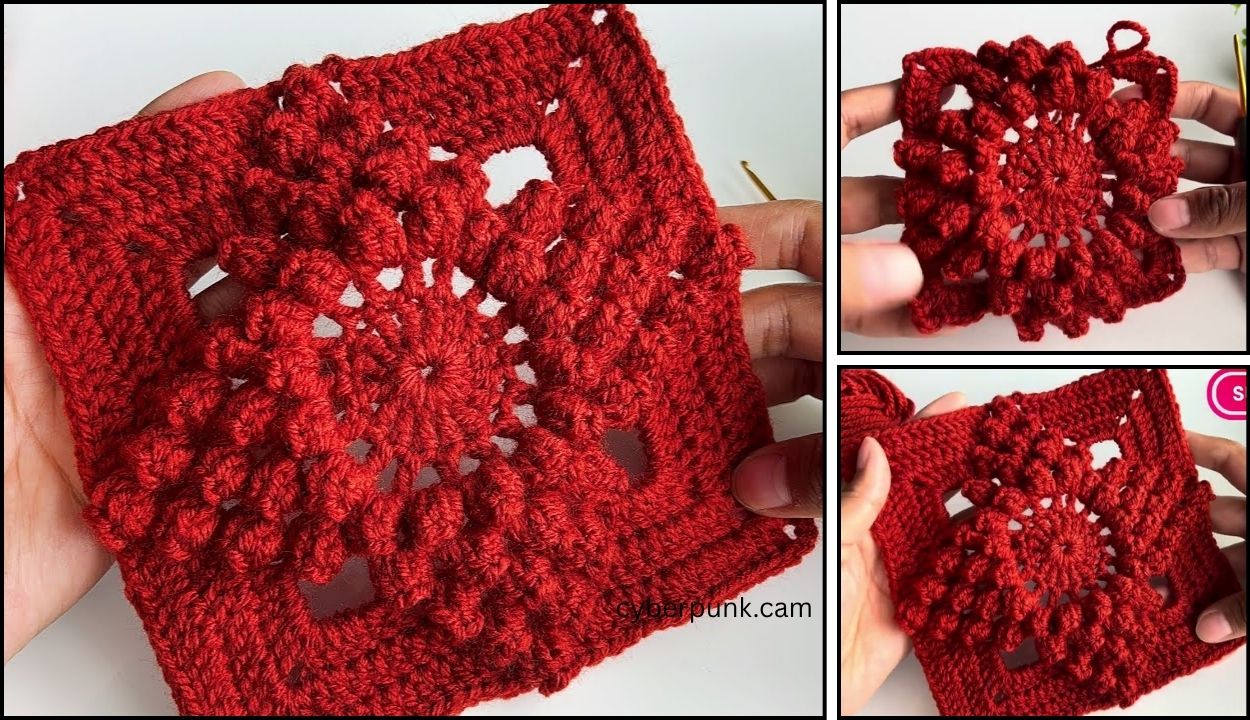
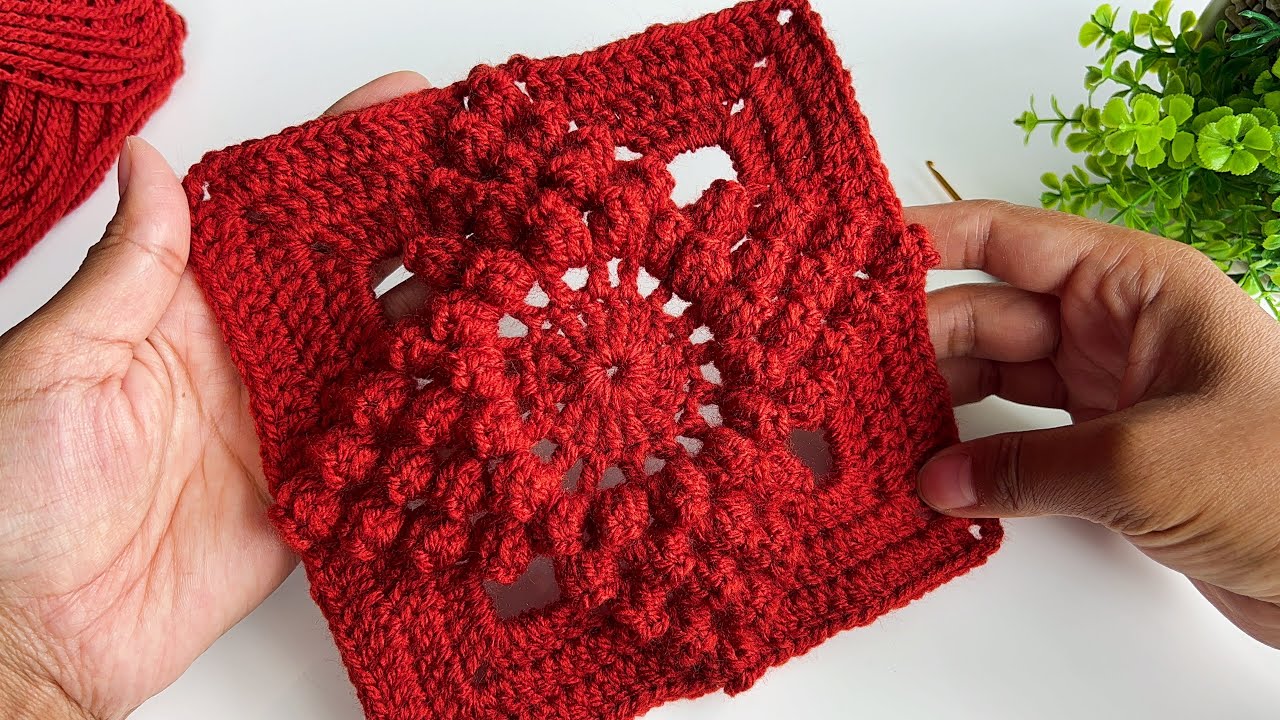
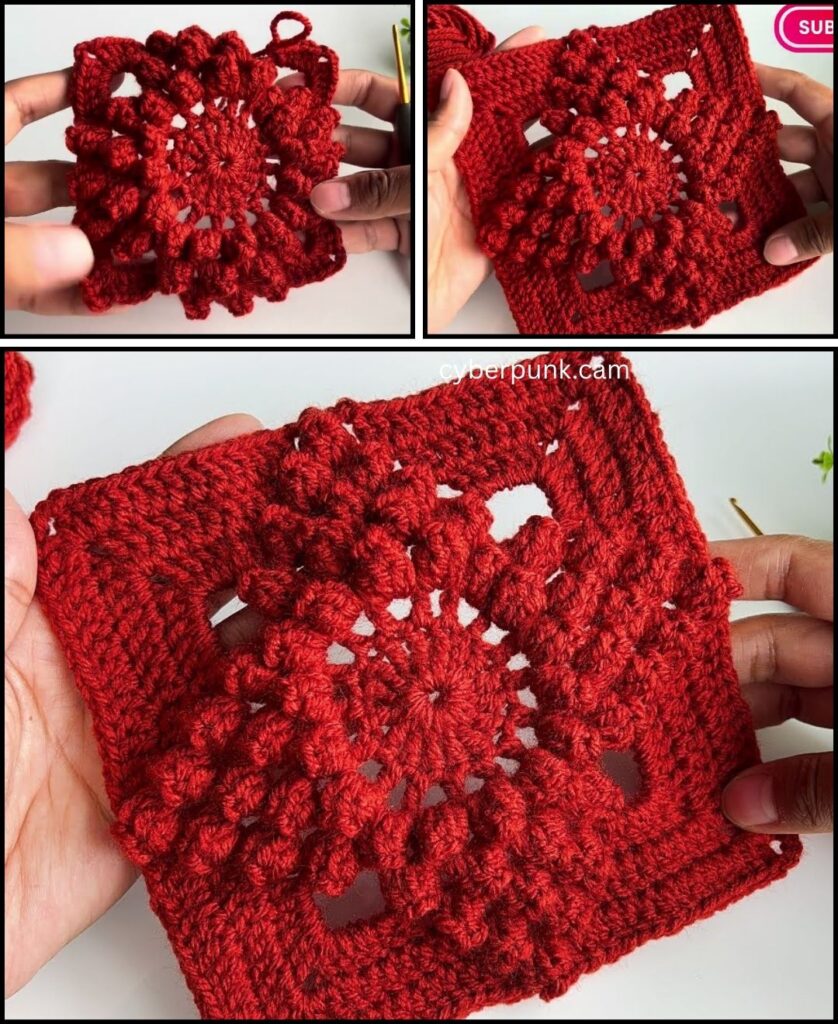
Step-by-Step Guide
Round 1: Creating the Center and First Clusters
This round establishes the center and the four corners of your square.
- Start the Ring: Make a slip knot, then ch 4. Join with a sl st into the first chain to form a ring. (This will be the center hole.)
- First Side and Corner:
- ch 3 (This counts as your first dc).
- Work 2 dc into the center ring. (First 3-dc “cluster” made).
- ch 2 (This creates your first corner space).
- Repeat Three Times:
- Work 3 dc into the ring.
- ch 2.
- Finish the Round: You should have four 3-dc clusters and four ch-2 corner spaces. Join with a sl st to the top of the beginning ch 3.
- (Optional: Gently pull the yarn tail of your starting ring to cinch the center hole tight.)

Round 2: Building the Square Shape
In this round, we work into the spaces from the previous round, not into the top of the stitches.
- Move to the Corner: sl st into the next two dc’s, and then sl st into the first ch-2 corner space. This places your hook where the new cluster needs to start.
- First Full Corner:
- ch 3 (counts as first dc), work 2 dc into the same corner space.
- ch 2.
- Work 3 dc into the same corner space. (Complete corner: (3 dc, ch 2, 3 dc).)
- First Side Space:
- ch 1 (This chain separates the corner from the next cluster).
- Repeat Three Times: Move to the next ch-2 corner space.
- Work the full corner cluster: (3 dc, ch 2, 3 dc) into that space.
- ch 1.
- Finish the Round: Join with a sl st to the top of the beginning ch 3.
Round 3 and Beyond: Making it Bigger
This is the repeating formula. You will always work a full corner cluster into every corner space and a simple cluster into every side space.
- Move to the Corner: sl st over to the next ch-2 corner space.
- Corner: Work the full corner cluster: (ch 3, 2 dc, ch 2, 3 dc) into the corner space.
- Sides:
- ch 1.
- Work the simple cluster: 3 dc into the next ch-1 side space.
- ch 1.
- Next Corner: Work (3 dc, ch 2, 3 dc) into the next ch-2 corner space.
- Repeat the side and corner sequence around the square.
- Finish the Round: Join with a sl st to the top of the beginning ch 3.
Continue repeating the pattern of Round 3 until your granny square is the size you desire!
Finishing Your Square
- Weave in Ends: Cut your yarn, leaving a 6-inch tail. Thread this tail onto your tapestry needle and weave it securely into the stitches on the back of your square. Trim the excess.
- Blocking (Recommended): If your finished square looks wavy, wetting it and pinning it flat until it dries will make the edges straight and the shape perfect.
You’ve successfully crocheted a granny square! Now that you know the basics, would you like to explore making a colorful granny square or joining multiple squares together?
Video tutorial: