 by
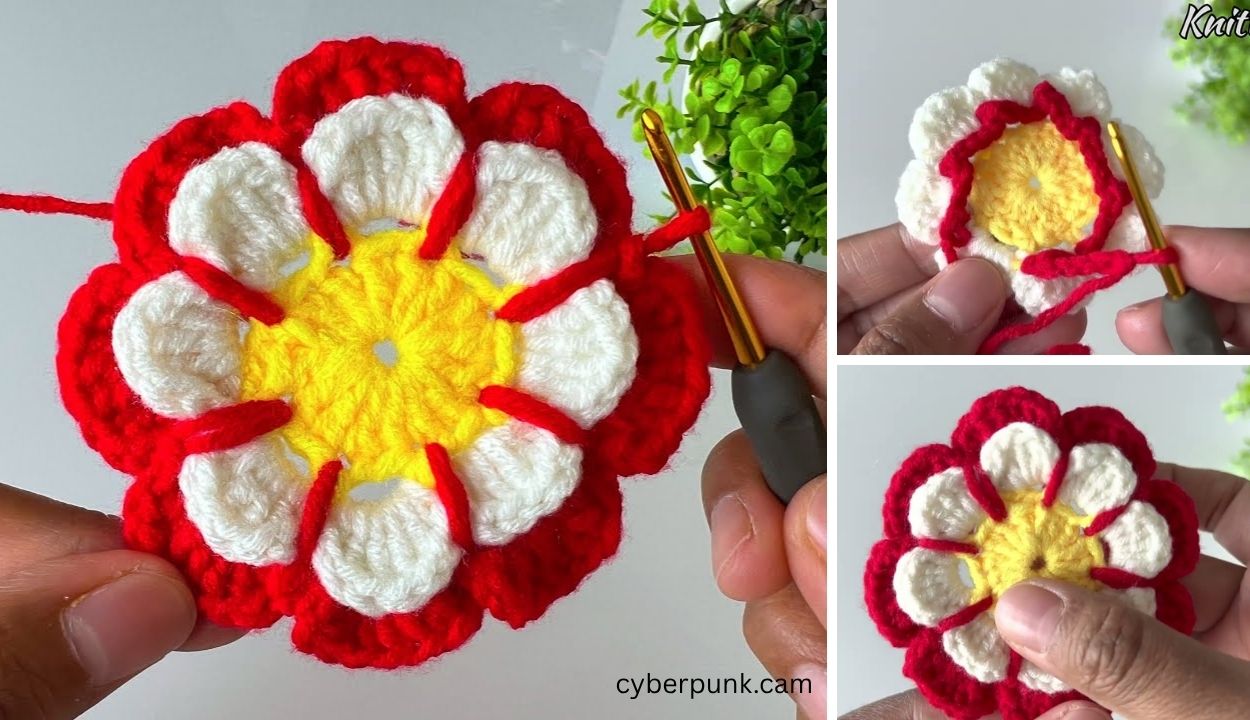
by Crocheting a simple flower is one of the best and quickest projects for beginners to master basic shaping and color changes. This pattern creates a classic, flat, five-petal flower that’s perfect for embellishments or practicing new stitches.
Here is a detailed, step-by-step tutorial on a lovely and easy Five-Petal Crochet Flower.

Materials Needed
- Yarn: Any medium-weight yarn (worsted/size 4) works well. Choose two colors:
- Color A: Center Color (e.g., yellow).
- Color B: Petal Color (e.g., pink, red, white).
- Crochet Hook: The size recommended for your yarn.
- Scissors
- Tapestry Needle: For weaving in the ends.
Key Crochet Terms
| Abbreviation | Stitch Name |
| ch | Chain |
| sl st | Slip Stitch |
| sc | Single Crochet |
| dc | Double Crochet |
| st(s) | Stitch(es) |
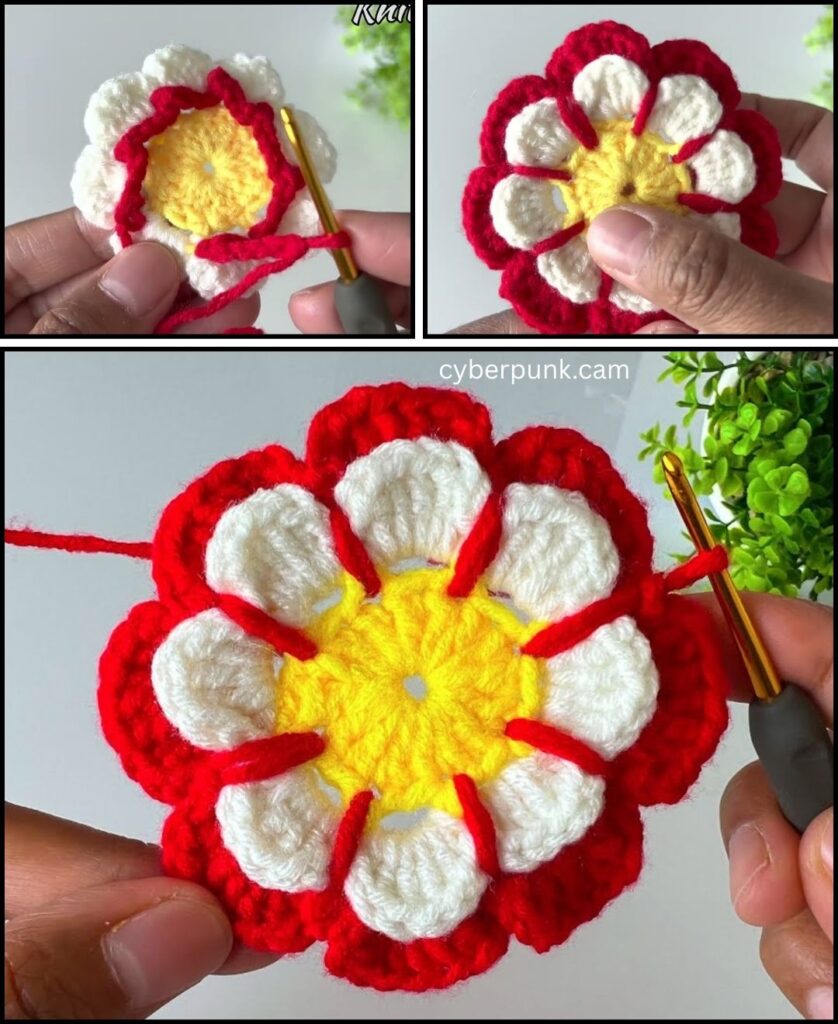
Part 1: The Center Ring (Color A)
The center provides the foundation stitches that the petals will be anchored to.
- Start the Ring: With Color A, create a Magic Ring (also called a Magic Circle). (Alternative for beginners: Chain 4 and join with a sl st to form a ring).
- Make the Base Stitches:
- ch 1 (does not count as a stitch).
- Work 10 sc into the center ring.
- Finish Ring: Pull the yarn tail tight to close the center hole. Join with a sl st to the first sc. (10 stitches total).
- Fasten off Color A and weave in the starting end.

Part 2: Creating the Petals (Color B)
The petals are worked directly into the 10 stitches you just made. We will use two stitches for each of the five petals.
- Join Yarn: Join your Petal Color (B) into any sc stitch from Round 1 with a sl st.
- First Petal:
- ch 2 (This sets the starting height for the petal).
- Work 3 dc into the same stitch where you joined.
- Work sl st into the next stitch. (This anchors the petal down and gives it a nice, rounded shape.)
- Petals 2, 3, 4, and 5 (Repeat Sequence):
- sl st into the next stitch. (This moves you to the next anchor point).
- Work the petal sequence: [ch 2, 3 dc] into the same stitch.
- Work sl st into the next stitch.
- Finish the Round: After completing the final petal, join with a sl st into the base of the very first petal you made (where you initially joined Color B).
- Fasten off Color B.

Finishing Touches
- Secure Ends: Use your tapestry needle to thread all remaining tails and weave them securely into the back of your flower’s center. Trim any excess yarn.
- Shaping: Gently adjust and shape the petals with your fingers until they lie evenly and look symmetrical.
Your beautiful, handmade flower is complete! Now that you know how to make a basic flower, would you like to try a three-dimensional flower or a rose pattern?
Video tutorial: