 by
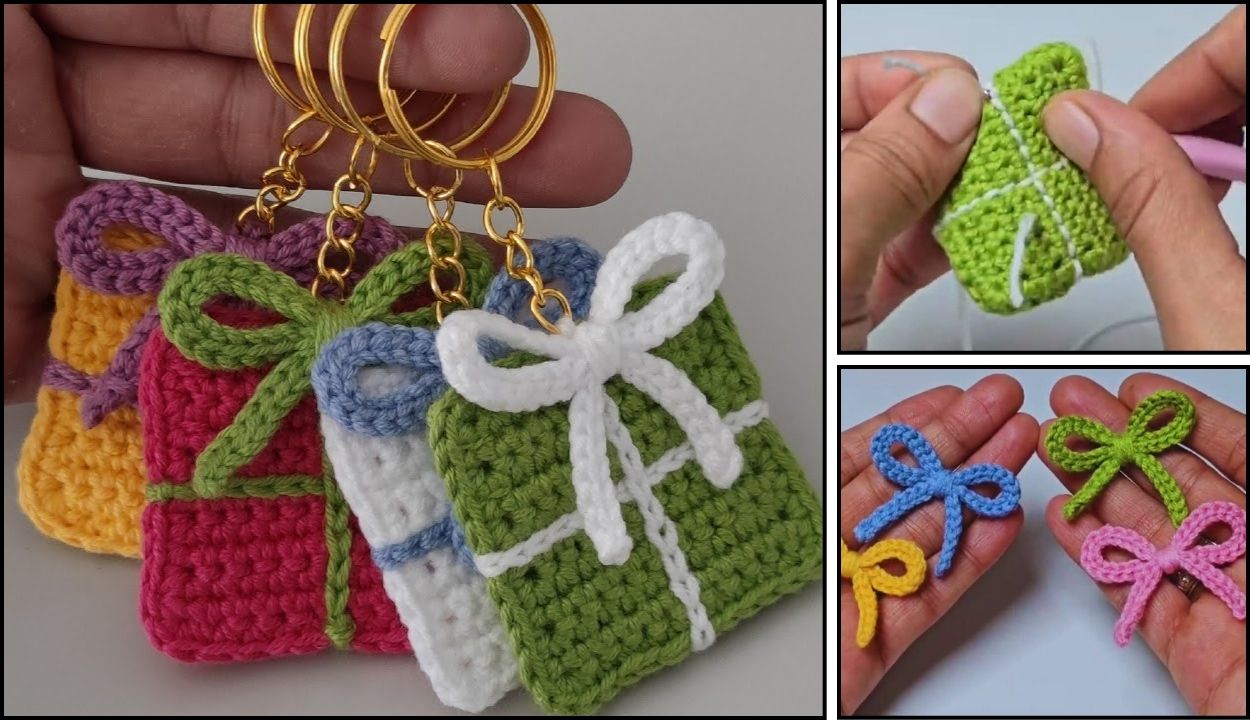
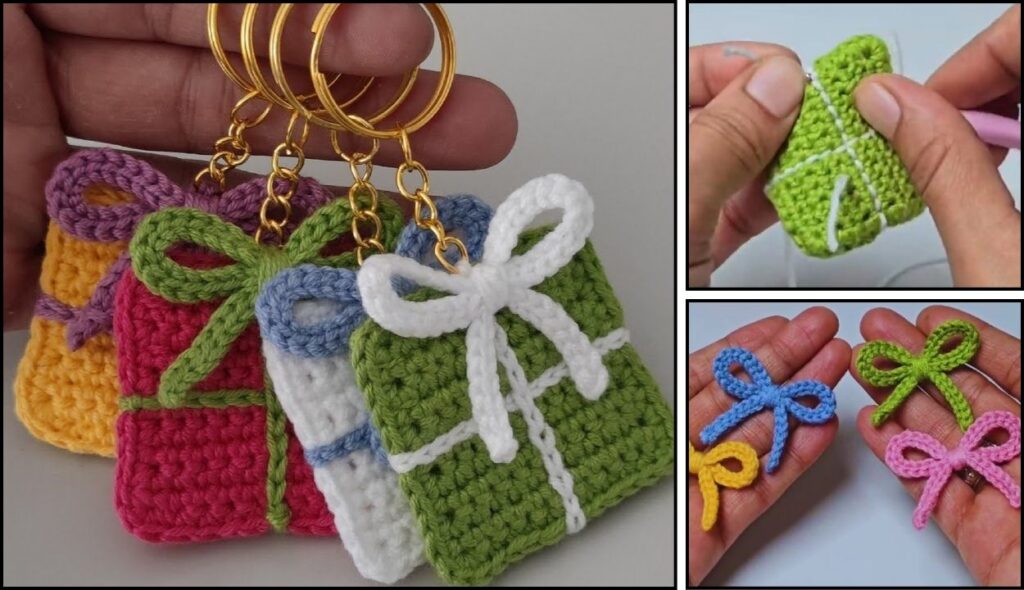
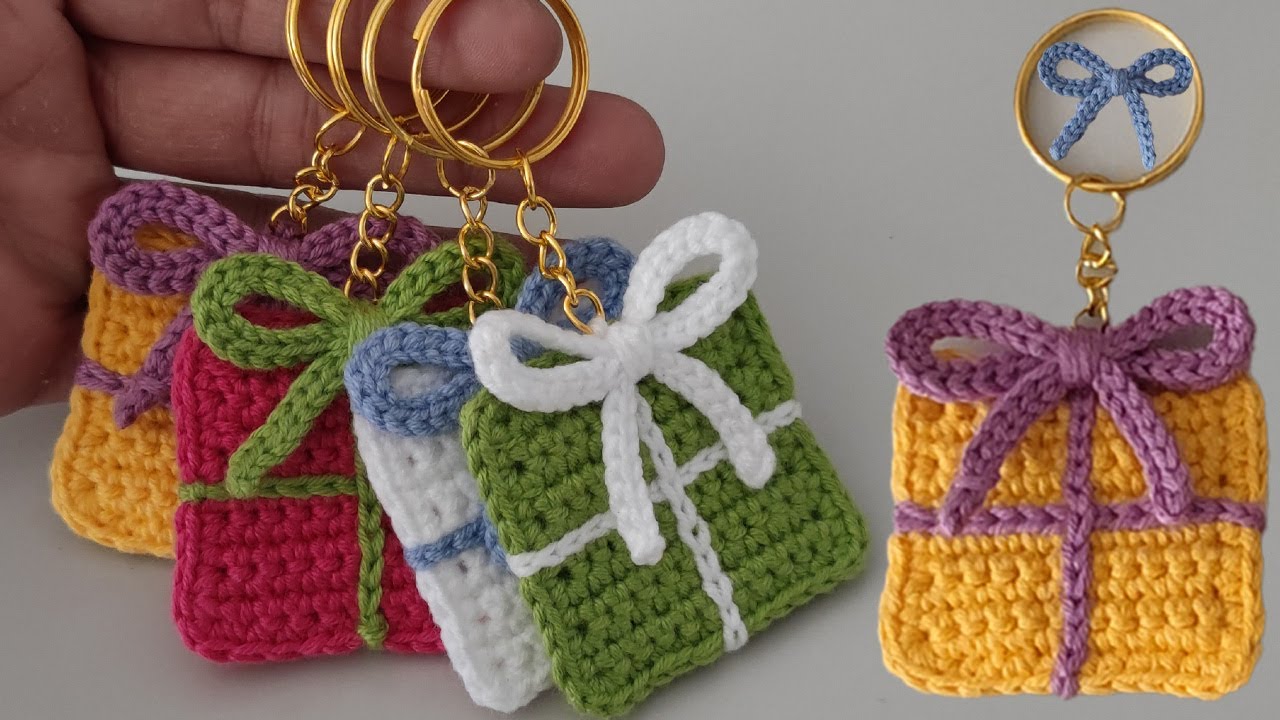
by Crocheting a keychain is an excellent project for beginners! It’s small, quick to complete, uses minimal yarn, and helps you practice fundamental stitches. Plus, you end up with a cute, functional item to keep or give as a gift.
Given that it’s warm in Phnom Penh, 100% cotton yarn or a smooth, durable acrylic yarn would be ideal for your keychain. Both offer good stitch definition, stand up well to everyday wear and tear, and are easy to work with.
How to Crochet a Keychain for Beginners: A Simple Heart Pattern
This tutorial will guide you through making a classic, flat heart keychain. It’s an easy shape to start with, and the resulting heart is charming!
1. Essential Materials You’ll Need
- Yarn:
- Worsted Weight (Aran / Medium / Category 4) Cotton or Acrylic Yarn: Choose any color you like for your heart. You’ll only need a small amount, making this a perfect scrap yarn project!
- Crochet Hook:
- A 3.5mm (US E/4) or 4.0mm (US G/6) hook. Use a hook size that creates a dense, tight fabric so your keychain holds its shape well and stuffing (if any) doesn’t show through.
- Scissors: For cutting yarn.
- Yarn Needle (Tapestry Needle): Essential for weaving in ends and assembling the heart.
- Stitch Marker (Optional but helpful): To mark stitches.
- Keychain Ring/Split Ring: The actual hardware for your keychain!
- Optional: A tiny bit of polyester fiberfill (stuffing) if you want a slightly plump heart.
2. Basic Crochet Stitches You’ll Use
This project relies on just a few core stitches:
- Magic Ring (MR) / Adjustable Ring: (Highly Recommended!) Creates a neat, hole-free center. Alternatively, you can
ch 2, then work all stitches of Round 1 into the 2nd ch from the hook. - Chain (ch): For starting stitches and forming loops.
- Slip Stitch (sl st): For joining and neatening.
- Single Crochet (sc): A dense, short stitch, perfect for small items.
- Half Double Crochet (hdc): A medium-height stitch.
- Double Crochet (dc): A taller stitch.
- Fasten Off: To securely end your work.
- Weaving in Ends: Hiding yarn tails for a neat finish.
Crochet Heart Keychain Pattern
This pattern creates a heart approximately 2 inches (5 cm) wide.
Abbreviations (US Crochet Terms):
- MR: Magic Ring
- ch: chain
- sl st: slip stitch
- sc: single crochet
- hdc: half double crochet
- dc: double crochet
- tr: treble crochet (triple crochet)
- st(s): stitch(es)
(...): work stitches into the same stitch or space[...]: repeat instructions in brackets- FO: Fasten off

Part 1: First “Bump” of the Heart (Make 1)
This will form one of the rounded top sections of your heart.
- Start with your chosen yarn.
- Round 1: Create a MR. Ch 2 (does not count as a stitch). Work the following stitches into the MR: 2 dc, 2 hdc, 1 dc, 2 hdc, 2 dc. Join with a sl st to the top of the beginning ch 2. (9 stitches total)
- Gently pull the tail of the MR to close the center hole.
- Fasten Off, leaving a tail about 4-6 inches (10-15 cm) long. Weave in the starting tail from the Magic Ring.
Part 2: Second “Bump” of the Heart (Make 1)
This will form the second rounded top section of your heart.
- Repeat all steps for Part 1 exactly.
- DO NOT Fasten Off this second bump. You will use the yarn still attached to your hook to join the two bumps.

Part 3: Joining the Bumps & Forming the Heart
Now we’ll connect the two bumps and shape the bottom of the heart.
- With the second bump still on your hook (do not chain or turn), insert your hook into the first dc of the first bump (the one you fastened off earlier).
- Make a sl st to join the two bumps together. This creates the top center dip of the heart.
- Ch 1 (does not count as a stitch).
- Work into the side of the first bump: Sc in the side of the next hdc (or a convenient space). Hdc in the side of the next dc.
- Work into the point of the first bump: Work (sc, dc, sc) into the bottom-most dc of the first bump.
- Work into the side of the first bump (again): Hdc in the side of the next dc. Sc in the side of the next hdc.
- Work across the second bump (the one still on your hook): Sc in the next 2 dc. Hdc in the next 2 hdc. Dc in the next dc. Hdc in the next 2 hdc. Sc in the next 2 dc.
- Form the bottom point of the heart: Work (sc, ch 1, sc) all into the very center stitch at the bottom of the heart (this would be the first
dcof the1 dcfrom Round 1 of Part 1, or just visually the very bottom center). - Continue around the first bump: Work 2 sc into the next dc, 2 hdc into the next 2 hdc, 1 dc into the next dc, 2 hdc into the next 2 hdc, 2 sc into the next 2 dc.
- Sl st into the first sc you made to join the round.
- This might seem complex in text, but you’re essentially working around the outer edges of both bumps, shaping the V at the bottom.
- If you want to stuff the heart slightly, do so now with a tiny pinch of fiberfill before closing the last few stitches. You can make 2 identical heart halves and sew them together around the edge, stuffing them lightly before fully closing if you prefer a plump heart.
- Fasten Off, leaving a long tail (about 6-8 inches / 15-20 cm).
Part 4: Finishing and Attaching Keychain Ring
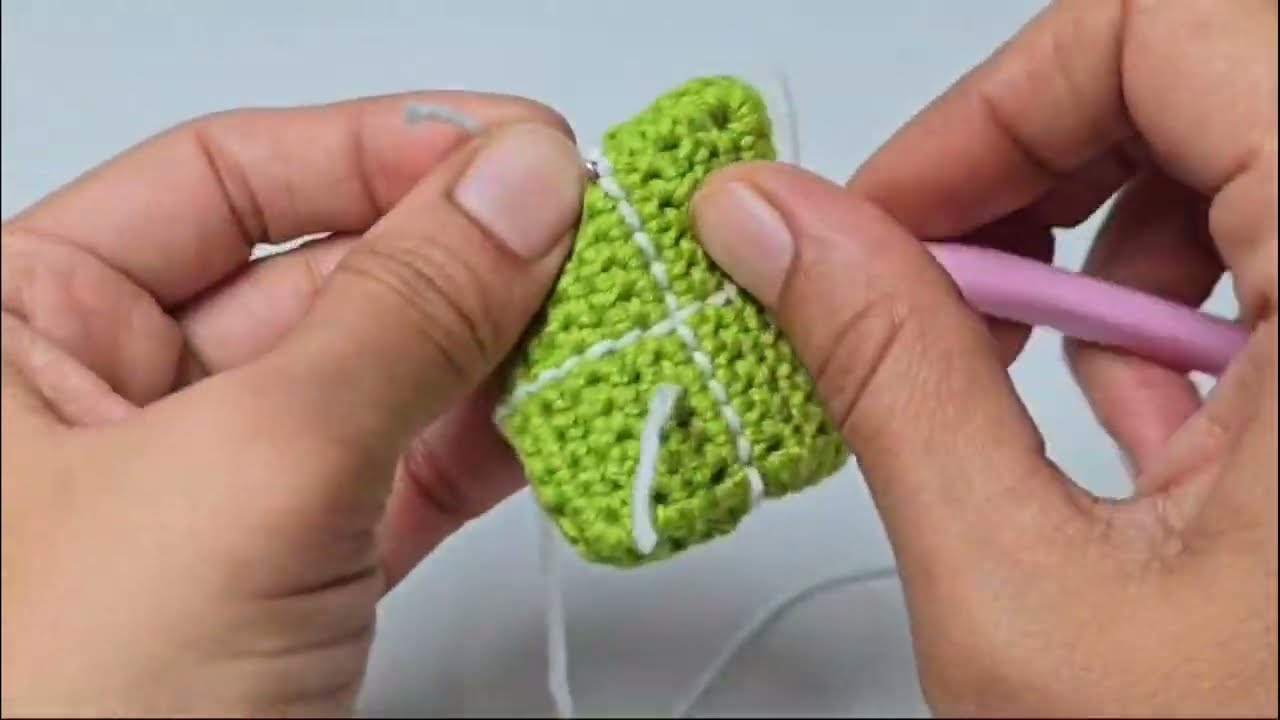
- Weave in ALL Ends NEATLY: This is crucial for a professional-looking keychain. Use your yarn needle to carefully weave in every single yarn tail. Go back and forth through stitches several times to ensure they are hidden and secure and won’t unravel with use.
- Shape the Heart: Gently push and pull the stitches to perfect your heart shape.
- Attach the Keychain Ring:
- Using your yarn needle and the long tail from where you fastened off (or a new short piece of matching yarn), thread it through a sturdy stitch at the very top center dip of your heart.
- Thread both ends of this yarn piece through your keychain ring.
- Tie the yarn ends securely in a double knot, ensuring the keychain ring is firmly attached. Trim any excess yarn.
Tips for a Successful First Keychain
- Consistent Tension: Try to keep your stitches uniform in size. This will make your heart look much neater and help it hold its shape.
- Counting Stitches: For a project this small, every stitch counts! Take your time and count as you go.
- Don’t Be Afraid to Undo: Crochet is very forgiving. If you make a mistake, don’t hesitate to pull out your hook and unravel (called “frogging”) back to where you went wrong.
- Yarn Choice: Stick with a smooth yarn that doesn’t split easily. This makes learning and practicing much easier.
- Practice the Magic Ring: This technique is a game-changer for small, round projects like keychains. It creates a much neater center than chaining and joining.
- Weave in Ends Thoroughly: Keychains get a lot of handling, so secure ends are vital to prevent your hard work from unraveling!

You’ve now got the detailed instructions to crochet your very first keychain! What other simple shapes might you try to crochet next?