 by
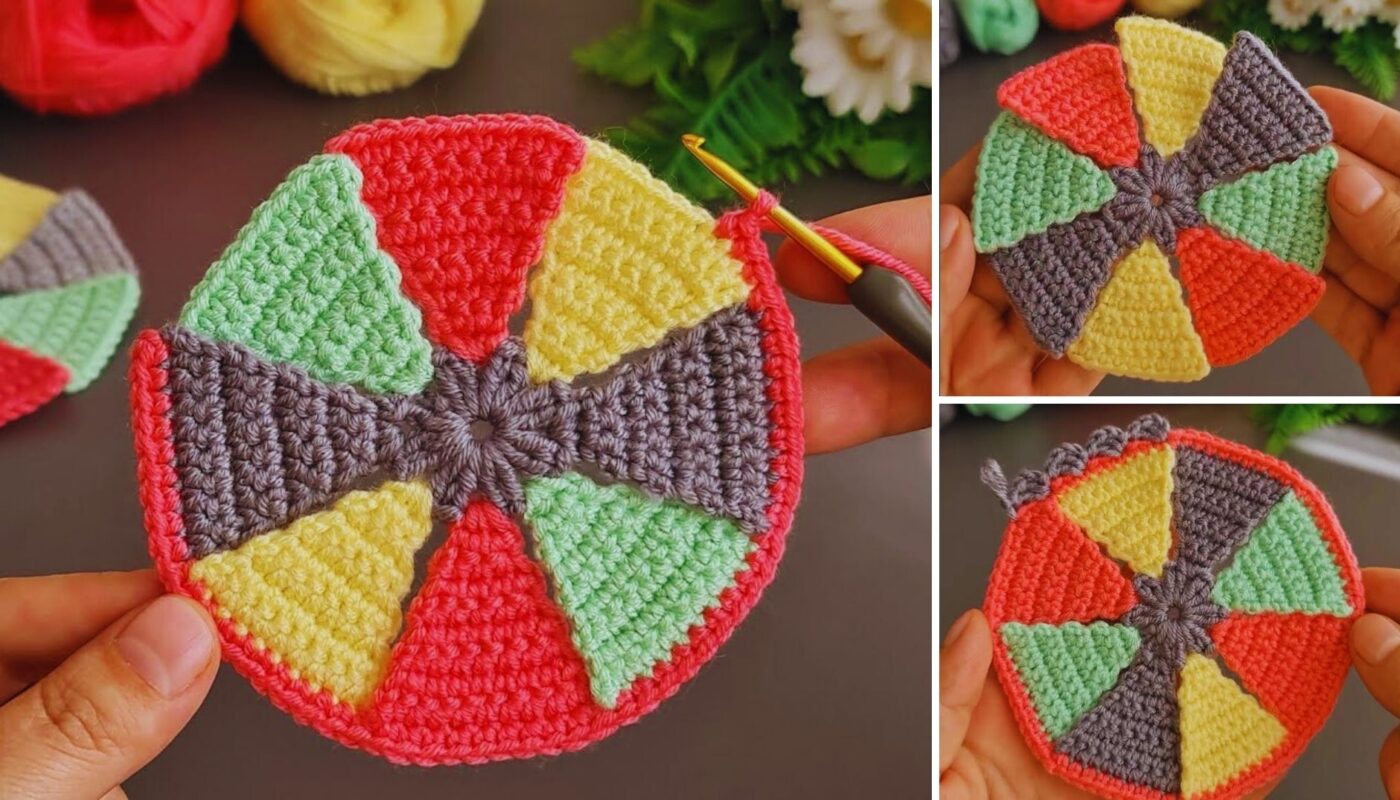
by Let’s crochet a sweet and simple striped flower coaster! This project is perfect for beginners looking to make something pretty and practical quickly. It’s also a fantastic way to use up those colorful yarn scraps you have lying around and create a vibrant, eye-catching accessory for your home.
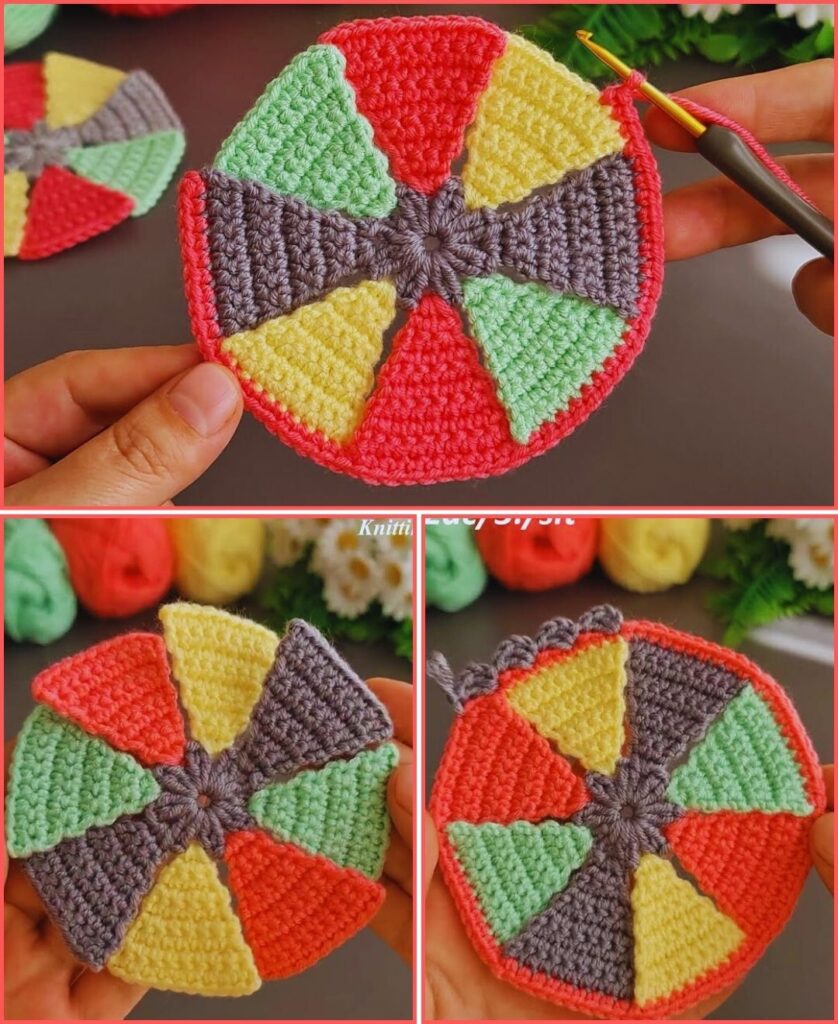
How to Crochet a Very Easy Striped Flower Coaster
This pattern creates a cute, flat flower with striped petals, ideal for protecting your surfaces from drinks while adding a pop of handmade charm.
Skill Level: Easy to Beginner-Friendly
You’ll need to know:
- Basic crochet stitches: chain (ch), slip stitch (sl st), single crochet (sc), double crochet (dc).
- Working in rounds.
- Creating a Magic Ring (MR) (optional but highly recommended for a tight center).
- Performing clean color changes at the end of a round.
Finished Coaster Dimensions (Approximate):
- 4.5-5.5 inches (11.5-14 cm) in diameter, depending on your yarn and tension.
Materials You’ll Need:
- Yarn: Approximately 30-50 yards (27-45 meters) of Worsted Weight (Medium #4) Cotton Yarn. Cotton is highly recommended because it’s absorbent and heat-resistant, making it ideal for coasters.
- Color A (Center & Petal Stripe 1): Approx. 15-25 yards.
- Color B (Petal Stripe 2): Approx. 10-20 yards.
- (Optional: You can use a third color for the final coaster base if you like!)
- Crochet Hook: Size H/5.0mm. Or the hook size that gives you a sturdy yet flexible fabric.
- Yarn Needle (Tapestry Needle): Essential for seamlessly weaving in all your loose ends.
- Scissors
Gauge:
Gauge isn’t critical for a coaster, but aiming for consistent tension will result in a neater and more effective coaster. If your coaster is too loose, it might not be as absorbent; if it’s too tight, it might be stiff.
Abbreviations Used:
- ch: chain
- sl st: slip stitch
- sc: single crochet
- dc: double crochet
- st(s): stitch(es)
- MR: Magic Ring (also called Magic Circle or Adjustable Ring)
- (): repeat instructions within parentheses a specified number of times.
- []: indicates the total number of stitches at the end of a round.
How to Make a Clean Color Change at the End of a Round:
This technique is key to creating neat, crisp stripes.
- Work the last stitch of your current round as usual, but stop when you have two loops left on your hook.
- Drop the current color.
- Pick up your new color, yarn over with the new color, and pull it through the remaining two loops on your hook to complete the stitch.
- Now, using the new color, sl st into the first stitch of the round (or the top of your turning chain, if applicable) to join.
- Always cut the old color yarn, leaving a 4-6 inch tail. You’ll weave these tails in later for a clean finish.
Let’s Crochet Your Striped Flower Coaster!
This pattern builds the coaster in layers: the center, then the striped petals, and finally a flat coaster base.
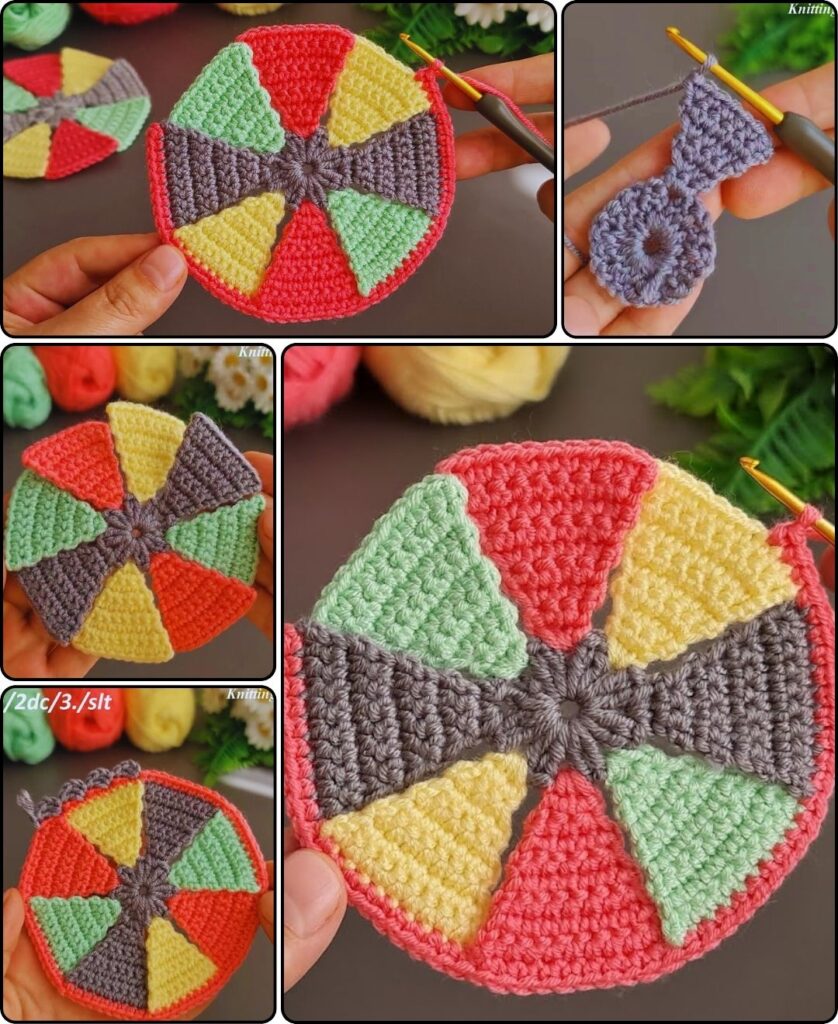
Part 1: Flower Center (Color A)
- Start: Make a Magic Ring (MR).
- Alternative Start (if you prefer not to use a MR): Ch 4, then sl st into the first chain to form a ring.
- Round 1: Ch 1 (does NOT count as a stitch). Work 10 single crochet (sc) stitches into the MR. Pull the tail tightly to close the center hole. Sl st into the first sc to join the round. [10 sc]
- Round 2: Ch 2 (does NOT count as a stitch). Work 2 double crochet (dc) stitches into each stitch around. [20 dc]
- On the very last dc of this round, perform a clean color change to Color B (refer to the “How to Make a Clean Color Change” section above). After completing the stitch with Color B, sl st into the top of the first dc of the round to join. Cut Color A, leaving a 4-inch tail.
Part 2: Striped Petals (Alternating Color B & Color A)
This is where your coaster gets its distinctive striped look! Each petal will have two rows in alternating colors.
- Round 3 (Petal Row 1 – Color B): Ch 1 (does NOT count as a stitch).
- *In the first stitch where you joined, sl st. Then, (Ch 2, work 2 dc into the next stitch, ch 2, sl st into the next stitch).* Repeat from * to * 9 more times around. You will be working into every other stitch from the previous Round 2.
- You will have 10 small petal bases. Do NOT sl st to join at the very end of this round to form a closed loop. Instead, prepare for a color change for the next row of petals.
- On the last sl st of this round, perform a clean color change to Color A. Cut Color B, leaving a 4-inch tail.
- Round 4 (Petal Row 2 – Color A):Turn your work. You’ll now be working into the ch-2 spaces and the dc stitches of the petals you just created in Round 3.
- Ch 1 (does NOT count as a stitch).
- In the first ch-2 space of the first petal: (sc, dc).
- In the 2 dc stitches of that same petal: dc in the first dc, dc in the second dc.
- In the next ch-2 space of the same petal: (dc, sc).
- Sl st into the sl st between the first and second petals from Round 3.
- Repeat this sequence for each of the remaining 9 petals:
- *(In the next ch-2 space: sc, dc).
- (In the next 2 dc stitches: dc, dc).
- (In the next ch-2 space: dc, sc).
- Sl st into the sl st between the current and next petal from Round 3.*
- After the very last petal, sl st into the first sc stitch you made at the beginning of this Round 4 to securely finish.
- Fasten off (FO) Color A, leaving a 6-inch tail.
Part 3: Coaster Base / Edging (Color A or an Optional Third Color)
This step creates a solid, flat back for your coaster and provides a neat, finished edge.
- Turn your work to the back. You’ll work into the remaining unworked loops from Round 2 (the stitches you skipped when forming the petal bases in Round 3) or directly into the back of the stitches from Round 3.
- Join Color A (or your optional third color) with a sl st into any unworked stitch from Round 2. You should have 10 unworked stitches from Round 2.
- Round 5 (Coaster Base): Ch 2 (does NOT count as a stitch). Work 2 hdc into each unworked stitch from Round 2 around. Sl st into the top of the first hdc to join. [20 hdc]
- Round 6: Ch 2. (Hdc in next st, 2 hdc in next st) around. Sl st into the top of the first hdc to join. [30 hdc]
- Round 7: Ch 2. (Hdc in next 2 sts, 2 hdc in next st) around. Sl st into the top of the first hdc to join. [40 hdc]
- This should give you a good, solid coaster base. If you want a slightly larger coaster, you could add another increase round (e.g., Round 8: Ch 2, (hdc in next 3 sts, 2 hdc in next st) around).
- Final Round (Optional – Edging for firmness): Ch 1. Sc in each hdc around. Sl st to the first sc to join. This creates a very neat, firm edge.
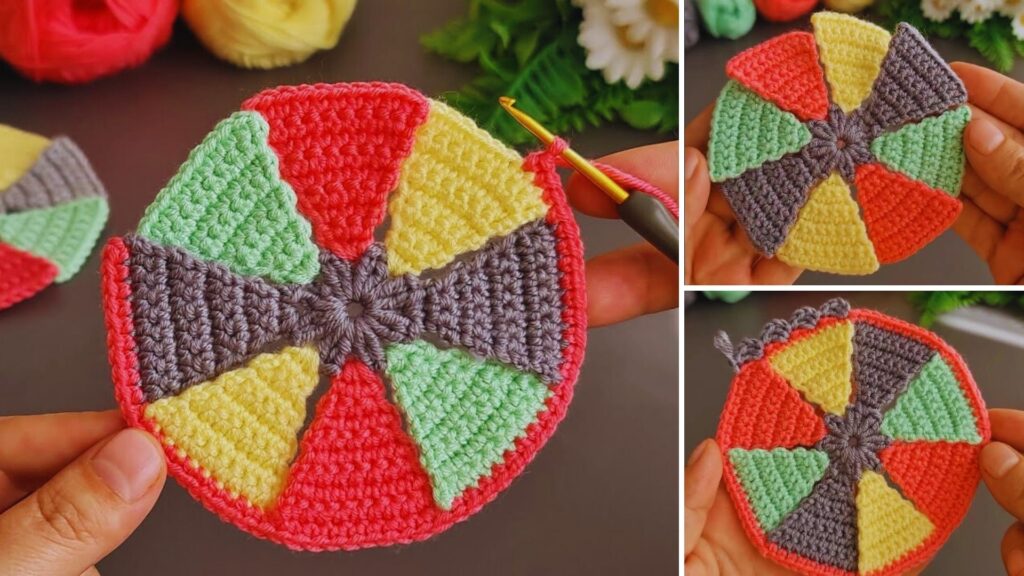
Part 4: Finishing Your Striped Flower Coaster
- Fasten Off: After completing your final round, cut your yarn, leaving a 6-inch tail. Yarn over and pull the tail completely through the loop on your hook to secure the last stitch.
- Weave in All Ends: This is a crucial step for a beautiful and durable coaster, especially with the frequent color changes. Thread each yarn tail onto your yarn needle. Carefully weave them through several stitches of the same color on the back side of your coaster, making them secure and invisible. Take your time to ensure all tails are tucked away neatly.
- Shape: Gently lay your coaster flat and use your fingers to shape the petals, ensuring they lie flat and the stripes are well-defined.
You’ve now created a truly beautiful and unique striped flower crochet coaster! This is a wonderful way to add a custom, colorful touch to your home or create a heartfelt handmade gift. What two (or three!) colors will you choose for your next striped flower coaster?