by
by Crocheting a butterfly is a fantastic project for beginners! It’s quick, uses very little yarn, and lets you practice some fundamental stitches while creating a beautiful decorative piece. The skills you learn can be applied to many other projects, from adding a butterfly to a blanket to making a cute embellishment for a hat, bag, or hair clip.
Given that you’re in a warm place like Phnom Penh, 100% cotton yarn or a soft acrylic yarn would be excellent choices for this project. Cotton gives a very crisp, defined look to the wings, while acrylic is widely available and comes in a huge range of colors.
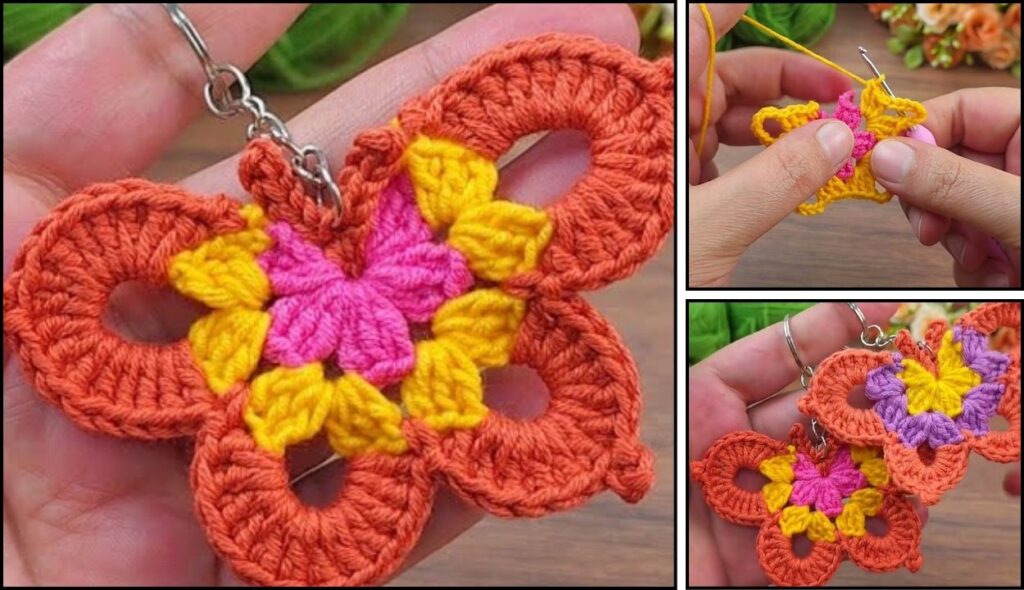
How to Crochet a Butterfly: A New Pattern for Beginners
This pattern creates a lovely, symmetrical butterfly with four wings. It looks more complicated than it is, making it a great project to impress yourself and others! This pattern will use basic stitches to create the body and a simple chain and cluster to create the wings.
1. Essential Materials You’ll Need
- Yarn:
- Wing Color (WC): For the butterfly’s wings. Worsted Weight (Aran / Medium / Category 4) is a good standard.
- Body Color (BC): For the butterfly’s body. A small amount of black, brown, or a contrasting color. Worsted Weight, matching WC in thickness.
- Quantity: You’ll only need a few grams of each color. This is a perfect project for using up yarn scraps!
- Crochet Hook:
- A 4.0mm (US G/6) or 4.5mm (US 7) hook. Choose a hook size that feels comfortable with your yarn and makes a fabric that isn’t too tight or too loose.
- Scissors: For cutting yarn.
- Yarn Needle (Tapestry Needle): Essential for weaving in ends and securing the wings to the body.
- Optional:
- Beads or sequins: For decorating the body.
- Pipe cleaner: For a sturdier body and antennae.
2. Basic Crochet Stitches You’ll Use
This pattern uses just a handful of very common stitches:
- Chain (ch): For foundation and spacing.
- Slip Stitch (sl st): For joining and moving across stitches.
- Single Crochet (sc): Creates a short, dense stitch.
- Double Crochet (dc): A taller stitch, used here for the wings.
- Triple/Treble Crochet (tr): A very tall stitch, used for the largest wings.
- Fasten Off: Securely ending your work.
- Weaving in Ends: Hiding yarn tails for a neat finish.
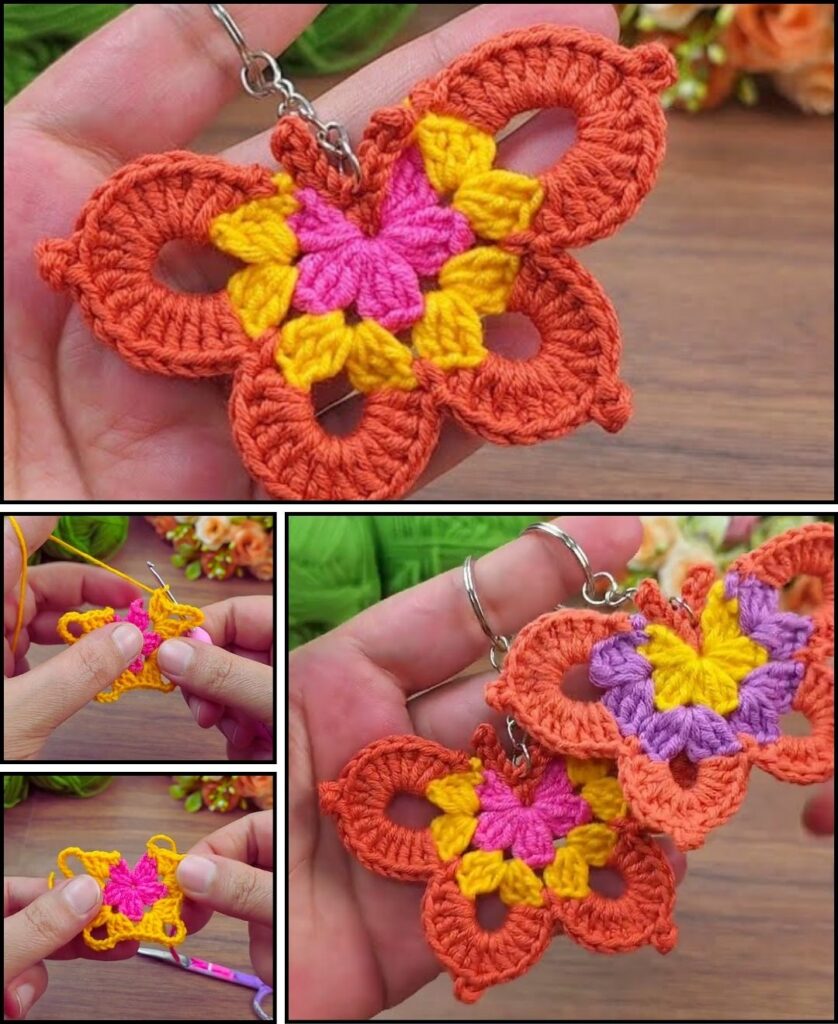
Crochet Butterfly Pattern
This pattern is a step-by-step guide to making a lovely multi-winged butterfly. The wings are created by crocheting into a single chain for the body.
Abbreviations (US Crochet Terms):
- WC: Wing Color
- BC: Body Color
- ch: chain
- sl st: slip stitch
- sc: single crochet
- dc: double crochet
- tr: treble crochet
- st(s): stitch(es)
(...): work stitches into the same stitch or space- FO: Fasten off
Part 1: The Body and Wings (All One Piece)
This method is super easy for beginners because you don’t have to sew a bunch of pieces together.
- Start (Body and Foundation): With BC, Ch 4.
- Row 1 (Body): Sc in the 2nd ch from hook. Sc in each of the next 2 chs. (3 sc)
- FO BC, leaving a long tail for weaving in.
- You now have a small, rectangular body piece.
- Create the Wings:
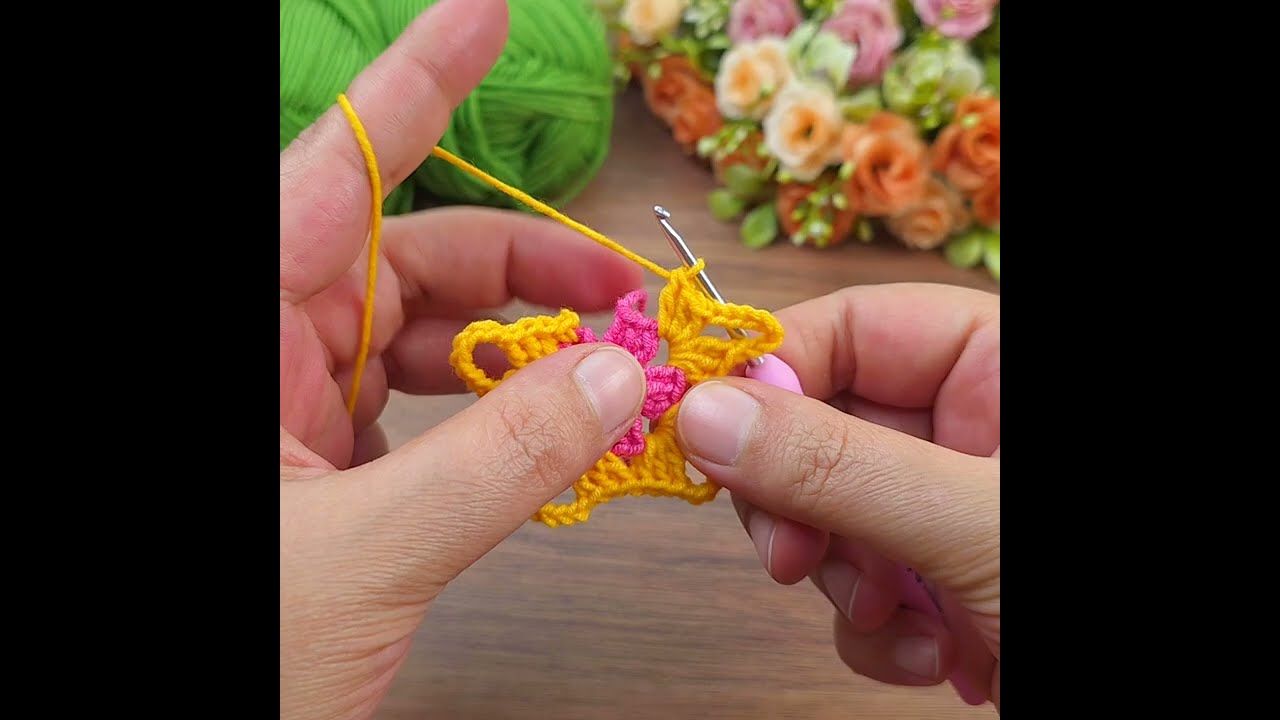
- Join WC with a sl st to the first sc on the body piece (the top corner).
- First Upper Wing:
*Ch 3. In the 2nd ch from hook, work 1 dc. In the next ch, work 1 tr. Now, sl st back into the same sc stitch on the body.*You now have your first upper wing. - Second Upper Wing: Sl st to the next sc stitch on the body.
*Ch 3. In the 2nd ch from hook, work 1 dc. In the next ch, work 1 tr. Now, sl st back into the same sc stitch on the body.*You now have your second upper wing. - First Lower Wing: Sl st to the last sc stitch on the body.
*Ch 2. In the 2nd ch from hook, work 1 hdc. Now, sl st back into the same sc stitch on the body.*You now have your first lower wing. - Second Lower Wing: Sl st back to the beginning of your foundation chain (the opposite side of the first sc).
*Ch 2. In the 2nd ch from hook, work 1 hdc. Now, sl st back into the same beginning chain stitch on the body.*You now have your second lower wing. - FO WC, leaving a long tail.

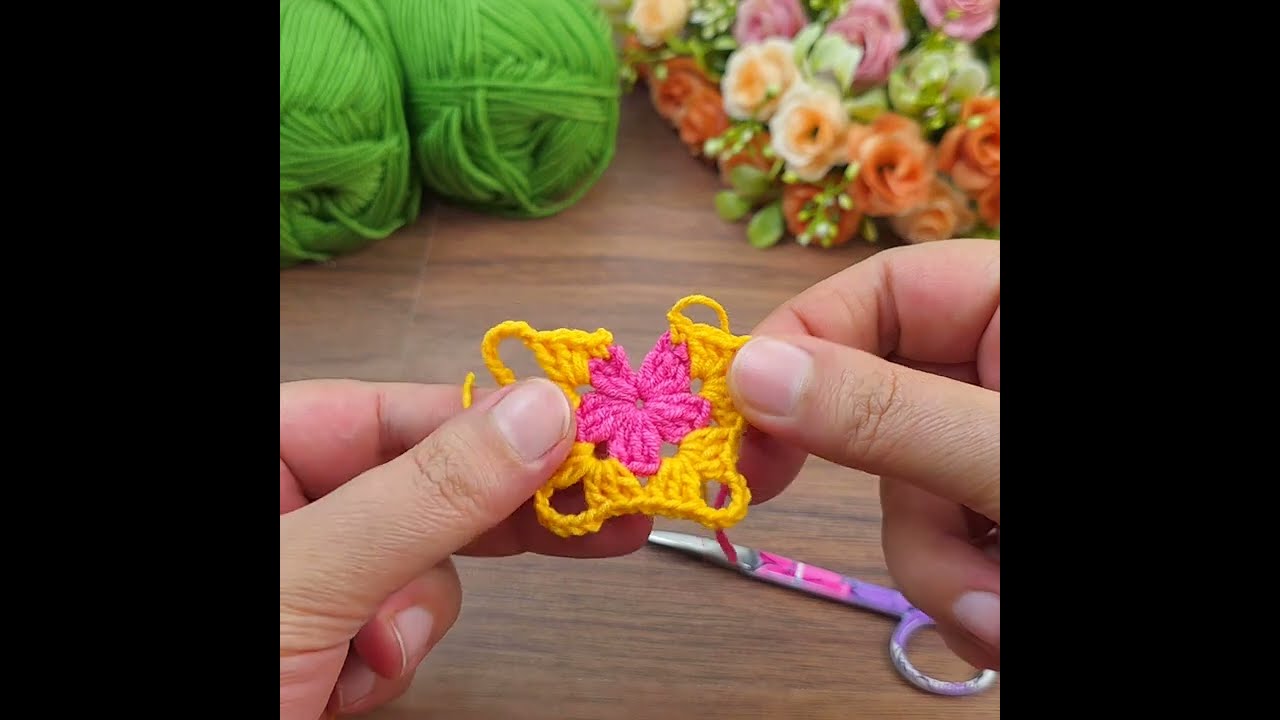
Part 2: Assembling and Finishing
- Weave in All Ends NEATLY: This is crucial for a professional look. Use your yarn needle to carefully weave in every single yarn tail. Take your time with the ends from the body and the wings.
- Shape the Wings: Gently tug on the ends of the wings to open them up and shape them.
- Adding Antennas:
- With BC, ch 10-12.
- Sl st in the 2nd ch from hook and in each ch back down the chain.
- FO BC, leaving a long tail.
- Use your yarn needle to thread this chain through the top of the butterfly’s body and tie a secure knot to hold it in place. Weave in the ends.
- Alternatively, you can just tie a piece of yarn to the top of the body and knot it a few times to create a simple antenna effect.
Tips for Customizing Your Crochet Butterfly
- Size Adjustment:
- Larger Butterfly: Start with a longer foundation chain for the body. Use taller stitches for the wings (e.g.,
tranddtr). - Smaller Butterfly: Start with a shorter foundation chain (e.g., Ch 2-3). Use shorter stitches for the wings (e.g.,
scandhdc).
- Larger Butterfly: Start with a longer foundation chain for the body. Use taller stitches for the wings (e.g.,
- Different Stitches for Wings: Instead of the chain method, you can also use a “shell” stitch for the wings. Example:
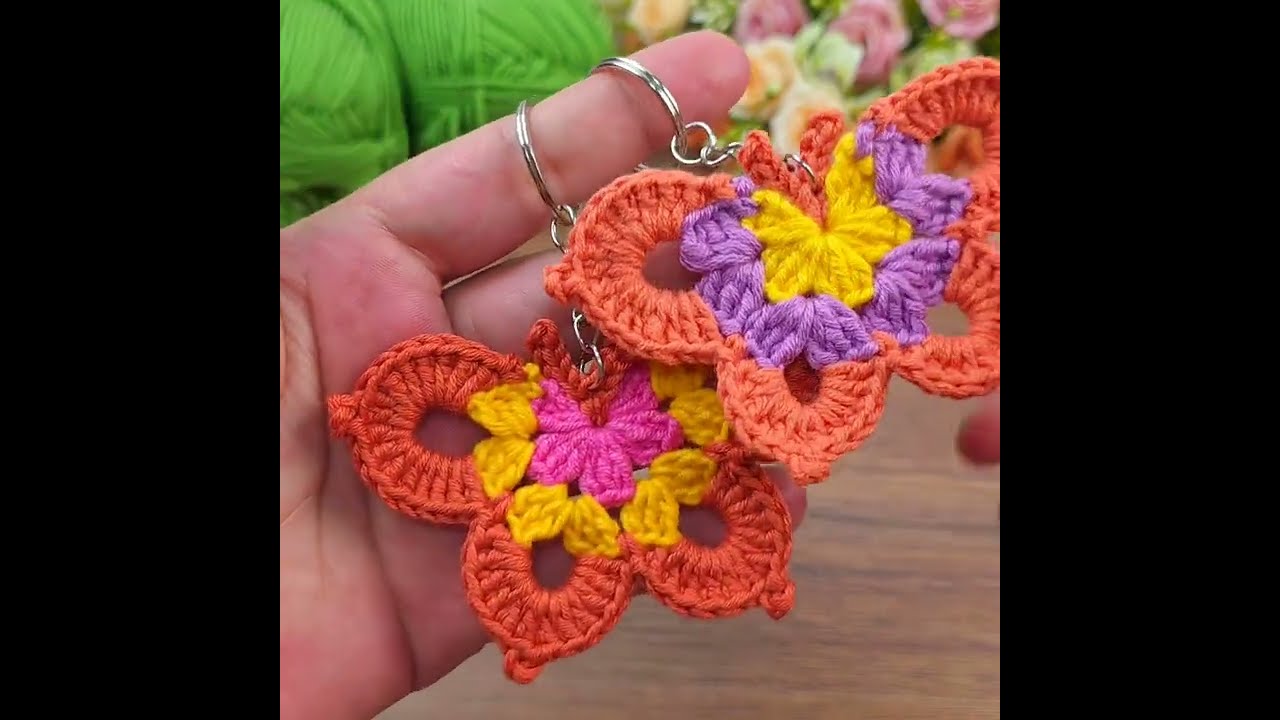
(sc, hdc, dc, hdc, sc)all in the same stitch. This creates a fuller, more rounded wing. - Color Blocking: Use different colors for the upper and lower wings, or make a variegated yarn choice for a beautiful effect.
- Embellishments: Sew a line of beads or sequins down the body for a touch of sparkle. You could also embroider a simple design on the wings.
- Adding a Pipe Cleaner: For a sturdier, bendable butterfly, you can crochet a single crochet chain over a pipe cleaner. This creates a flexible body and antennas that you can shape.
- For the body: Crochet the initial chain around a small piece of a pipe cleaner.
- For the antennas: Take a separate small piece of pipe cleaner and twist it at the top of the body. You can add beads to the ends if you like.
What colors are you excited to try for your first butterfly?