by
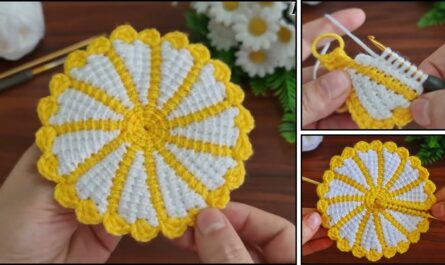
by Let’s make a cheerful yellow 3D flower crochet coaster! This project is a wonderful way to add a pop of color and handmade charm to your home. It’s both practical and pretty. Since you’re in Phnom Penh, where it can get warm, 100% cotton yarn is definitely the best choice for a coaster. It’s absorbent, heat-resistant, and easy to wash.
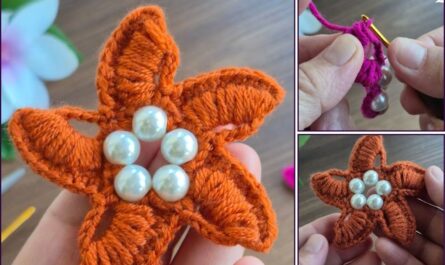
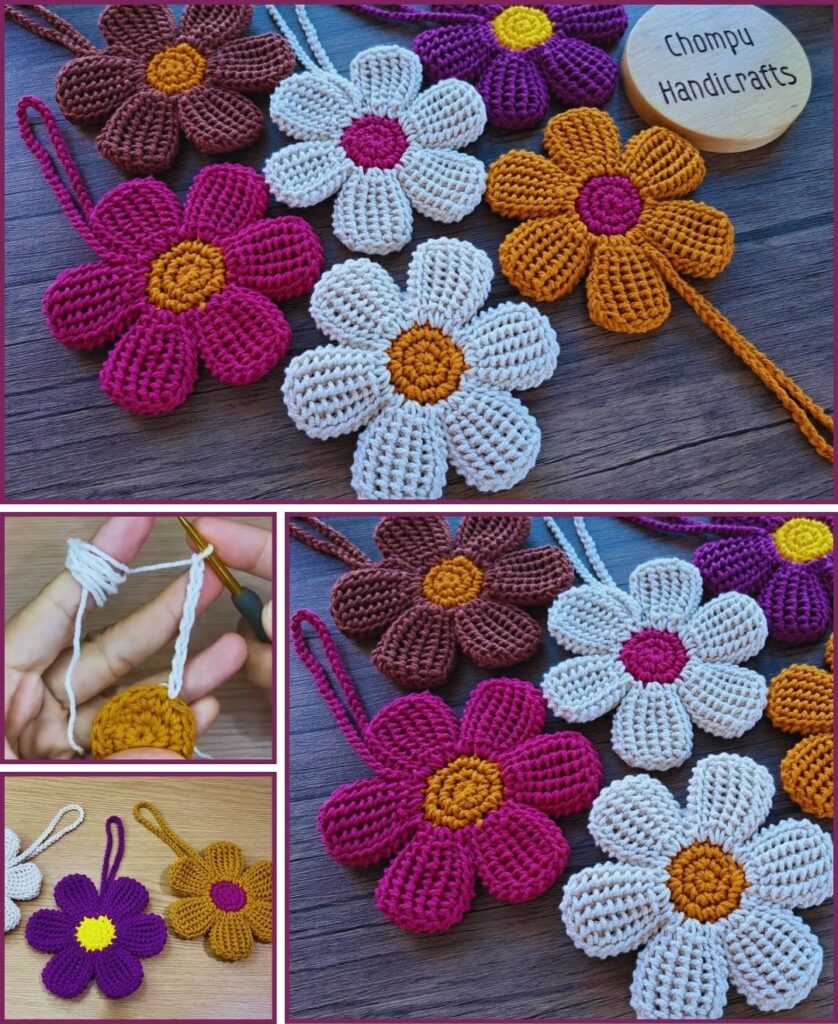
How to Make a Crochet 3D Flower Keychain🧶🌸🌸
This guide will walk you through creating a sturdy, flat coaster base and then adding a lovely, dimensional yellow flower on top.
1. Essential Materials You’ll Need
- Yarn:
- For the Flower Base: About 30-40 yards (27-36 meters) of 100% Worsted Weight Cotton Yarn. Choose a color that pairs well with yellow, like white, green, grey, or even a soft blue.
- For the 3D Flower: About 10-15 yards (9-14 meters) of 100% Worsted Weight Cotton Yarn in Yellow. A bright, sunny yellow will look fantastic!
- Crochet Hook: A 4.0mm (US G/6) or 4.5mm (US 7) hook. Aim for a tight gauge to ensure your coaster is dense and protective. If your stitches look loose, go down a hook size.
- Scissors: For cutting yarn.
- Yarn Needle (Tapestry Needle): Essential for weaving in ends and assembling the flower onto the coaster.
2. Basic Crochet Stitches You’ll Use
This project relies on just a few fundamental stitches:
- Chain (ch): To begin your work.
- Slip Stitch (sl st): Used for joining rounds.
- Single Crochet (sc): Creates a tight, dense fabric, perfect for the coaster base.
- Double Crochet (dc): A taller stitch, used for creating the flower petals.
- Magic Ring (MR): (Also known as Magic Circle). This is the best way to start a round project as it creates a perfectly tight center with no hole. If you’re new to it, a simple alternative chain method is also provided below.

Part 1: Crafting the Flower Base
We’ll start with a classic round coaster using single crochet stitches for a sturdy foundation.
Abbreviations (US Crochet Terms):
- ch: chain
- sc: single crochet
- sl st: slip stitch
- MR: magic ring
- st(s): stitch(es)
Instructions for Coaster Base (Using your chosen base color):
- Starting Your Coaster (Choose ONE method):
- Method A: Magic Ring (Recommended for a tighter center)
- Create a Magic Ring (MR).
- Ch 1 (this chain is for height and does NOT count as a stitch).
- Work 8 sc into the Magic Ring.
- Gently pull the yarn tail to close the center hole tightly.
- Join with a sl st to the top of the first sc you made. (8 sc)
- Method B: Chain Method (Easier for Beginners)
- Ch 2.
- Work 8 sc into the second chain from your hook (the very first chain you made).
- Join with a sl st to the top of the first sc you made. (8 sc)
- Method A: Magic Ring (Recommended for a tighter center)
- Building the Coaster (Increasing Rounds to Keep it Flat):
- Round 1:
- Ch 1 (does not count as a stitch).
- Work 2 sc in each st around.
- Join with a sl st to the top of the first sc. (16 sc)
- Round 2:
- Ch 1 (does not count as a stitch).
- *1 sc in the next st, 2 sc in the following st*. Repeat from * to * around.
- Join with a sl st to the top of the first sc. (24 sc)
- Round 3:
- Ch 1 (does not count as a stitch).
- *1 sc in each of the next 2 sts, 2 sc in the following st*. Repeat from * to * around.
- Join with a sl st to the top of the first sc. (32 sc)
- Round 4:
- Ch 1 (does not count as a stitch).
- *1 sc in each of the next 3 sts, 2 sc in the following st*. Repeat from * to * around.
- Join with a sl st to the top of the first sc. (40 sc)
- Round 1:
- Finalizing the Base: Continue this pattern (increasing the number of single crochets between the increase stitches by one in each subsequent round) until your coaster base is about 4-5 inches (10-12 cm) in diameter. This is a standard coaster size.
- Once your base is the desired size, fasten off your yarn by cutting it (leaving a tail of about 6-8 inches) and pulling it completely through the loop on your hook.
- Weave in all ends securely using your yarn needle.

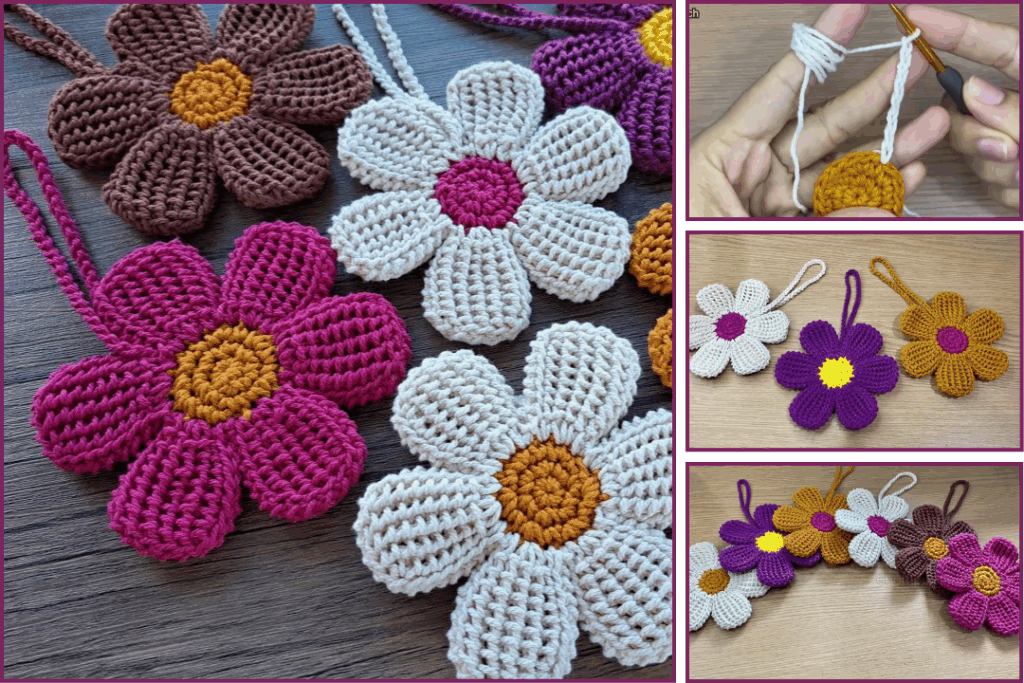
Part 2: Crocheting the Yellow 3D Flower
This flower uses simple clusters of stitches to create distinct, slightly raised petals. We’ll make two layers for a nice, full 3D effect.
Instructions for the Yellow 3D Flower (Using yellow yarn):
Flower Center / Base (Common for both layers):
- Create a Magic Ring (MR).
- Ch 1 (does NOT count as a stitch).
- Work 8 sc into the Magic Ring.
- Pull the ring tight. Join with a sl st to the first sc. (8 sc)
- This forms the small central base for your petals.
Flower Layer 1 (Back Layer – Larger Petals):
This layer will sit behind the second layer, adding initial fullness to the flower.
- From the center base (8 sc), Ch 2 (does NOT count as a stitch).
- *In the same stitch where you just joined, work (3 dc) (this forms your first petal cluster).
- Sl st into the next stitch.* Repeat from * to * 7 more times.
- You will have created 8 “petals,” each made of a 3-dc cluster, with a slip stitch in between. This makes a dense, slightly ruffled layer.
- Fasten off, leaving a long tail (about 12 inches / 30 cm) for sewing. Weave in the starting tail of this flower base.

Flower Layer 2 (Front Layer – Smaller Petals):
This layer will sit on top of the first, adding more definition and height.
- Create a Magic Ring (MR).
- Ch 1 (does NOT count as a stitch).
- Work 6 sc into the Magic Ring.
- Pull the ring tight. Join with a sl st to the first sc. (6 sc)
- This is a smaller base for a more prominent top layer of petals.
- Ch 2 (does NOT count as a stitch).
- *In the same stitch where you just joined, work (3 dc).
- Sl st into the next stitch.* Repeat from * to * 5 more times.
- You will have created 6 “petals” made of 3-dc clusters.
- Fasten off, leaving a long tail (about 12 inches / 30 cm) for sewing. Weave in the starting tail of this layer’s base.

Part 3: Assembly & Finishing
Now, let’s bring your coaster and beautiful yellow flower together!
- Stack the Flower Layers: Place the smaller 6-petal yellow flower (Layer 2) directly on top of the center of the larger 8-petal yellow flower (Layer 1). Gently arrange the petals so they are staggered (not directly on top of each other) for a fuller, more “blooming” look.
- Secure Flower Layers Together: Use the long yarn tail from Layer 2 and your yarn needle. Stitch through the very center of both flower layers a few times (like an “X” or a small circle) to secure them to each other.
- Attach Flower to Coaster:
- Position the assembled yellow 3D flower in the exact center of your finished coaster base.
- Using the same long tail from Layer 2, stitch through the center of the flower and then down through the coaster base.
- Make several small stitches in a circular motion around the very center of the flower, ensuring your needle goes through all layers (both flower layers and the coaster base). This will firmly attach the flower and subtly pull the center down, enhancing the 3D effect of the flower.
- Final Weaving: Double-check that all yarn tails from both the flower and the coaster are securely woven into the back of your coaster. Trim any excess yarn very close to the fabric.
- Blocking (Highly Recommended):
- Gently wet your entire coaster (with the flower attached).
- Carefully squeeze out excess water (do not wring!).
- Lay it flat on a clean towel or a foam blocking mat. Gently shape the coaster base into a perfect circle and softly arrange the 3D petals. You can use rust-proof pins to hold the shape if needed.
- Allow it to air dry completely. Blocking will help your coaster lay perfectly flat and give your beautiful yellow flower a defined shape.
You’ve now created a wonderfully charming and functional yellow 3D flower crochet coaster! It makes a lovely addition to your home or a thoughtful handmade gift.