 by
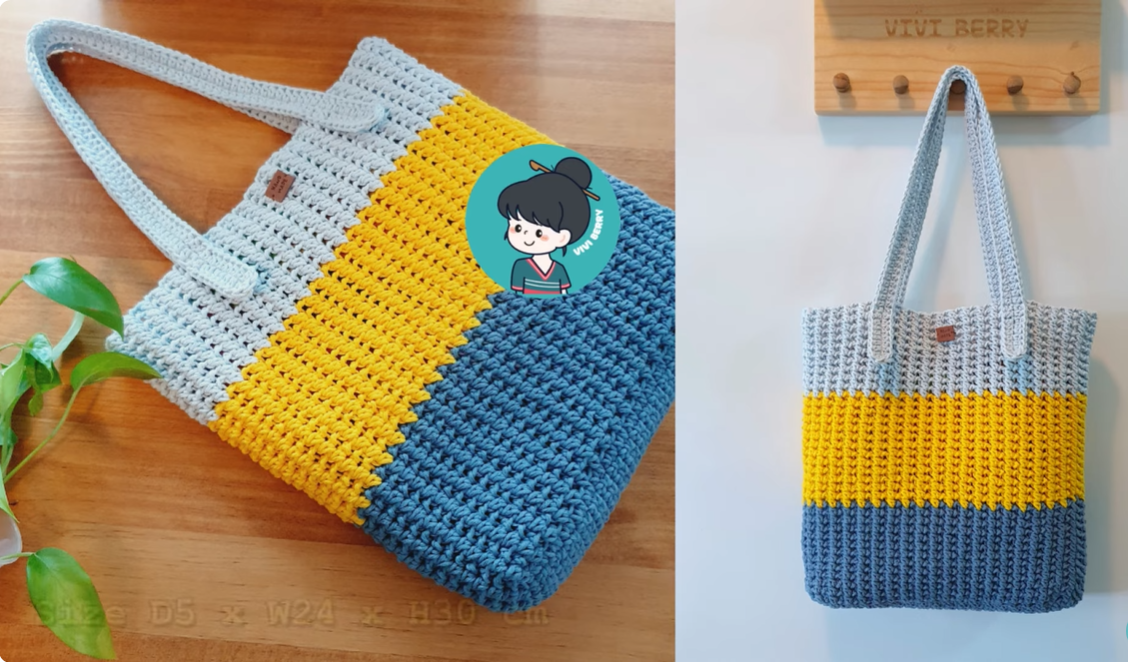
by Creating a vibrant, multi-color crochet shoulder bag is a fantastic project that allows for endless creativity and results in a practical, stylish accessory. This tutorial will guide you through making a sturdy shoulder bag with an oval base, straight sides featuring bold stripes, and a comfortable crocheted strap.
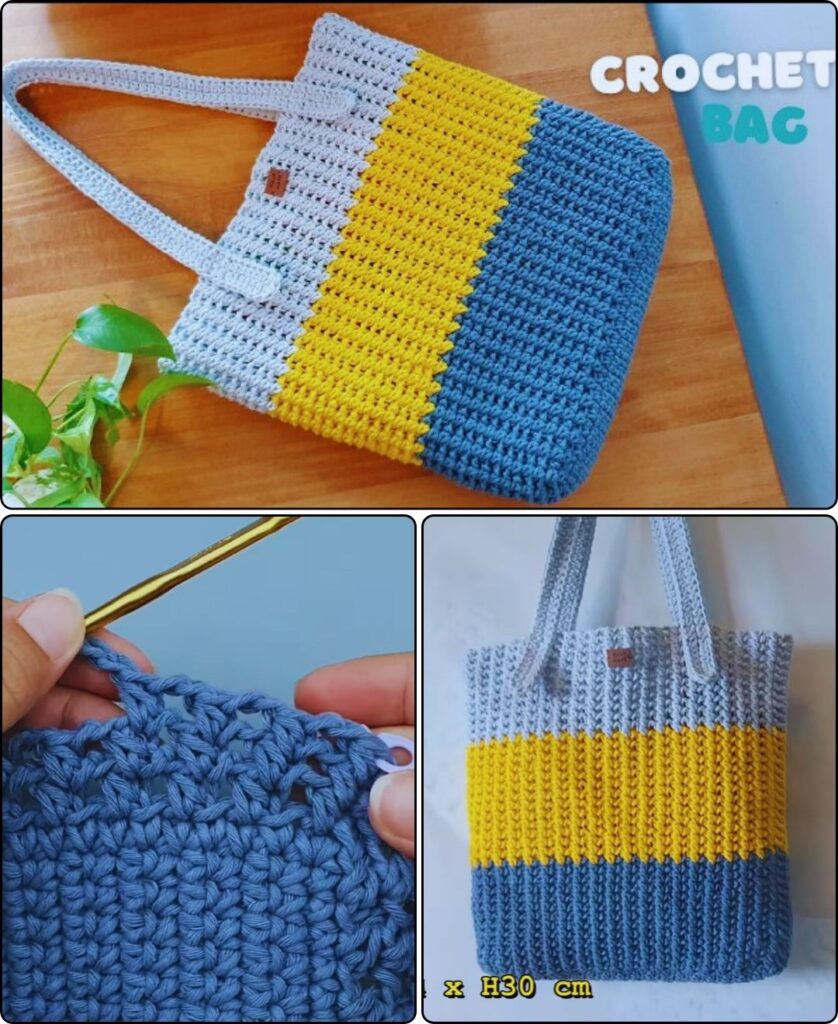
Crochet Shoulder Bag Tutorial: Multicolor Design
Project Overview: This pattern constructs a medium-sized shoulder bag, starting with a flat oval base and building up a durable body using half double crochet stitches. Multiple colors are incorporated through simple horizontal stripes, and the bag is finished with a comfortable crocheted strap.
Skill Level: Intermediate (Requires comfortable knowledge of basic stitches, working in the round, increasing, managing color changes neatly, and basic shaping for the strap).
Finished Bag Dimensions (Approximate):
- Base: 10 inches (25 cm) long x 4 inches (10 cm) wide
- Bag Height: 10-12 inches (25-30 cm)
- Strap Length: Approximately 40-48 inches (100-120 cm) – adjustable
Materials You’ll Need:
- Yarn:
- Worsted Weight (Medium #4) Cotton or Acrylic Yarn: Approximately 400-500 yards (365-457 meters) total.
- Color A (Main/Base): Approx. 150-200 yards (e.g., Cream, Black, Navy).
- Color B (Stripe 1): Approx. 75-100 yards (e.g., Bright Yellow, Turquoise).
- Color C (Stripe 2): Approx. 75-100 yards (e.g., Coral, Emerald Green).
- Color D (Stripe 3/Optional): Approx. 50-75 yards (e.g., Purple, Orange).
- Why these yarns? Cotton is durable and holds shape well. Acrylic is also sturdy, affordable, and comes in a wide range of colors. Avoid very stretchy or fuzzy yarns for a structured bag.
- Crochet Hook:
- Size H/5.0mm (or the size that gives you a dense, sturdy fabric suitable for a bag).
- Yarn Needle (Tapestry Needle): For weaving in ends and sewing the strap.
- Scissors
- Stitch Marker (Highly Recommended): To mark the beginning of rounds.
- Optional: Fabric for lining (about 1/2 yard), sewing machine or hand-sewing needle and thread (for lining), magnetic snap closure or button for flap.
Gauge (Crucial for Consistent Bag Size!):
With Color A and H/5.0mm hook, working in half double crochet (hdc):
- 14 hdc = 4 inches (10 cm) wide
- 11 hdc rows = 4 inches (10 cm) high
Your fabric should be firm and dense to ensure the bag holds its shape and is durable.
Abbreviations Used:
- ch: chain
- sl st: slip stitch
- sc: single crochet
- hdc: half double crochet
- st(s): stitch(es)
- inc: increase (work 2 stitches into the same stitch)
- BLO: back loop only
- FO: fasten off
Understanding Bag Construction & Multicolor Stripes:
- Bag Base: We start by crocheting a flat oval, which forms the sturdy bottom of the bag.
- Bag Body: The sides of the bag are then built upwards from this base, working in continuous rounds.
- Shoulder Strap: A separate piece crocheted to the desired length and width, then securely sewn onto the bag.
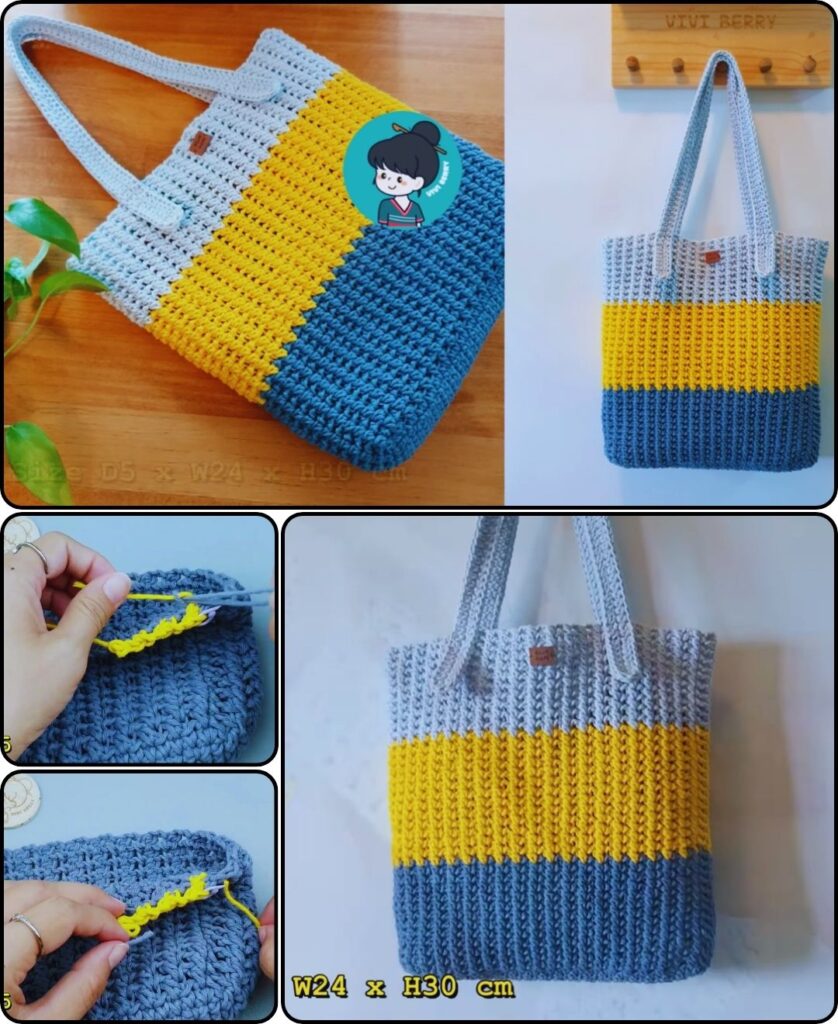
Color Changes for Stripes: For neat and crisp stripes, you’ll change colors at the end of a round.
- Work the last stitch of the round with the current color until you have 2 loops left on your hook.
- Drop the current color, pick up the new color, and yarn over with the new color.
- Pull the new color through the remaining 2 loops on your hook to complete the stitch.
- Continue the next round with the new color. Cut the old color yarn, leaving a 4-6 inch (10-15 cm) tail to weave in securely. Do NOT carry yarns up the side, as they may show through.
Let’s Start Crocheting Your Multicolor Shoulder Bag!
Part 1: The Bag Base (Color A)
Work in continuous rounds (do NOT join with sl st at the end of each round for the base). Use your stitch marker to mark the first stitch of each round.
- With Color A and H/5.0mm hook, ch 31. (This determines the length of your bag. Adjust chain length to change bag length).
- Round 1: Work 2 hdc in the 3rd ch from hook. (Counts as 2 hdc). Work 1 hdc in each of the next 28 ch. Work 4 hdc in the very last ch. (This turns the corner). Now, working down the other side of the foundation chain, work 1 hdc in each of the next 28 ch. Work 2 hdc in the very last ch (same as first 2 hdc). (Total: 64 hdc).
- Place your stitch marker in the first hdc of this round.
- Round 2: Work 2 hdc in the first st. Hdc in the next st. Work 2 hdc in the next st. Hdc in each of the next 28 sts. Work 2 hdc in the next st. Hdc in the next st. Work 2 hdc in the next st. Hdc in the next st. Work 2 hdc in the next st. Hdc in each of the next 28 sts. Work 2 hdc in the next st. Hdc in the next st. (Total: 72 hdc).
- Round 3: Work 2 hdc in the first st. Hdc in each of the next 2 sts. Work 2 hdc in the next st. Hdc in each of the next 30 sts. Work 2 hdc in the next st. Hdc in each of the next 2 sts. Work 2 hdc in the next st. Hdc in each of the next 30 sts. Work 2 hdc in the next st. Hdc in each of the next 2 sts. (Total: 80 hdc).
- Your base should now be a sturdy oval, approximately 10 inches (25 cm) long and 4 inches (10 cm) wide. It might curl slightly, which is normal as it will form the bottom of the bag.
Part 2: The Bag Body (Multicolor Stripes)
Now we’ll build the sides of the bag upwards from the base. The first round here creates a sharp edge for the bottom of the bag.
- Round 4 (Creating the edge): Work 1 sc in the BLO (back loop only) of each st around. (Total: 80 sc).
- Working in the BLO creates a defined ridge, helping the bag’s base stand out and encouraging the sides to stand up straight. Remove your stitch marker and place it in the first sc of this round.
- Round 5: Work 1 hdc in each st around. (Total: 80 hdc).
- Remove stitch marker and place it in the first hdc of this round.
- On the last hdc of this round, change to Color B on the last pull-through.
- Rounds 6-7 (Color B): Work 1 hdc in each st around. (Total: 80 hdc per round).
- On the last hdc of Round 7, change to Color C.
- Rounds 8-9 (Color C): Work 1 hdc in each st around. (Total: 80 hdc per round).
- On the last hdc of Round 9, change to Color D.
- Rounds 10-11 (Color D): Work 1 hdc in each st around. (Total: 80 hdc per round).
- On the last hdc of Round 11, change to Color A.
- Rounds 12-13 (Color A): Work 1 hdc in each st around. (Total: 80 hdc per round).
- On the last hdc of Round 13, change to Color B.
- Repeat Rounds 6-13 (continuing the stripe sequence of 2 rounds each of B, C, D, A) until the bag body reaches your desired height (e.g., 10-12 inches / 25-30 cm tall from the base edge).
- Aim to end on a Color A round (or the color you want your top edge to be).
- On the very last hdc of the final body round, sl st to the first hdc of the round to join cleanly. This creates a neat top edge for your bag.
Part 3: The Shoulder Strap (Main Color, or desired strap color)
We’ll make a simple, sturdy crocheted strap. Adjust length as needed.
- With your chosen strap color (e.g., Color A) and H/5.0mm hook, ch 121. (This will make a strap approx. 40-48 inches / 100-120 cm long. Adjust chain length for a shorter or longer strap).
- Row 1: Work 1 sc in the 2nd ch from hook and in each ch across. (Total: 120 sc).
- Ch 1, turn.
- Row 2: Work 1 sc in each sc across. (Total: 120 sc).
- Ch 1, turn.
- Repeat Row 2 for 2-4 more rows (for a total of 4-6 rows of single crochet), depending on how wide and sturdy you want your strap to be. A wider strap is generally more comfortable for a shoulder bag.
- FO, leaving a very long tail (approx. 20-30 inches / 50-75 cm) for sewing the strap to the bag.

Part 4: Finishing & Assembly
- Weave in All Bag Body Ends: This is critical for a professional and neat look, especially with multiple color changes. Thread each yarn tail onto your yarn needle and carefully weave it into the stitches on the inside of the bag. Take your time to secure them well so they don’t unravel.
- Attach the Shoulder Strap:
- Lay your bag flat and find the center of the side edges.
- Position one end of the strap onto the inside top edge of the bag, centering it roughly 1 inch (2.5 cm) from the side seam.
- Using the long tail you left on the strap and your yarn needle, securely sew the strap end to the bag using strong whip stitches or mattress stitches. Go through both layers of the strap and the top edge of the bag, ensuring it’s firmly attached. Reinforce by sewing back and forth multiple times.
- Repeat with the other end of the strap on the opposite side of the bag, making sure the strap is not twisted.
- Optional: Add a Lining (Highly Recommended for Durability & Functionality):
- A fabric lining will protect your crocheted stitches from stretching or catching on items, and it will prevent small items from slipping through any gaps in the crochet work.
- Measure: Measure the circumference of the bag at the top and the height of the bag body.
- Cut Fabric: Cut a piece of fabric (like cotton broadcloth or quilting cotton) that is 1 inch wider than the bag’s circumference and 2 inches taller than the bag’s height.
- Sew: Fold the fabric in half (right sides together) and sew up the side seam and the bottom seam. Create boxed corners if desired for a flatter base. Hem the top edge by folding it over twice (1/2 inch then 1/2 inch) and pressing or sewing.
- Insert: Place the finished fabric lining inside your crocheted bag.
- Attach: Hand-stitch the top hem of the lining to the inside top edge of your crocheted bag using small, neat stitches.
- Optional: Closure:
- You can sew a magnetic snap closure (available at craft stores) to the top center of the bag (inside).
- Alternatively, sew a decorative button onto the front of the bag and create a simple crochet loop (chain and slip stitch into a stitch) on the back for a button closure.
Tips for Success & Customization:
- Yarn Choice: Cotton or sturdy acrylic yarns are best for bags due to their durability and ability to hold shape. Avoid very soft or drapey yarns if you want a bag that stands up well.
- Consistent Tension: Maintain even tension throughout to create a smooth, consistent fabric that will wear well.
- Neat Color Changes: Practice your color changes to ensure they are tidy and don’t create visible bumps or holes.
- Strap Reinforcement: For a heavy-duty bag, you can sew a piece of sturdy webbing or even a piece of firm cording inside your crocheted strap for extra strength before sewing it to the bag.
- Sizing Up/Down:
- Base: Adjust your starting chain for length. Add or remove increase rounds to change the base width (always maintaining the oval increase pattern).
- Body Height: Add or remove rounds in Part 2.
- Strap Width: Add or remove rows in Part 3.
- Stripe Variations:
- Change colors every 1 round for thinner stripes.
- Use more colors for a truly vibrant look.
- Vary the number of rows per stripe (e.g., 3 rows of Color B, 2 rows of Color C, etc.).
- Other Stitch Patterns: Once you’re comfortable, you could try other dense stitches like single crochet, moss stitch, or even a solid granny square design for a different look. Just ensure the fabric remains sturdy.
Enjoy creating and using your beautiful, unique multicolor crochet shoulder bag!