 by
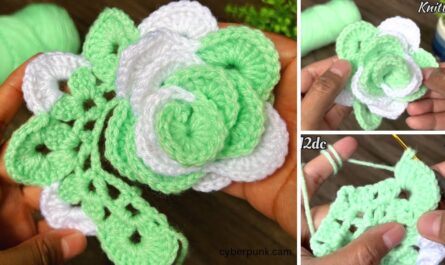
by Crocheting granny square slippers is a fantastic and satisfying project for beginners! It combines the beloved granny square motif with a practical, wearable item. The beauty of these slippers lies in their customizable nature and the fact that you learn to assemble crocheted pieces into a 3D shape.
Since you’re in Phnom Penh, where it’s warm, choosing the right yarn is important for comfort.
- 100% Cotton Yarn: This is an excellent choice for slippers in a warm climate. Cotton is breathable, absorbent, and comfortable against the skin. It will keep your feet cooler than wool or acrylic. Look for worsted weight (medium/category 4) or DK weight (light worsted/category 3) cotton.
- Cotton Blends (e.g., Cotton-Linen, Cotton-Bamboo, Cotton-Acrylic): These can also work well. Blends might offer a bit more durability or drape, while still maintaining breathability.
- Avoid: Thick wools or fluffy acrylics, as they’ll likely be too warm and could make your feet sweat.

How to Crochet Granny Square Slippers: A Beginner-Friendly Guide
This guide will walk you through making a pair of simple granny square slippers using a common method that involves a few squares joined together. The number of squares and their size will determine the final slipper size.
1. Essential Materials You’ll Need
- Yarn:
- Worsted Weight (Aran / Medium / Category 4) Cotton Yarn: You’ll need about 100-200g (depending on slipper size). Choose one main color or a few different colors for your granny squares.
- Contrast Color (Optional): For joining the squares and adding a border if desired.
- Crochet Hook: A 4.0mm (US G/6) or 4.5mm (US 7) hook. The goal is to create a fabric that’s dense enough to be sturdy for a slipper, so avoid a hook that makes your stitches too loose.
- Scissors: For cutting yarn.
- Yarn Needle (Tapestry Needle): Absolutely essential for weaving in ends and seaming the squares together.
- Stitch Markers (Optional but helpful): To mark corners or specific stitches during assembly.
- Non-Slip Fabric Paint / Puff Paint (Highly Recommended!): For applying dots or patterns to the bottom of the finished slippers to prevent slipping on smooth floors. Yarn slippers can be very slick!
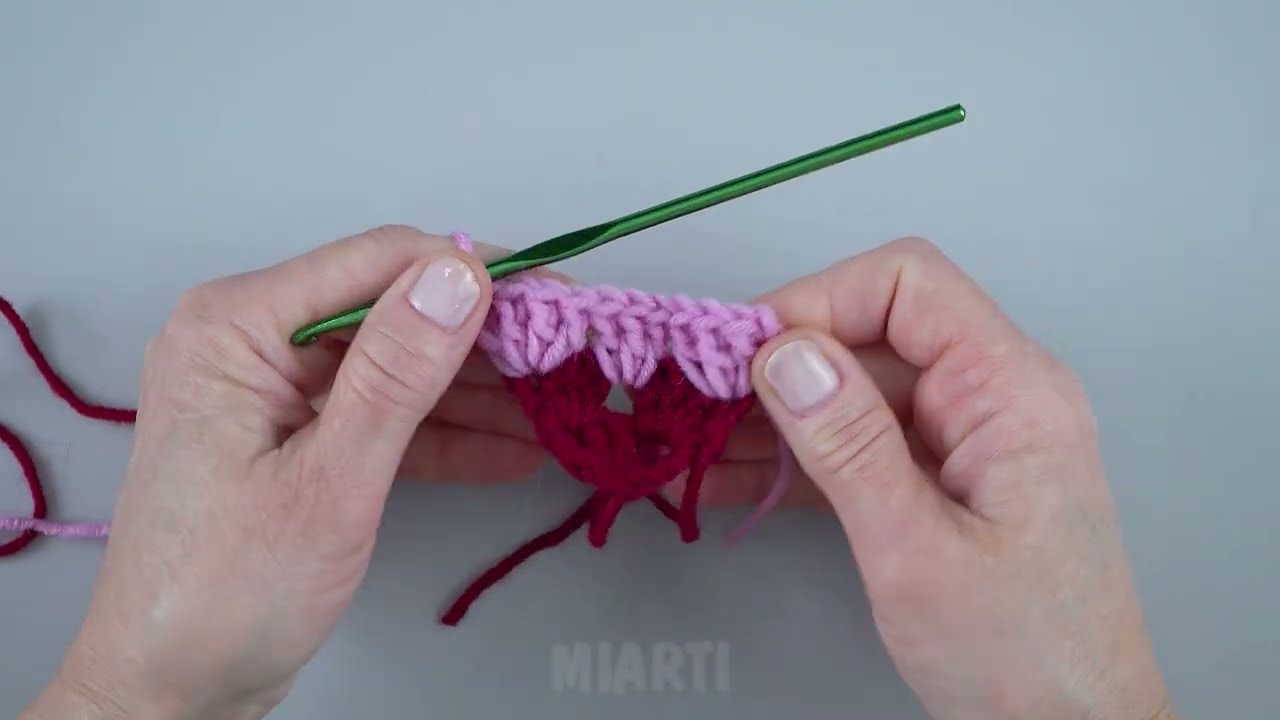
2. Basic Crochet Stitches You’ll Use
This project relies on the core stitches used in classic granny squares and simple joining techniques:
- Magic Ring (MR) / Adjustable Ring: (Highly Recommended!) Creates a tight, hole-free center for your first round. Alternatively, you can
ch 4, then sl st to joininto the first chain to form a ring. - Chain (ch): Used for foundation, spacing, and forming corner spaces within the granny squares.
- Slip Stitch (sl st): For joining rounds within the granny square and for seaming.
- Double Crochet (dc): The main stitch for forming the “clusters” in a granny square.
- Single Crochet (sc): Often used for joining squares and for the final border.
- Working in Rounds: You’ll build each granny square in circles from the center out.
- Fasten Off: Securely ending your work.
- Weaving in Ends: Hiding yarn tails for a neat and professional finish.
Crochet Granny Square Slipper Pattern (Adult Small/Medium)
This pattern uses 6 classic granny squares per slipper. You can adjust the slipper size by:
- Number of rounds per square: More rounds make larger squares, meaning they will fit a larger foot. Fewer rounds make smaller squares.
- Hook size: A larger hook creates a looser fabric and a slightly larger square, and vice-versa.
Sizing Tip: To determine the right size, measure your foot length from heel to toe. A good rule of thumb is that the sole of your slipper (which will be formed by two granny squares side-by-side) should be roughly the length of your foot. Make one granny square and measure it.
Abbreviations (US Crochet Terms):
- MR: Magic Ring
- ch: chain
- sl st: slip stitch
- dc: double crochet
- st(s): stitch(es)
- ch-sp: chain space
(...): work stitches into the same stitch or space[...]: repeat instructions in brackets- FO: Fasten off
Part 1: Making the Granny Squares (Make 12 Total)
For an adult small/medium slipper, we’ll use 4-round granny squares. You’ll need 12 identical squares (6 for each slipper).
- Start (Color A): Create a Magic Ring (MR).
- (Alternatively: Ch 4, then sl st into the 1st ch to form a ring.)
- Round 1: Ch 3 (counts as 1st dc). Work 2 dc into the ring.
*Ch 2 (creates a corner space). Work 3 dc into the ring.*Repeat from*to*2 more times. Ch 2. Join with a sl st to the top of the beginning Ch 3. (4 clusters of 3 dc, 4 ch-2 spaces).- Fasten off Color A.
- Round 2 (Color B): Join Color B with a sl st into any ch-2 corner space. Ch 3 (counts as 1st dc). Work (2 dc, ch 2, 3 dc) all into the same ch-2 corner space.
*Ch 1 (creates a side space). In the next ch-2 corner space, work (3 dc, ch 2, 3 dc).*Repeat from*to*2 more times. Ch 1. Join with a sl st to the top of the beginning Ch 3.- Fasten off Color B.
- Round 3 (Color C): Join Color C with a sl st into any ch-2 corner space. Ch 3 (counts as 1st dc). Work (2 dc, ch 2, 3 dc) all into the same ch-2 corner space.
*Ch 1. Work 3 dc into the next ch-1 side space. Ch 1. In the next ch-2 corner space, work (3 dc, ch 2, 3 dc).*Repeat from*to*2 more times. Ch 1. Work 3 dc into the last ch-1 side space. Ch 1. Join with a sl st to the top of the beginning Ch 3.- Fasten off Color C.
- Round 4 (Color D or repeat C): Join Color D (or continue with Color C) with a sl st into any ch-2 corner space. Ch 3 (counts as 1st dc). Work (2 dc, ch 2, 3 dc) all into the same ch-2 corner space.
*Ch 1. Work 3 dc into the next ch-1 side space. Ch 1. Work 3 dc into the next ch-1 side space. Ch 1. In the next ch-2 corner space, work (3 dc, ch 2, 3 dc).*Repeat from*to*2 more times. Ch 1. Work 3 dc into the next ch-1 side space. Ch 1. Work 3 dc into the last ch-1 side space. Ch 1. Join with a sl st to the top of the beginning Ch 3.- Fasten off Color D.
- Weave in ALL yarn ends on each individual granny square as you complete them. This is absolutely crucial for a neat finish and to avoid a monumental task at the end.
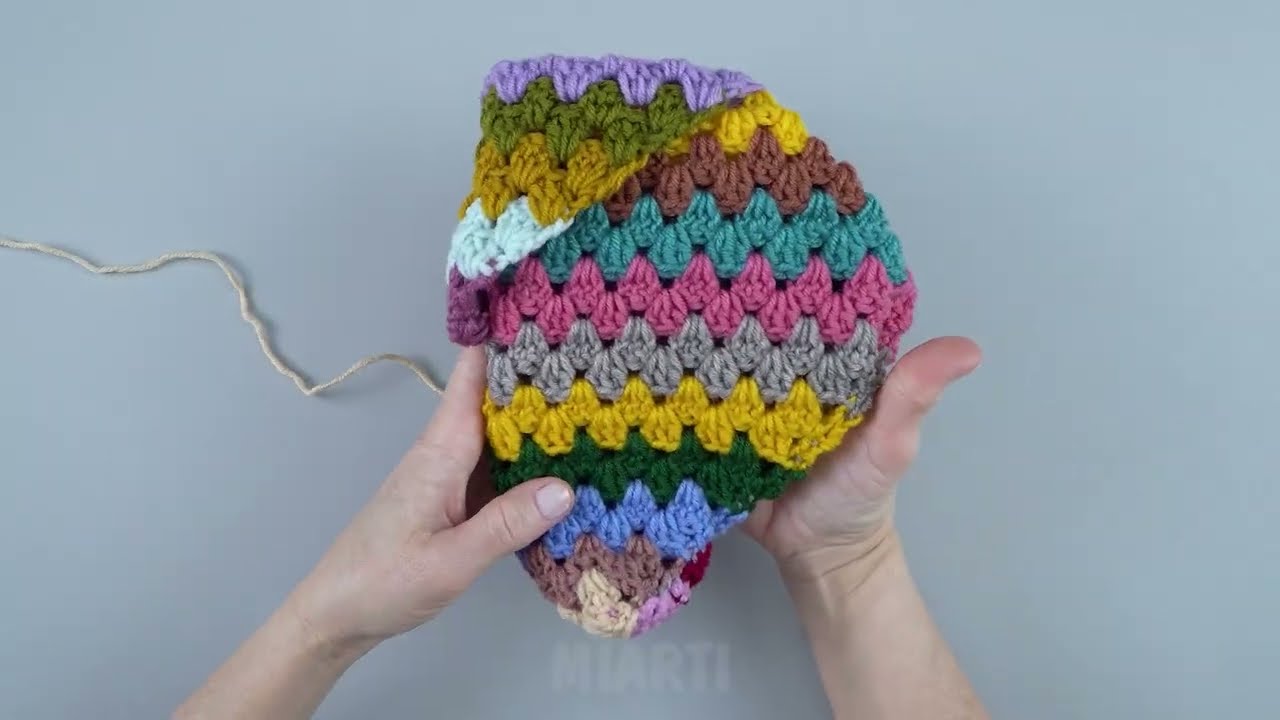
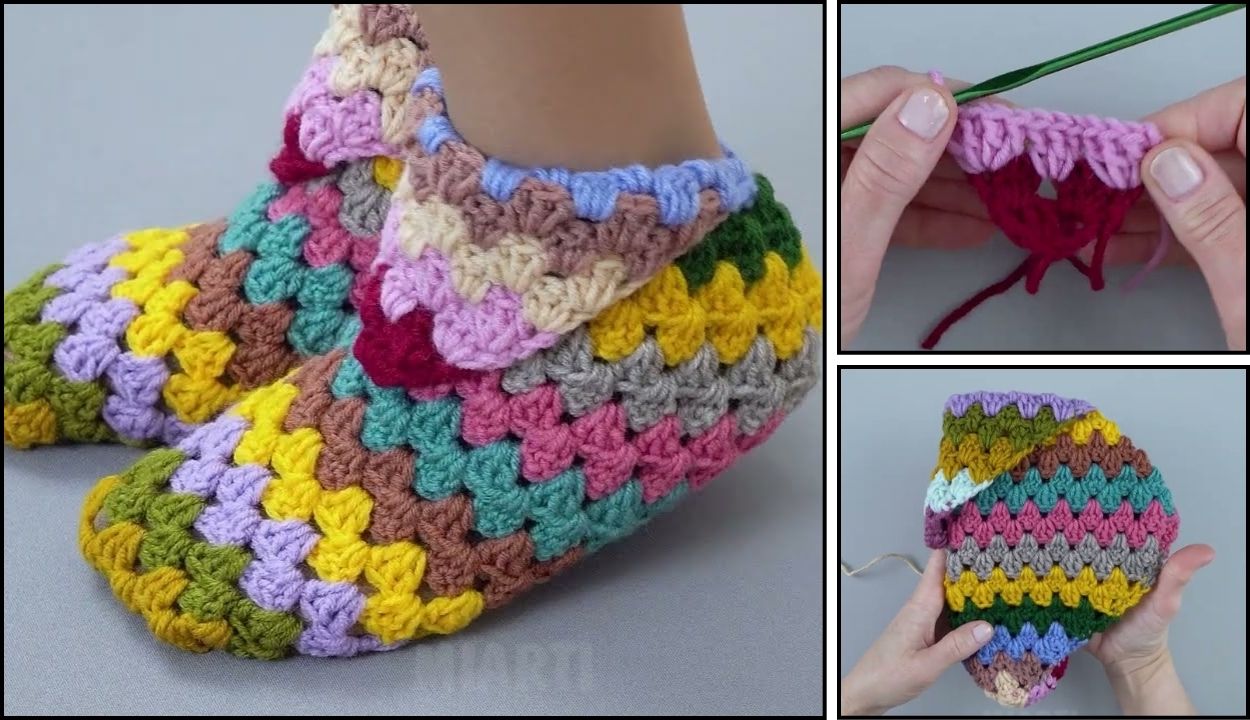
Part 2: Assembling One Slipper (Repeat for the Second Slipper)
You’ll need 6 squares for one slipper. We’ll use a single crochet (sc) join or a slip stitch (sl st) join. The sc join creates a more defined, slightly raised seam, while the sl st join is flatter. Choose what you prefer!
Visual Aid (Highly Recommended!): It’s easiest to visualize the assembly with a diagram. Imagine your 6 squares laid out like this:
      [TOP TOE SQUARE]
       /        \
[SIDE 1]-----[SOLE 1]-----[SOLE 2]-----[SIDE 2]
               \        /
            [HEEL SQUARE]
- Layout Your Squares: Lay out 5 of your granny squares in a cross shape:
- One square in the center (this will be the front part of your sole). Let’s call this Sole 1.
- One square directly in front of Sole 1 (this will be the top of the toe). Let’s call this Top Toe Square.
- One square behind Sole 1 (this will be the back part of your sole). Let’s call this Sole 2.
- One square to the left of Sole 1 (this will be the left side of the slipper). Let’s call this Side 1.
- One square to the right of Sole 1 (this will be the right side of the slipper). Let’s call this Side 2.
- The 6th square will be your Heel Square, placed behind Sole 2.
- Joining the Sole:
- Place Sole 1 and Sole 2 with wrong sides together (or right sides together if you want a ridge).
- Join your chosen joining yarn with a sl st into a corner space of both squares.
- Join the inner edge of Sole 1 to Sole 2 using sc or sl st along the entire edge. Fasten off. You now have a long rectangular piece for the sole.
- Joining the Toe:
- Take your Top Toe Square. Align one edge of it with the front edge of Sole 1.
- Join these two edges together using your chosen joining method. Fasten off.
- Joining the Sides to the Sole:
- Align one edge of Side 1 with the left edge of Sole 1. Join them. Fasten off.
- Align the other edge of Side 1 with the left edge of Sole 2. Join them. Fasten off.
- Repeat this for Side 2, joining it to the right edges of Sole 1 and Sole 2. Fasten off after each seam.
- Joining the Heel:
- Take your Heel Square. This square will form the back of your slipper.
- Align one edge of the Heel Square with the back edge of Sole 2. Join them. Fasten off.
- Now, you’ll join the sides of the Heel Square to the back edges of Side 1 and Side 2. This will close up the back of the slipper. Fasten off after each seam.
- Joining the Top Edges (Toe to Sides):
- Now, you need to join the remaining open edges to form the top of the slipper where your foot goes in.
- Join the unworked side edges of the Top Toe Square to the front top edges of Side 1 and Side 2.
- This step might require some careful alignment, as the corners might not perfectly match up. Just ensure you’re working through corresponding stitches.

Part 3: Final Touches
- Weave in ALL Remaining Ends NEATLY: You’ll have quite a few from all the joining. This is the most crucial step for a polished and durable slipper. Take your time with your yarn needle to carefully weave in every single yarn tail securely.
- Optional: Add a Top Border (Recommended):
- Join your yarn (could be your joining color or a new one) with a sl st at the back heel opening.
- Ch 1. Work single crochet (sc) stitches evenly around the entire top opening where your foot goes in. Work 1 sc into each stitch and into any chain spaces or seam points for a neat edge.
- Join with a sl st to the first sc.
- Repeat this sc round for 1-2 more rounds for a sturdier opening.
- Fasten off and weave in ends.
- Non-Slip Bottom: This is essential for safety, especially on hard floors like tile (common in Phnom Penh).
- Turn your finished slipper inside out.
- Using non-slip fabric paint or puff paint, apply dots, stripes, or a pattern on the sole of the slipper.
- Let it dry completely (usually 24-72 hours, check product instructions) before wearing.
- Repeat for the Second Slipper!

Tips for Comfortable & Durable Granny Square Slippers
- Consistent Tension: Maintaining even tension throughout all your granny squares and joining seams is vital for a symmetrical and well-fitting slipper.
- Blocking (Optional): While you can block individual squares, it’s often more effective to lightly block the finished slipper. Gently wet it, stuff it with plastic bags or paper to maintain its shape, and let it air dry. This can help even out stitches and give a more professional look.
- Seam Placement: Experiment with joining methods. A slip stitch join worked through the back loops only, or even a mattress stitch using a yarn needle, can create a very neat, almost invisible seam.
- Sole Reinforcement: For extra durability, you can purchase slipper soles (often made of suede or leather) from craft stores and hand-sew them to the bottom of your finished crocheted slippers. This will make them last much longer.
- Adjusting Size:
- Smaller Foot: Use fewer rounds per granny square (e.g., 3-round squares) or a smaller hook size.
- Larger Foot: Use more rounds per granny square (e.g., 5-round squares) or a larger hook size. You might also consider using 7 squares per slipper for very large feet, adjusting the layout.
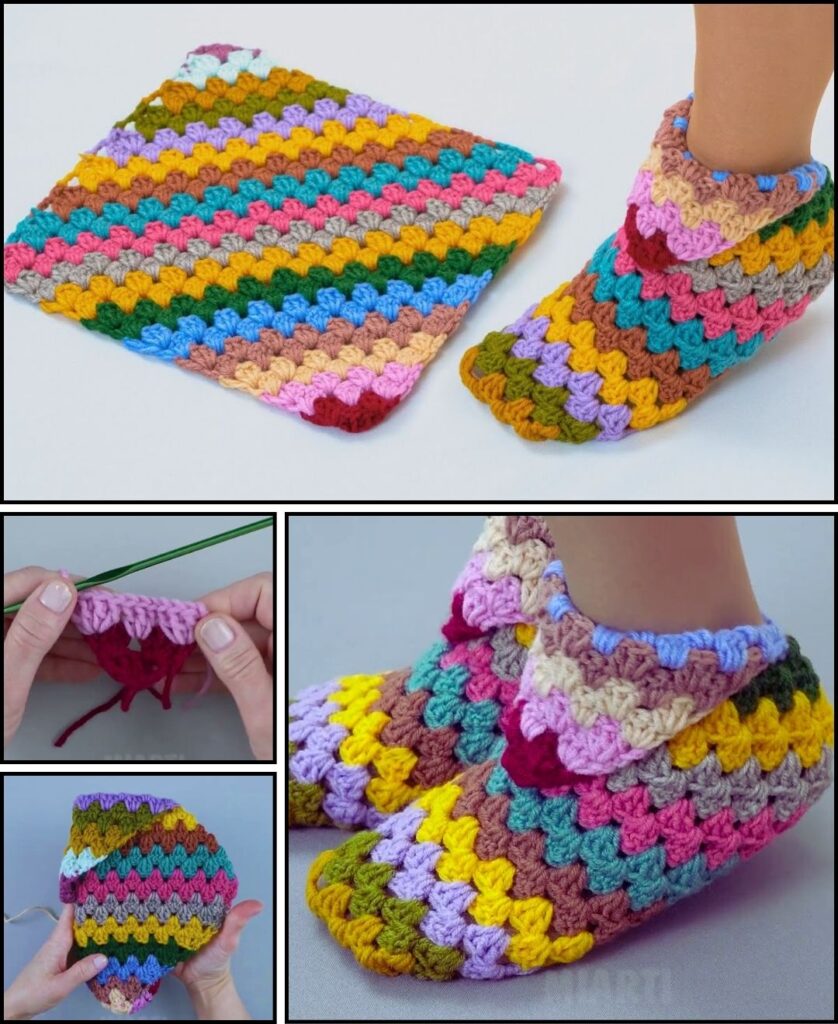
You’re now ready to crochet cozy and unique granny square slippers! Enjoy the process of seeing your squares transform into a wearable item.